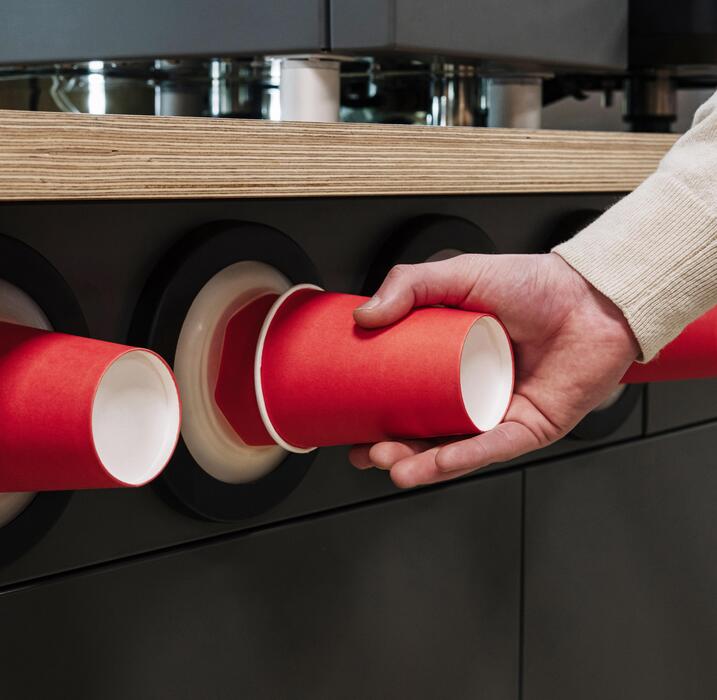
Under Cabinet K Cup Holder Diy
Looking for a under cabinet k cup holder diy to reclaim counter space and stop digging through messy drawers? You’re tired of overpriced store-bought organizers that don’t fit your setup. I’ll show you simple, custom solutions using wood, PVC, or magnetic strips—built to mount right under your cabinets. No fluff, just a clear path to a clutter-free coffee station that saves you money.
Why Build an Under Cabinet K Cup Holder DIY
Save counter space with a simple DIY project
If your kitchen counter is cluttered with coffee pods, a DIY under cabinet K Cup holder is the perfect solution to reclaim valuable workspace. By mounting a holder beneath your upper cabinets, you instantly free up counter area for food prep, appliances, or just a cleaner look.
This project requires only basic tools like a drill, screws, and a wooden board or metal rack, plus your choice of finish to match your decor. Start by measuring the space under your cabinet to ensure the holder fits snugly without interfering with cabinet doors or your coffee maker.
Attach a simple shelf or a pegboard-style rack using sturdy brackets, and add a lip or rails to prevent pods from sliding off. The entire process can be completed in under an hour, making it an accessible weekend task.
Not only does this maximize your vertical storage, but it also keeps your coffee station tidy and efficient. You’ll love how much easier meal prep becomes when your counters are free from scattered K Cups, and the satisfaction of a custom build adds a personal touch to your kitchen.
Keep K Cups organized and easy to reach
An under cabinet K Cup holder DIY project transforms chaotic pods into a neatly arranged, accessible system. Instead of digging through a drawer or a messy bin, you can organize your pods by flavor or roast using simple dividers or rows.
For example, attach a wooden strip with small compartments or use a magnetic strip with metal tins to hold each cup. This setup keeps your favorites at eye level and within arm’s reach, speeding up your morning routine.
Label each section with a chalkboard or sticker to quickly grab the coffee you crave. Additionally, a tiered design allows you to see all options at a glance, reducing the chance of duplicates or forgotten flavors.
The vertical orientation prevents pods from getting crushed or lost, and you can easily restock from the top or bottom. By dedicating a specific spot under the cabinet, you eliminate clutter and create a streamlined coffee station that works for you.
This organization hack also saves time because you won’t have to hunt for that single vanilla pod hiding in the back of a cupboard.
Cost comparison: store-bought vs. homemade
When deciding between a store-bought under cabinet K Cup holder and a DIY version, the cost difference is significant. Pre-made holders from retailers like Amazon or home goods stores typically range from $15 to $40, depending on materials and capacity.
However, these often lack customization and may not fit your exact cabinet dimensions or style. In contrast, a DIY project uses inexpensive materials like a 1×4 pine board ($3–$5), wood screws ($2), and paint or stain ($5–$8), totaling under $15 for a high-quality, custom solution.
If you already have tools like a saw and drill, the cost drops even lower. The DIY approach also allows you to use scrap wood or repurpose items like an old cutting board, making it virtually free.
While store-bought options offer convenience, they rarely match the durability or personal fit of a homemade holder. Plus, you can build a larger capacity unit for the same price as a small commercial one.
Investing an hour of your time saves you $20 or more and yields a product tailored precisely to your kitchen’s needs and your coffee consumption habits.
Tools and Materials You Need
Essential tools: saw, drill, measuring tape
To build a custom under cabinet K-Cup holder, start with a circular saw or miter saw for precise cuts on your wood pieces. A cordless drill with a set of drill bits is crucial for making pilot holes and driving screws.
You’ll also need a measuring tape to accurately gauge your cabinet’s depth and the space between the coffee pods. Don’t forget a level to ensure your holder sits perfectly straight, and a sanding block or power sander to smooth rough edges.
A stud finder helps locate secure mounting points, while clamps hold your workpieces steady during assembly. For finishing, grab a paintbrush or foam roller if you plan to stain or paint. If you’re attaching the holder directly to the cabinet bottom, use wood screws appropriate for your cabinet material.
For a no-drill option, consider heavy-duty adhesive strips or command hooks—just ensure they’re rated for the weight of a full K-Cup load. A countersink bit will help you sink screws flush for a clean look.
Finally, a pencil for marking cuts and a safety goggles for protection round out your essential toolkit.
Best wood types for a sturdy holder
For a durable under cabinet K-Cup holder, choose hardwoods like oak, maple, or birch for their strength and resistance to warping from humidity. These woods hold screws well and provide a premium finish that matches most kitchen cabinetry.
Plywood is an excellent budget-friendly alternative, especially baltic birch plywood, which offers consistent layers and minimal voids—ideal for a flat, stable base. Avoid softwoods like pine or cedar unless you reinforce with a thicker gauge, as they can dent or split under the weight of multiple pods.
For a lightweight yet sturdy option, poplar is a good compromise: it’s affordable, easy to work with, and takes paint beautifully. If you prefer a natural look, walnut or cherry adds warmth and elegance without needing heavy staining.
Always select wood that’s 1/2-inch to 3/4-inch thick for the main structure—thinner stock may bow over time. For the pod rails or dividers, use 1/4-inch hardwood plywood or solid strips to prevent sagging. Pre-finish your wood with a clear polyurethane or cabinet-grade paint to protect against spills and grease.
Remember to sand all surfaces smooth to avoid snagging the K-Cup foil lids.
Optional add-ons: magnets, hooks, or labels
Elevate your DIY under cabinet K-Cup holder with smart add-ons for extra functionality. Neodymium magnets can be embedded into the holder’s bottom to secure metal tins or a magnetic strip for holding loose pods—just drill shallow pockets and epoxy them in place.
Small hooks (like cup hooks or S-hooks) attached underneath provide space for hanging measuring spoons, coffee scoops, or even small mugs. For organization, use chalkboard labels or vinyl lettering on the front edge to mark coffee strengths, roasts, or flavors—this makes morning selection a breeze.
Consider adding a LED strip light with a motion sensor underneath the cabinet to illuminate your pods, especially in dark corners. Rubber bumpers on the back prevent the holder from scratching your cabinet face.
If you’re building a multi-row holder, install thin dividers (like 1/8-inch wood strips) to keep pods upright and prevent tipping. For a clean, integrated look, paint or stain your add-ons to match your cabinet hardware. Small drawer knobs can double as pull handles if you design a sliding version.
These enhancements make your holder not just storage, but a personalized coffee station that saves counter space and adds convenience to your daily routine.
How to Measure Your Cabinet Space
Step-by-step measuring guide for a perfect fit
To ensure your DIY under-cabinet K-cup holder fits seamlessly, start by measuring the width of the space between cabinet walls or from the cabinet edge to a side panel.
Use a metal tape measure for accuracy, and record the measurement at the front, middle, and back of the cabinet bottom—this accounts for any irregularities. For depth, measure from the cabinet’s front edge to the back wall, subtracting 1-2 inches to avoid blocking outlets or light fixtures.
Height clearance is crucial: measure from the countertop to the underside of the cabinet. Most K-cup holders need at least 6-8 inches of vertical space to load pods easily. Write down all measurements, and note if the cabinet is recessed or flush with the wall.
If you plan to mount the holder directly under the cabinet, also measure the thickness of the cabinet bottom to choose the right screws or adhesive. Finally, measure the width of your K-cup pods (standard is about 1.5 inches each) to determine how many will fit in a row.
Double-check all numbers before cutting or buying materials.
Account for cabinet depth and clearance
Cabinet depth often varies, so measure from the front lip to the back panel—standard depths range from 12 to 18 inches. For a DIY under-cabinet K-cup holder, you’ll need at least 4-6 inches of depth to store pods without them protruding.
If your cabinet is shallow, consider a holder that mounts sideways or uses a sliding mechanism to pull out for access. Clearance is equally important: measure the vertical gap between your countertop and the cabinet’s underside.
If you have a tile backsplash, account for its thickness, as it can reduce usable space. Also, check if the cabinet has a lip or molding that might interfere with mounting. For a flush fit, ensure the holder’s height (including pods) doesn’t exceed this clearance.
If you’re using a magnetic or adhesive mount, test that the surface is clean and flat. For screws, pre-drill holes to avoid splitting the cabinet wood. Finally, consider the depth of your countertop appliances—leave room to pull them forward without knocking the holder.
Check for obstacles like hinges or handles
Before finalizing your design, inspect the cabinet area for obstacles that could block installation. Hinges on adjacent cabinets may swing into the space, so measure the arc of the door’s movement—ensure the holder won’t be hit when doors open.
Handles or knobs on cabinet doors can also protrude and interfere; if so, plan to mount the holder offset or use a recessed design. Check for outlets, light switches, or under-cabinet lighting—these can limit where you place the holder.
If there’s a sink or stove nearby, avoid heat or moisture zones that could damage the holder or pods. Also, look for pipes, gas lines, or electrical conduits that run under the cabinet; use a stud finder to locate them.
For a DIY solution, you might install a removable bracket or adjustable track system to avoid permanent damage. Finally, test the clearance of the cabinet door itself—if it opens upward, measure the swing path. Document all obstacles with photos or sketches to guide your build.
Step-by-Step Building Instructions
Cut and sand your wood pieces
Start by measuring your under-cabinet space to determine the exact dimensions for your K-Cup holder. A standard size is about 18 inches wide, 4 inches deep, and 6 inches tall, but adjust based on your available area.
Using a miter saw or circular saw, cut your chosen wood—such as 1×4 pine or plywood—into pieces: two side panels, one back panel, one bottom shelf, and one front lip. For a single-row holder, cut the shelf to fit K-Cups snugly (about 1.5 inches apart).
After cutting, sand all edges and surfaces with 120-grit sandpaper to remove splinters, then finish with 220-grit for a smooth touch. This step is crucial for a polished look and to prevent snagging on cups. Wipe away dust with a tack cloth before moving on.
Assemble the frame with screws or glue
Begin assembly by attaching the side panels to the back panel. Apply wood glue along the edges for a strong bond, then secure with 1.5-inch wood screws using a drill, pre-drilling pilot holes to avoid splitting.
Attach the bottom shelf between the sides at your desired height—typically 1.5 inches from the bottom for cup clearance. For a flush, sturdy frame, clamp pieces together while the glue dries. Add the front lip at the bottom edge to keep cups from sliding out.
If you prefer a no-screw look, use pocket hole joinery with a jig for hidden fasteners. Alternatively, heavy-duty construction adhesive works well for quick builds without visible hardware. Ensure all corners are square by measuring diagonally; adjust before the glue sets. Let the assembly dry for at least 2 hours.
Attach mounting brackets for secure installation
For a safe, wobble-free holder under your cabinet, install metal L-brackets or a French cleat system. Measure and mark the back panel’s top edge at 12-inch intervals. Pre-drill holes, then screw 1-inch L-brackets into the back panel using 3/4-inch screws, ensuring they align with your cabinet’s underside.
For a French cleat, cut a 45-degree bevel on a 2-inch strip of wood, attach it to the holder’s back, and mount a matching strip to the cabinet. Test the fit by holding the assembly in place; it should sit flush against the cabinet bottom.
If your cabinet has a lip, use adjustable shelf brackets for added support. Finally, drive screws through the brackets into the cabinet using a drill, checking levelness with a bubble level. This step ensures your K-Cup holder stays put, even with frequent use.
Tips for Installing Under the Cabinet

Use a level to ensure straight placement
Before mounting your under-cabinet K-Cup holder, always use a level to guarantee a straight, professional-looking installation. Start by holding the holder against the underside of the cabinet at your desired location. Place a small bubble level on top of the holder or along its front edge.
Adjust until the bubble is centered, then lightly mark the mounting holes with a pencil. A crooked holder not only looks sloppy but can cause K-Cups to slide or fall out, especially if you’re using a gravity-fed dispenser.
If your cabinets are uneven, consider using shims or adjustable brackets to create a level surface. For DIYers, a magnetic level or laser level can simplify this step, ensuring precision even in tight spaces. Double-check your marks before drilling—measure twice, install once.
This small effort saves you from re-drilling holes or patching mistakes later. Remember, a level installation also makes future refills easier and keeps your coffee station looking tidy.
Best methods for attaching to wood or drywall
For wood cabinets, pre-drill pilot holes slightly smaller than your screws to prevent splitting. Use 1-inch wood screws or self-tapping screws for a secure hold. If mounting into the bottom of a cabinet, ensure the wood is thick enough—at least ½ inch—to support the weight.
For drywall, avoid relying on drywall anchors alone; instead, locate wall studs using a stud finder and screw directly into them. If studs aren’t accessible, use heavy-duty toggle bolts or molly bolts rated for 20+ pounds.
For a cleaner look, consider adhesive strips like 3M Command strips rated for your holder’s weight—but only on smooth, clean surfaces. Test the adhesive by pressing firmly for 30 seconds and waiting 24 hours before loading. Avoid attaching to tile or laminate without specialized anchors.
Always check the holder’s mounting holes align with your chosen method, and tighten screws just enough to secure it without cracking the material.
Test weight capacity before loading K Cups
Before filling your DIY under-cabinet K-Cup holder, test its weight capacity to avoid a messy collapse. Start by mounting the holder as intended, then gradually add weight—use small bags of rice or beans as stand-ins for K-Cups.
Add one at a time, checking for any sagging, loosening screws, or adhesive failure. Most standard K-Cup holders hold 12-24 pods, weighing roughly 1-2 pounds total. If your holder uses magnets or adhesive, load only 50% of the capacity during the first 24-hour test period.
For screw-mounted holders, tug gently on the unit after each addition. Pay attention to the cabinet material: particleboard may strip screws under strain, while solid wood holds better. If you notice movement, reinforce with additional screws or upgrade to stronger anchors. Once satisfied, load your K-Cups evenly—avoid overloading one side.
This simple test prevents damage to your cabinets and ensures your coffee station stays functional and safe for daily use.
Creative Design Ideas for Your Holder
Add a sliding drawer for easy access
Transform your under cabinet K-cup holder into a smooth, space-saving organizer by installing a sliding drawer mechanism. Start by measuring the depth of your cabinet overhang and selecting a soft-close drawer slide rated for the weight of your pods.
Build a simple wooden box that fits snugly beneath the cabinet, then attach the slides to the sides of the box and the underside of the cabinet. For a polished finish, add a small lip or handle to the front edge so you can pull it open effortlessly.
This design keeps your K-cups neatly stored but fully visible when you slide the drawer out, eliminating the need to reach into dark corners. Use thin plywood or MDF to keep the profile low, and consider adding dividers inside the drawer to separate flavors or brands.
A sliding drawer also prevents pods from rolling out when you open the cabinet, making your morning routine faster and less messy. Test the slide action before finalizing to ensure it glides smoothly without wobbling.
Paint or stain to match your kitchen decor
Elevate your DIY under cabinet K-cup holder by painting or staining it to blend seamlessly with your kitchen cabinetry. Start by sanding the wood with fine-grit sandpaper to create a smooth base, then apply a primer to ensure even color adhesion.
For a modern look, use semi-gloss or matte paint in the same shade as your cabinets or countertops. If you prefer a natural wood finish, choose a gel stain that works well on vertical surfaces and wipe on thin coats for a rich, even tone.
To avoid drips, work in a well-ventilated area and apply thin layers with a foam brush. Once dry, seal with a clear polyurethane to protect against moisture and daily handling. For a farmhouse vibe, try a two-tone approach—paint the frame white and stain the interior a warm walnut.
Remember to let each coat dry fully before sanding lightly between layers. This simple upgrade turns a functional storage solution into a custom decorative accent that feels intentional rather than an afterthought.
Incorporate a magnetic strip for metal pods
Maximize your under cabinet K-cup holder’s versatility by adding a magnetic strip to securely hold metal or compostable pods. First, measure the length of your holder and cut a flexible magnetic strip to fit along the back or bottom edge.
Use strong adhesive backing or small screws to attach the strip, ensuring it sits flush against the wood. This design works brilliantly for stainless steel or aluminum pods that are too heavy for traditional slots, keeping them visible and easy to grab.
To avoid interference, place the strip away from any sliding mechanisms or hinges. For extra grip, choose a neodymium magnet strip with at least 2 pounds of pull force. Test the hold by attaching a few pods and shaking the holder gently—if they stay put, you’re set.
This hack also frees up shelf space for other items and adds a modern, industrial touch to your kitchen. Clean the strip occasionally with a damp cloth to remove dust, ensuring consistent magnetic strength over time.
Common Mistakes to Avoid
Skipping pre-drilling can crack the wood
One of the most frequent DIY errors is driving screws directly into cabinet wood without pre-drilling pilot holes. This creates excessive outward pressure that can split thin plywood, particle board, or even solid wood, ruining your cabinet’s finish.
To avoid this, always select a drill bit slightly smaller than your screw’s diameter and drill a pilot hole to the same depth as the screw length. For hardwoods like oak or maple, pre-drilling is non-negotiable to prevent cracks.
For softer materials like MDF, a pilot hole also reduces the risk of stripping the screw hole over time. Use a countersink bit if you want the screw head flush with the surface. Taking this extra minute per screw ensures your K-cup holder stays securely mounted without visible damage.
Remember, a cracked cabinet is much harder to repair than to prevent.
Overlooking cabinet door swing clearance
A common oversight is failing to account for the full swing path of your cabinet doors when installing an under-cabinet K-cup holder.
Even if the holder seems flush, the door’s hinges and handle need at least 1-2 inches of clearance to open fully without hitting the pods or the unit itself. Measure the door’s arc by opening it completely while holding a mock-up of your holder in place.
For standard cabinets, mounting the holder 1.5 inches back from the door edge usually works, but always test with the actual door closed and opened. If your cabinet has soft-close hinges, they may require extra space. Also, consider that loaded K-cup holders can protrude slightly more than empty ones.
A quick test with painter’s tape marking the holder’s position can save you from a frustrating re-installation or damaged door edges.
Using weak adhesive instead of screws
Many DIYers opt for adhesive strips or glue to avoid drilling, but this often leads to a catastrophic failure when the holder is loaded with K-cups.
The weight of a full holder—often 3-5 pounds—combined with the constant vibration from opening and closing cabinets, can cause adhesive to lose grip over time. Screws provide a permanent, load-bearing solution that won’t fail mid-use.
If you must use adhesive, choose a heavy-duty construction adhesive rated for vertical loads and ensure the surface is clean and dry, but even then, screws are far more reliable. For a clean look, use small, stainless-steel screws that match your cabinet color or hide them under the holder’s base.
Drilling into the cabinet’s bottom panel is usually safe, as it’s often hidden from view. Trust screws for safety—your K-cup holder will stay put even with daily use.
Frequently Asked Questions
What is an under cabinet K-Cup holder DIY?
An under cabinet K-Cup holder DIY is a homemade storage solution mounted underneath a kitchen cabinet to organize and store K-Cup pods. It typically uses materials like wood, PVC pipes, or wire racks to keep pods accessible while saving counter space.
What materials do I need for a simple DIY under cabinet K-Cup holder?
Common materials include a piece of wood or plastic for the base, PVC pipes or small baskets to hold the cups, screws or adhesive strips for mounting, and optional paint or finish. Basic tools like a saw, drill, and measuring tape are also needed.
How do I measure and mount a DIY K-Cup holder under a cabinet?
First, measure the available space under your cabinet, ensuring clearance for the holder and pods. Use a level to mark mounting points, then attach the holder with screws into cabinet studs or strong adhesive strips designed for cabinets.
Can I use PVC pipes for an under cabinet K-Cup holder?
Yes, PVC pipes cut to size work great for holding individual K-Cups. Glue them together in a row or grid, attach a backplate, and mount under the cabinet for a low-cost, durable solution.
How do I prevent K-Cups from falling out of a DIY holder?
Ensure the holder has a slight upward tilt or a front lip to keep pods secure. Adding a small stop at the bottom or using snug-fitting slots can also prevent them from sliding out when the cabinet is bumped.
What is the best way to mount a DIY K-Cup holder without damaging cabinets?
Use heavy-duty removable adhesive strips or hooks designed for cabinets, which can hold weight without leaving residue. For a permanent option, screw into the cabinet bottom, but pre-drill to avoid cracking.
How many K-Cups can a typical DIY under cabinet holder store?
A standard DIY holder can store 6 to 12 K-Cups, depending on the design and available space. For example, a 12-inch long PVC pipe holder might hold 8-10 pods, while a wider wood rack can fit more.
Conclusion
Creating your own under-cabinet K-Cup holder is a simple, cost-effective way to reclaim counter space and organize your morning routine. The key takeaways are measuring your clearance, choosing durable materials like wood or metal, and securing the holder properly. This DIY project not only saves money but also adds a personalized touch to your kitchen. So grab your tools and get building—your clutter-free coffee station is just an afternoon away.