Sour Beer Making Kit
Ready to brew your own tangy, refreshing sour beer at home? A sour beer making kit is the easiest way to dive into the world of craft fermentation without the guesswork. Whether you’re a beginner or a seasoned homebrewer, these all-in-one kits come packed with the grains, hops, yeast, and bacteria needed to create complex, lip-puckering flavors. In this guide, we’ll break down the best kits available, what to look for, and how to get started—so you can enjoy delicious homemade sour beer in no time.
What Is a Sour Beer Making Kit?
Components of a Typical Sour Beer Kit
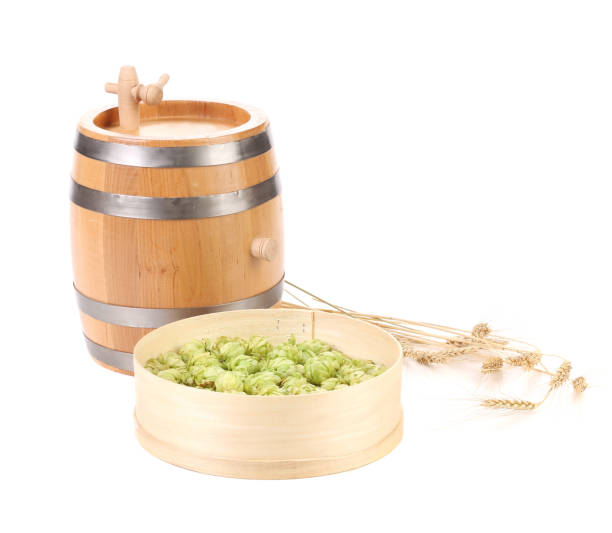
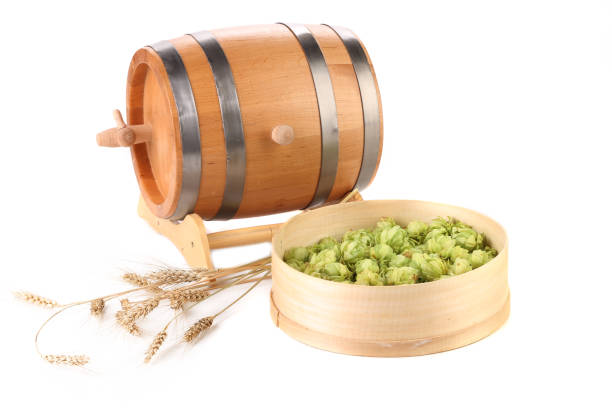
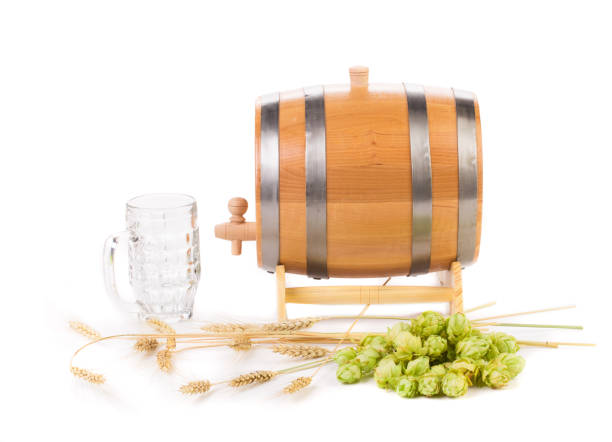
A sour beer making kit includes specialized ingredients tailored to produce tart, acidic flavors distinct from traditional brews. Key components usually consist of a base malt extract, acid-producing bacteria like *Lactobacillus* or *Pediococcus*, and sometimes wild yeast such as *Brettanomyces*.
These kits often include hops in minimal amounts, as high bitterness can clash with sour profiles. Sanitation supplies are crucial due to the sensitivity of cultures to contamination. Many kits also provide specialty grains for added complexity and step-by-step instructions guiding fermentation timelines and temperature control.
Unlike standard kits, sour beer kits may require longer aging periods to develop full flavor. Optional add-ins like fruit purees or oak chips enhance complexity. Using the right fermentation vessel, preferably glass or food-grade plastic to prevent bacterial harboring, ensures success.
With proper handling, these components work together to deliver a balanced, refreshing sour beer perfect for beginners and seasoned brewers alike.
Types of Sour Beer Kits Available
Sour beer kits come in various styles catering to different taste preferences and brewing experience levels. Beginner-friendly kits often feature pre-balanced ingredient blends for styles like Berliner Weisse or Gose, using *Lactobacillus* for quick, reliable souring.
Intermediate to advanced kits may include *Brettanomyces* or mixed-culture fermentations for complex, funky profiles seen in Lambics or Flanders Red. Fruit-infused kits with raspberry, cherry, or passionfruit offer natural sweetness to balance acidity.
Some kits are all-in-one, containing fermenter, airlock, and instructions, while others are add-on cultures designed to modify existing recipes. Quick-sour kits use kettle souring methods for results in under two weeks, whereas traditional souring kits require months of aging.
Breweries and homebrew suppliers offer style-specific kits, enabling experimentation with American wild ales or saison hybrids. Choosing the right type depends on desired flavor, timeline, and equipment—ensuring every brewer can craft a satisfying, authentic sour beer.
How Sour Beer Differs from Regular Beer Kits
The primary difference between sour beer kits and regular beer kits lies in the microbial agents used for fermentation. Standard kits rely on *Saccharomyces* yeast, which produces clean, consistent flavors without acidity. In contrast, sour kits introduce acid-producing bacteria such as *Lactobacillus*, creating the signature tartness.
This requires stricter sanitation protocols, as these cultures are sensitive and can be easily contaminated. Sour fermentation often takes longer, sometimes extending to several months, to develop nuanced flavors, while regular beers typically ferment in 2–4 weeks.
Sour kits may also use different fermenters—glass or plastic—to avoid harbor spots in metal equipment. Additionally, sour beers often feature lower hop content, since hops can inhibit bacterial growth. The flavor profile is intentionally complex, tart, and funky, differing from the malt-forward or hoppy notes of conventional ales and lagers.
Ultimately, sour beer kits offer a unique, adventurous brewing experience distinct from traditional methods.
How to Choose the Best Sour Beer Making Kit
Key Features to Look For
When selecting a sour beer making kit, focus on included ingredients, yeast and bacteria strains, and ease of instructions. A high-quality kit should contain a balanced blend of Lactobacillus and Brettanomyces or Pediococcus for authentic souring.
Check if the kit includes malted grains, hops, and priming sugar, or if you’ll need to purchase them separately. Clear, step-by-step directions are crucial—especially for beginners—to avoid contamination and off-flavors. Look for kits that provide sanitization guidelines, as sour brewing is sensitive to unwanted microbes.
Fermentation time estimates help set realistic expectations, as sour beers often require longer aging. Some kits offer oak chips or fruit additions for complexity. Ensure the kit matches your brewing setup—whether extract-based or all-grain. Finally, customer reviews and support resources like online tutorials or email assistance add value.
Prioritize kits with transparent labeling and reputable ingredient sourcing for consistent, delicious results.
Beginner vs. Advanced Kits
Choosing between beginner and advanced sour beer making kits depends on your experience level, equipment, and patience for fermentation. Beginner kits focus on simplicity and speed, often using kettle souring methods with Lactobacillus to achieve tanginess in under two weeks.
These kits usually come with pre-measured ingredients, easy extract brewing, and minimal equipment needs, making them ideal for new brewers. In contrast, advanced kits embrace traditional mixed fermentation, including Brettanomyces and long aging periods—sometimes months.
They may require a secondary fermenter, temperature control, and strict sanitation to manage complex microbial environments. Advanced brewers appreciate grain bills, dry hopping options, and blending components for custom profiles. Beginners should avoid wild fermentation initially to prevent cross-contamination.
Advanced kits offer greater creativity and authenticity but demand more knowledge and space. Assess your comfort with souring timelines and equipment before deciding.
Top Brands and Kit Recommendations
Several trusted brands stand out in the sour beer making kit market, offering reliable ingredients, clear instructions, and consistent results. Northern Brewer offers beginner-friendly kits like their ‘Funk Machine’ series, featuring balanced sour profiles and step-by-step video support.
Austin Homebrew Supply provides well-reviewed kettle sour kits with fast turnaround and fruit-infused options. MoreBeer! excels in intermediate to advanced kits, including mixed-culture fermentations with Brett and Pediococcus for authentic lambics. Gigantic Brewing Co. collaborates on high-quality, craft-inspired kits available through specialty retailers, known for bold flavors and modern twists.
For those exploring fruit sours, Country Malt Group’s Brewers Choice line includes raspberry and passionfruit variants with natural flavorings. Always check batch size, ABV range, and included adjuncts when comparing. Reading verified customer feedback helps gauge real-world performance.
Investing in a kit from a reputable brand increases your chances of brewing a refreshing, well-balanced sour beer safely and successfully.
Essential Equipment for Sour Beer Brewing
Fermenters and Airlocks
Choosing the right fermenter is crucial for successful sour beer brewing, as these beers often require extended aging and exposure to wild yeast and bacteria. Glass carboys or food-grade plastic fermenters are ideal for primary fermentation due to their durability and ease of cleaning.
However, for long-term aging, many brewers prefer stainless steel conical fermenters or oak barrels, which provide better oxygen control and can foster complex flavor development. Always pair your fermenter with a three-piece airlock or blow-off tube, as sour fermentations can be vigorous and produce large amounts of CO2 and krausen.
The three-piece airlock is preferred because it’s easier to clean and less prone to clogging. Ensure all fermenters are scratched-free to prevent bacterial harborage, and dedicate separate vessels exclusively to sour batches to avoid cross-contamination with clean beers.
Temperature Control Tools
Maintaining precise temperature control is essential when brewing sour beers, as different microbes thrive at specific ranges. Lactobacillus performs best between 90–115°F (32–46°C), while Brettanomyces and mixed cultures often require cooler, stable conditions over months of aging.
Invest in a temperature-controlled fermentation chamber, such as a modified fridge or freezer with a digital temperature controller (dual-stage), to maintain ideal conditions year-round. Use fermentation heaters or heating belts in colder environments to keep cultures active.
Place a high-quality digital thermometer or thermowell probe directly in the fermenter for accurate readings. Consistent temperatures prevent stalling and off-flavors, ensuring a clean, balanced sour profile. Avoid rapid fluctuations, as they can stress microbes and lead to unpredictable fermentation results.
Proper thermal management is key to repeatable, high-quality sour beers.
Sanitization Supplies
Rigorous sanitation is non-negotiable in sour beer brewing to prevent unwanted contamination while safely managing intentional souring agents. Use a no-rinse sanitizer like Star San or iodophor, which are effective against bacteria and wild yeast without leaving harmful residues.
All equipment—fermenters, tubing, airlocks, and utensils—must be thoroughly cleaned and sanitized before and after use. Consider dedicated tools for sour brewing, clearly labeled to avoid cross-contact with clean beer setups. Use acidic cleaners like PBW (Powdered Brewery Wash) to remove organic buildup, followed by sanitizing.
Pay special attention to hard-to-reach areas like valve crevices and airlock bends where bacteria can hide. Rinse only if required by the product, as many modern sanitizers are safe at proper dilution. Consistent, meticulous sanitation ensures your sour beer develops the intended complexity without spoilage or infection from rogue microbes.
Step-by-Step Guide to Using a Sour Beer Kit
Preparing Your Workspace
Before starting with your sour beer making kit, thoroughly clean and sanitize all equipment to prevent contamination. Use a no-rinse sanitizer on fermenters, airlocks, spoons, and any tools that will touch the wort. Work in a clutter-free area with good ventilation, away from open windows or sources of dust.
Gather all kit components—grains, hops, souring agents, yeast, and instructions—so everything is within reach. Ensure your fermentation vessel is large enough for the batch size and has a secure lid or airlock. Wash your hands thoroughly and consider wearing gloves.
Temperature control is crucial, so choose a spot that maintains a consistent 65–75°F (18–24°C). Keep a notebook nearby to log dates, temperatures, and observations. Proper preparation minimizes risks of off-flavors or infections, setting the foundation for a successful sour beer.
Taking time here ensures a smooth brewing process and high-quality results.
Mixing and Fermenting the Wort
Begin by heating water to the recommended temperature—usually around 155°F (68°C)—then steep the included grains for 20–30 minutes to extract fermentable sugars. Remove grains and bring the liquid to a boil. Add hops and any adjuncts as directed by your kit’s instructions, boiling for the specified duration, typically 60 minutes.
After boiling, cool the wort rapidly using an ice bath or wort chiller to below 80°F (27°C). Transfer the cooled wort to your sanitized fermenter, topping up with clean water to reach the target volume. Seal the fermenter and attach an airlock filled with sanitizer.
Place in a stable, dark location. During the first 24–48 hours, monitor for signs of fermentation like bubbling in the airlock. This stage sets the base flavor and alcohol content, so maintaining cleanliness and temperature is essential for consistency and quality.
Adding Cultures and Yeast
Once the wort is in the fermenter and cooled, it’s time to pitch the souring cultures—typically a blend of Lactobacillus and sometimes Pediococcus—following the kit’s timeline. Some kits recommend a short souring phase at 85–95°F (29–35°C) for 2–4 days to develop tartness before boiling, while others use kettle souring methods.
After souring (if applicable), cool the wort and add the primary yeast, such as Saccharomyces or a Brettanomyces strain, which drives alcoholic fermentation. Always rehydrate dry yeast in sterile water before pitching for best results. Seal the fermenter and maintain a consistent temperature ideal for the yeast strain.
Fermentation may last 1–3 weeks. Monitor gravity with a sanitized hydrometer to confirm completion. Proper culture addition ensures a balanced, complex sour beer with bright acidity and clean fermentation character.
Managing Fermentation for Sour Beer
Ideal Temperature Ranges
Maintaining ideal temperature ranges is critical when using a sour beer making kit to ensure balanced acidity and clean fermentation. For mixed-culture ferments involving *Lactobacillus*, *Pediococcus*, and *Brettanomyces*, a stable temperature between 68–75°F (20–24°C) supports gradual acid development without harsh off-flavors.
If using a kettle-souring method with *Lactobacillus*, hold the wort at 95–110°F (35–43°C) for 24–48 hours to accelerate souring while inhibiting unwanted bacteria. Avoid temperature spikes, as they can encourage excessive diacetyl or volatile acidity. Use a temperature-controlled fermentation chamber or heating belt with a thermostat for consistency.
Cooler temperatures slow fermentation but improve complexity over time, while warmer conditions speed up souring but risk producing solvent-like notes. Always monitor with a reliable digital thermometer. Stability and precision are key—fluctuations can stall fermentation or lead to incomplete attenuation.
Adjust based on yeast and bacteria strain requirements listed in your kit’s instructions.
Common Fermentation Timelines
Understanding common fermentation timelines helps manage expectations and ensures quality when using a sour beer making kit. Kettle-soured beers typically follow a fast timeline: souring in 1–2 days, followed by a standard 1–2 week primary fermentation with ale yeast.
Mixed-culture or traditional sour beers require much longer, often 3–12 months, due to slow-acting *Brettanomyces* and bacterial strains. Primary fermentation may finish in 2–3 weeks, but full maturation, including acid integration and flavor development, takes months.
Use a hydrometer to track progress, but remember that *Brettanomyces* can continue fermenting residual sugars for months. Avoid rushing—patience is essential for complexity and balance. Some kits include a schedule; follow it closely. Rack to secondary for extended aging if recommended.
Never bottle until fermentation is fully complete to prevent over-carbonation or bottle bombs. Plan ahead and label batches with dates to track aging progress.
How to Prevent Contamination
Preventing contamination is non-negotiable in sour beer production, especially when using a sour beer making kit containing wild microbes. While some bacteria and yeast are intentional, unwanted microbes like acetobacter or wild molds can ruin a batch.
Always sanitize thoroughly: use no-rinse sanitizers on all equipment, including airlocks, siphons, and fermenters. Dedicate specific tools—fermenters, spoons, tubing—exclusively for sour batches to avoid cross-contamination with clean beers. Use tight-sealing fermenters with proper airlocks, and consider pellicle-safe lids that allow gas exchange without exposure. Avoid opening the fermenter unnecessarily.
Work in a clean, draft-free area, and flame sanitizer any sampling tools before use. If using a shared space, store sour fermentations separately. Never reuse bottle caps or stoppers from sour batches in clean beer lines.
Remember: intentional souring is controlled fermentation—hygiene and organization are your best defenses against spoilage and off-flavors.
Troubleshooting Common Sour Beer Problems
Off-Flavors and How to Fix Them
Off-flavors in sour beer, such as excessive vinegar, barnyard funk, or medicinal notes, often stem from uncontrolled bacterial strains or wild yeast contamination.
To fix this, ensure you’re using a reputable sour beer making kit with defined cultures like *Lactobacillus*, *Pediococcus*, or *Brettanomyces*, rather than relying on spontaneous fermentation unless experienced. Maintain strict sanitation of all equipment, as unwanted microbes can introduce harsh acidity or rotten aromas.
If the beer tastes overly acetic, it may have been exposed to too much oxygen or acetobacter—limit headspace and use airlocks properly. For strong phenolic or band-aid flavors, consider switching to yeast strains low in phenolic off-flavor production. Extended aging on healthy yeast can help mellow harsh notes.
Taste frequently during aging and blend with a cleaner beer if needed to balance flavors. Always keep detailed notes to identify and prevent repeat issues.
Slow or Stuck Fermentation
Slow or stuck fermentation in sour beer is common due to the complex interplay of yeast and bacteria, which ferment more slowly than traditional brewer’s yeast. First, confirm fermentation is actually stuck by taking gravity readings over several days—sour microbes can take weeks to show activity.
Ensure the fermentation temperature is within the ideal range (typically 68–75°F / 20–24°C) for the included cultures. If activity remains low, consider pitching a fresh starter of a robust Saccharomyces strain to kickstart fermentation. Avoid excessive alcohol or acidity early on, which can inhibit microbes—dilute with water if needed.
Check pH levels; if below 3.0, the environment may be too acidic. Introducing a small amount of fresh wort or nutrients can also revive sluggish cultures. Patience is key—many sour fermentations take months to complete properly.
Cloudiness and Clarity Issues
Cloudiness in sour beer is often expected due to the presence of bacteria and wild yeast, but excessive haze may indicate process issues. To improve clarity, allow ample time for settling—many sour beers clear naturally during extended aging.
Use fining agents like gelatin or isinglass after primary fermentation, but avoid filtering until the beer is stable, as live cultures can repopulate. Ensure your sour beer making kit includes instructions on cold crashing, which helps particles settle.
If cloudiness persists, check for infection or protein haze from under-modified grains—use a protein rest during mashing if crafting your own base beer. Avoid over-pitching bacteria, which can contribute to turbidity. For consistent results, maintain proper sanitation and avoid disturbing the sediment during transfers.
Remember, some haze is natural and acceptable in traditional sour styles like Berliner Weisse or Lambic.
Tips for Aging and Bottling Sour Beer
Best Practices for Aging
Aging sour beer properly is critical for developing complex flavors and achieving the desired balance between acidity, funk, and fruitiness. Use glass carboys or oak barrels for long-term aging, as they resist bacterial contamination and allow for micro-oxygenation that enhances depth.
Always sanitize equipment thoroughly to prevent unwanted microbes from spoiling your batch. Store the beer in a cool, dark place with stable temperatures between 60–68°F (15–20°C) to encourage slow, controlled fermentation by Brettanomyces, Lactobacillus, and Pediococcus. Avoid frequent racking, which increases oxidation risk—limit transfers to only when necessary.
Age for at least 6–12 months, though some styles benefit from several years. Keep detailed notes on flavor development and microbial activity. Use airlocks with mineral oil or specialized devices to prevent vinegar-producing bacteria from entering while allowing gases to escape.
Choosing the Right Bottles and Caps
Selecting high-quality, thick glass bottles is essential when bottling sour beer, as extended aging and active microbes can increase internal pressure and risk of failure. Champagne-style bottles are ideal due to their strength and ability to withstand high carbonation levels.
Avoid twist-off bottles, as they don’t seal reliably with standard cappers and are prone to leaks or oxidation. Use oxygen-barrier caps or gold pry-off caps to minimize oxygen ingress, which can lead to off-flavors or acetic spoilage.
Always sanitize bottles and caps thoroughly—consider a no-rinse sanitizer like Star San to eliminate contaminants. For corked bottles, use cage retainers to prevent blowouts. Consistent bottle quality ensures safe storage, better shelf stability, and protects the nuanced character of your sour beer over time.
Carbonation Methods for Sour Beers
Carbonation in sour beers requires careful planning due to slow or ongoing fermentation from wild yeast and bacteria. The priming sugar method is most common: add a precise amount of corn sugar or dextrose (typically 3/4 cup per 5 gallons) to ensure consistent carbonation without over-pressurizing.
Dissolve the sugar in boiled water and mix thoroughly to avoid bottle bombs. Because Brettanomyces can ferment complex sugars, use highly fermentable priming agents. Alternatively, consider bottle conditioning with cultured yeast like Saccharomyces to ensure reliable carbonation without introducing new variables.
For faster results, force carbonation via kegging before bottling allows precise control and reduces risk. Regardless of method, store bottles at 70°F (21°C) for 2–4 weeks to allow full carbonation, then refrigerate before opening.
Frequently Asked Questions
What is a sour beer making kit?
A sour beer making kit is a packaged set of ingredients and instructions designed to help homebrewers create sour beers. It typically includes specialty yeast strains, bacteria like Lactobacillus or Pediococcus, and sometimes fruit or flavorings to achieve the tart, tangy profile characteristic of sour beers.
Do I need special equipment to use a sour beer making kit?
While basic homebrewing equipment works, it’s recommended to use dedicated tools to avoid cross-contamination with wild yeast and bacteria. Sanitation is critical, and having a separate fermenter, tubing, and bottles for sour brewing is ideal.
How long does it take to make sour beer with a kit?
Sour beer typically takes longer than regular beer, ranging from a few weeks to several months depending on the style. The extended time allows the souring bacteria to develop the desired acidity and complex flavors.
Can I speed up the souring process in a homebrew kit?
Yes, some kits use fast-souring methods like kettle souring with Lactobacillus, which can produce noticeable sourness in 1–3 days before boiling. This method reduces overall brewing time compared to traditional mixed fermentation.
Are sour beer kits suitable for beginners?
Yes, many kits are beginner-friendly and come with step-by-step instructions. However, brewers should be cautious about contamination and understand the unique fermentation requirements of sour beer.
What flavors can I expect from a sour beer kit?
Sour beer kits often produce tart, fruity, and funky flavors, with profiles ranging from citrusy and bright to earthy and wine-like. Many kits include fruit additions like raspberries, cherries, or passionfruit to enhance complexity.
Can I customize my sour beer from a kit?
Absolutely—many homebrewers add extra fruit, spices, or age their sour beer in barrels for deeper flavors. Just ensure any additions are sanitized and compatible with the active cultures in the beer.
Conclusion
Making sour beer at home has never been easier thanks to sour beer making kits. With patience and proper sanitation, you can craft complex, tangy brews right in your kitchen. Whether you’re a seasoned homebrewer or just starting out, a sour beer kit offers a fun, rewarding way to explore bold flavors. Give it a try—your perfect pint awaits!