How To Wash Oven Racks
Cleaning oven racks doesn’t have to be a chore. In this quick guide we’ll walk you through two simple methods—one using everyday kitchen staples and another with a powerful soak—so you can restore those racks to sparkling condition in minutes. By the end, you’ll have a spotless rack ready for your next bake, without the hassle. And enjoy a cleaner kitchen today.
Understanding Oven Rack Materials
Types of metal used in oven racks
Identify the common metals used in oven racks, such as chrome‑plated steel, stainless steel, and cast iron. Chrome‑plated steel offers a shiny finish but can chip if handled roughly, while stainless steel provides corrosion resistance and a smoother surface.
Cast iron racks are heavy and retain heat, often coated with enamel to prevent rust. Knowing the exact material helps you select the right cleaning agents; for example, abrasive powders can scratch chrome but are safe on stainless.
Check the manufacturer’s label or look for a stamped code inside the rack to confirm the metal type before you begin any washing routine. This initial step prevents unnecessary damage and ensures you apply the most effective, material‑specific cleaning technique.
Regularly removing baked‑on grease after each use reduces the effort required later, and a brief pre‑soak in warm, soapy water for 10‑15 minutes loosens stubborn particles before scrubbing.
How material affects cleaning methods
The metal composition of your oven rack dictates which cleaning tools and chemicals will work without causing damage. For chrome‑plated steel, avoid harsh acids like vinegar at full strength; instead, use a mild dish‑soap solution and a non‑abrasive sponge to protect the plating.
Stainless steel tolerates slightly stronger cleaners such as diluted lemon juice or a commercial stainless‑steel cleaner, but you should still use soft cloths to prevent micro‑scratches.
Cast iron racks, especially those with enamel coating, require gentle, non‑scratching pads and a neutral pH cleanser; harsh alkalis can erode the enamel and expose raw iron to rust.
When choosing a method, match the scrubbing intensity to the material’s durability: light circular motions for delicate chrome, moderate pressure for stainless, and firm but careful strokes for cast iron. After cleaning, rinse thoroughly and dry immediately to avoid water spots or corrosion, which can compromise the rack’s longevity.
Safety considerations for each material
Cleaning oven racks safely means respecting the specific risks each metal presents. With chrome‑plated steel, the primary concern is plating loss; wearing rubber‑grip gloves prevents slipping and reduces the chance of scratching the surface with metal tools.
Stainless steel can release nickel particles when aggressively scrubbed, so use a mask or work in a well‑ventilated area if you employ powdered cleaners.
For cast iron racks, especially those without enamel, the danger is rust formation; keep the cleaning area dry, apply a thin coat of high‑temperature oil after drying, and store the rack away from moisture.
Always test any new cleaner on a hidden spot first to ensure it does not discolor or degrade the finish. Dispose of used cleaning solutions according to local regulations, and never mix bleach with acidic cleaners, as this can generate harmful gases that affect both the material and your health.
Gathering Essential Cleaning Supplies

Choosing the right cleaning agents
Start by selecting a cleaning agent that cuts through baked‑on grease without damaging the metal finish of your oven racks. Alkaline powdered cleaners such as dishwasher detergent mixed with hot water work well for light to moderate buildup.
For tougher carbon deposits, a commercial oven cleaner containing sodium hydroxide provides strong action, but always test a small area first to avoid corrosion. If you prefer milder chemistry, white vinegar combined with baking soda creates a fizzing reaction that loosens grime while remaining safe for most rack coatings.
Keep the solution in a spray bottle for even coverage, and let it sit for 10‑15 minutes before scrubbing. Remember to read the label for any warnings about metal surfaces, and ventilate the kitchen to disperse fumes.
After cleaning, rinse the racks thoroughly with warm water and dry them with a lint‑free cloth to prevent rust spots.
Tools you’ll need: brushes, sponges, and gloves
Equip yourself with the right tools to turn a stubborn rack into a sparkling surface. Heavy‑duty scrub brushes with stiff nylon bristles can tackle thick, baked‑on layers without scratching the metal. For tighter corners, a soft‑sponged brush or an old toothbrush reaches crevices where larger brushes miss.
Gloves made of nitrile or rubber protect your hands from harsh chemicals and hot water; choose a pair with a textured grip to keep the brush steady. A plastic scraper helps lift large chunks of residue before applying any liquid cleaner, reducing the amount of scrubbing needed.
Finally, keep a bucket or large basin handy for soaking the racks in your chosen solution; the longer the soak, the easier the subsequent wipe‑down. By organizing these items within arm’s reach, you’ll maintain momentum and finish the job efficiently.
Eco‑friendly alternatives for a green clean
Turn to green chemistry when you want a safe, effective clean that respects the environment. Baking soda alone acts as a mild abrasive; sprinkle a generous layer on the rack, spray with a little water to form a paste, and let it sit for 20 minutes to break down grease.
Pair it with lemon juice, whose natural acidity boosts the cleaning power and leaves a fresh scent. For a foaming action, mix castile soap with warm water and a splash of white vinegar; this combination emulsifies oil and dissolves carbon without harsh fumes.
After the soak, use a reusable silicone scrub pad to wipe away loosened debris, then rinse thoroughly. These biodegradable ingredients break down quickly in wastewater, reducing chemical load on the ecosystem while still delivering a spotless finish on your oven racks.
Preparing the Oven Racks for Cleaning
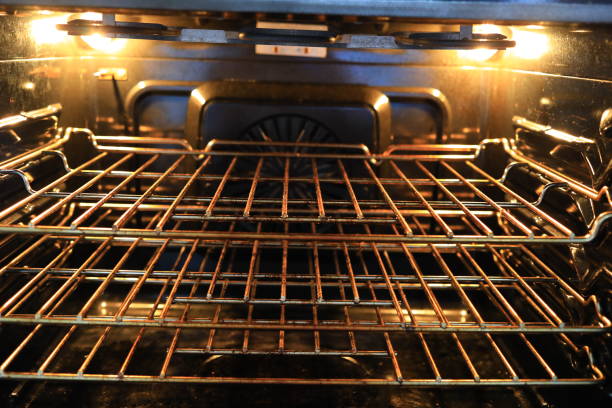
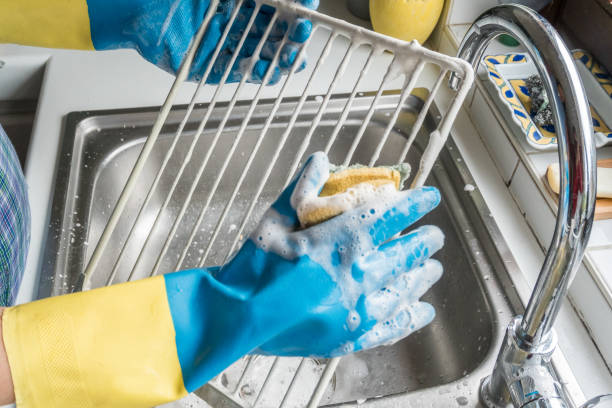
Removing racks safely from the oven
Before you begin any cleaning, make sure the oven is completely cool and unplugged. Turn off the appliance and allow at least 30 minutes for residual heat to dissipate.
Open the oven door fully and, using a sturdy oven mitt or heat‑resistant glove, grasp the front of the rack near the handle.
Lift gently to avoid bending the metal; if the rack is stuck, wiggle it slightly or tap the side of the oven with a rubber mallet to loosen it. Place the rack on a stable surface such as a kitchen counter or a large tray.
If your oven has multiple levels, remove the top rack first to prevent it from falling onto the lower one. Inspect the rack for any cracks or rust before proceeding, and set it aside in a safe spot away from children or pets.
Pre‑cleaning: wiping off loose debris
Start the cleaning process by eliminating loose food particles and grease that can interfere with soaking. Use a dry paper towel or a soft brush to sweep across each rack, paying special attention to the corners and the underside where crumbs accumulate.
For stubborn bits, lightly dampen the towel with warm water and scrape gently with a plastic spatula; avoid metal tools that could scratch the coating. As you work, transfer the debris to a trash bin or a disposable bag to keep the workspace tidy.
This step reduces the amount of soap needed later and speeds up the overall cleaning time. If you notice heavy carbon buildup, sprinkle a thin layer of baking soda over the affected areas before wiping; the mild abrasive helps lift the residue without damaging the metal.
Finish by giving each rack a quick wipe‑down to ensure it is mostly free of visible grime.
Setting up a cleaning workstation
Create a dedicated area where you can soak and scrub the racks without creating a mess. Lay down a large garbage bag or a waterproof tarp on your kitchen floor or countertop to catch any drips.
Fill a sturdy bathtub, a deep sink, or a large plastic basin with hot water—ideally just below boiling—and add a generous cup of dishwashing liquid or a mixture of vinegar and baking soda for extra degreasing power.
Place the racks inside, ensuring they are fully submerged; if they are too long, you can lean them against the side of the tub to keep them stable. Keep a scrub brush, a non‑abrasive sponge, and a pair of rubber gloves within arm’s reach.
Label the container with the start time so you can track the soaking duration, typically 30‑45 minutes for moderate grime. This organized setup minimizes cleanup afterward and keeps your kitchen surfaces safe from chemical splashes.
Effective Soaking Techniques
Hot water vs. warm water soak
Begin by deciding whether hot or warm water will best suit the grime on your oven racks. Hot water (around 140‑150°F) loosens baked‑on food faster, especially for heavy grease and caramelized residues. It also helps dissolve soap more efficiently, reducing scrubbing time.
However, if your racks are coated with a non‑stick finish or delicate enamel, warm water (around 110‑120°F) is gentler and less likely to cause warping or damage.
Fill a large basin or bathtub with enough water to fully submerge the racks, add a few drops of dish soap, and stir to create suds. Let the racks sit for at least five minutes before proceeding to the next step.
This initial soak softens the debris, making the subsequent cleaning actions more effective and less labor‑intensive. Adjust the temperature based on the rack material and the severity of the buildup for optimal results.
Adding baking soda and vinegar for extra power
After the preliminary soak, boost cleaning power with a baking soda and vinegar combo. Sprinkle a generous layer of baking soda over each rack, focusing on crevices where grease accumulates. Baking soda’s mild alkaline nature lifts stubborn particles and neutralizes odors.
Then, slowly pour white vinegar onto the soda; the mixture will fizz, creating a gentle abrasive action that penetrates baked‑on spots without scratching the metal. Let this reaction sit for 5‑10 minutes; the carbonic bubbles help break down carbonized residue.
For heavily stained areas, repeat the sprinkle‑spray cycle or form a paste of baking soda and a few drops of water, applying it directly and allowing it to dwell for an additional 15 minutes.
This method is safe for stainless‑steel, chrome, and even enamel‑coated racks, but avoid excessive abrasion on delicate non‑stick surfaces. Rinse thoroughly after the reaction to wash away loosened grime and prevent any lingering acidic taste.
Soak duration recommendations for different stains
Tailor the soak time to the type of stain for maximum efficiency. Light grease or splatters from occasional baking can be removed after a short 10‑15 minute soak; the mild soap and warm water will dissolve the residue quickly.
Medium‑level baked‑on food, such as caramelized cheese or sauce, benefits from a 30‑45 minute immersion, allowing the heat‑softened grease to loosen before scrubbing. For heavy, carbonized stains—think burnt-on pizza crust or stubborn grill marks—extend the soak to 1‑2 hours, or even overnight if the racks are removable and space permits.
Adding a cup of vinegar to the water for these tougher jobs accelerates breakdown of carbon. Monitor the water temperature; hotter water speeds up the process but should not exceed the rack’s material tolerance.
After the designated soak, gently agitate the racks in the water to dislodge loosened particles before proceeding with a brush or sponge.
Scrubbing Methods for Stubborn Stains
Choosing the right scrub brush or pad
Start by removing the oven racks and giving them a quick rinse to loosen loose debris. Select a brush that matches the level of grime: a stiff‑bristled nylon brush works well for baked‑on grease, while a non‑abrasive sponge or microfiber pad protects delicate enamel from scratches.
For heavily carbonized spots, a metal scouring pad can be used, but test it on an inconspicuous area first to avoid surface damage. Avoid harsh steel wool on coated racks, as it can strip the finish.
Warm, soapy water in a large basin or bathtub lets you soak the racks while you work. After soaking, apply the chosen brush in circular motions, focusing on corners and crevices where food particles hide.
Rinse thoroughly and dry with a clean towel before placing the racks back in the oven. This method ensures a thorough clean without compromising the rack’s integrity.
Using a paste of baking soda and water
Create a cleaning paste by mixing one part baking soda with just enough warm water to form a thick, spreadable consistency—about a 1:1 ratio works well for most racks. Apply the paste liberally to the metal surfaces, paying special attention to the underside and the edges where grease builds up.
Let it sit for 15‑20 minutes; the mild alkaline action breaks down carbonized residue without harming the coating. While the paste works, use a soft‑bristled brush to gently scrub in a back‑and‑forth motion, allowing the baking soda granules to act as a gentle abrasive.
For stubborn spots, re‑apply a small amount of paste and let it fizz for a few extra minutes before scrubbing again. Once the grime lifts, rinse the racks thoroughly under warm running water to remove all soda residue, then dry them completely.
This natural method is safe, inexpensive, and leaves no harsh chemicals behind.
When to use a commercial oven cleaner
If the racks are coated with a heavy layer of baked‑on sauce that does not respond to manual scrubbing or baking‑soda paste, a commercial oven cleaner can be the next step.
Choose a product that is specifically labeled safe for metal racks and free of bleach, which can corrode the finish. Before applying, work in a well‑ventilated area and wear gloves and eye protection; the chemicals are potent and can irritate skin and lungs.
Spray the cleaner evenly, covering all surfaces, and let it sit for the manufacturer’s recommended time, typically five to ten minutes. After the dwell period, use a non‑abrasive scrub pad to wipe away the softened grime, then rinse the racks thoroughly with plenty of water to eliminate any residue.
Reserve this method for truly stubborn stains, as frequent use may wear down protective coatings over time.
Rinsing, Drying, and Reinstalling Racks
Thorough rinsing to remove residue
After scrubbing your oven racks, the most important step is a thorough rinse to eliminate any lingering soap, grease, or cleaning solution. Fill a large basin or bathtub with hot water and submerge each rack, allowing the water to flow over all surfaces.
Use a clean sponge or soft brush to swirl the water, dislodging particles that may have settled in crevices. For stubborn residue, pour a steady stream of warm water from a faucet while gently shaking the rack; the pressure helps flush out hidden grime.
Be sure to rinse both the interior and exterior, paying special attention to the corners where debris accumulates. Once the water runs clear, give each piece a final dip in fresh water to guarantee no cleaning agents remain.
This step prevents unwanted odors and protects the metal from chemical corrosion during the drying phase.
Drying methods to prevent rust
To keep oven racks from developing rust, immediate and complete drying is essential once they have been rinsed. Begin by shaking off excess water over the sink, then place each rack on a clean, lint‑free towel in a well‑ventilated area.
Pat the surfaces dry with a second towel, focusing on the undersides and any joints where moisture can linger. For faster results, use a low‑heat setting on a hair dryer or a handheld fan, moving it continuously to avoid overheating any spot.
If you prefer a hands‑off approach, set the racks on a drying rack under a ceiling fan for several hours. After they appear dry to the touch, inspect them for hidden dampness; a quick press with a dry cloth will reveal any remaining wet patches.
Finally, apply a thin coat of food‑safe oil—such as vegetable or canola oil—using a paper towel; this creates a protective barrier that further discourages oxidation during storage and the next cooking cycle.
Repositioning racks correctly in the oven
Once the racks are clean, dry, and protected, reinstalling them properly ensures even heating and prevents damage during future use. Start by checking the oven interior for any debris or leftover cleaning residue; a quick wipe with a damp cloth removes stray particles that could scratch the metal.
Identify the designated rack positions—most ovens have low, middle, and high slots, each optimized for specific cooking tasks. Slide each rack gently into its slot, making sure the wheels or glides sit flush against the oven walls to avoid wobbling.
Align the rack so that the front edge is slightly forward; this placement improves airflow and promotes consistent browning. If your oven features adjustable rack supports, verify that they are fully engaged before loading heavy pans.
After placement, close the oven door and run a short 5‑minute preheat cycle; this helps the racks settle and confirms they remain stable under heat. Proper repositioning not only extends rack lifespan but also contributes to better cooking results.
Maintenance Tips to Keep Racks Clean Longer
Regular quick‑wipe routine after each use
After every baking session, let the rack cool for a few minutes, then spray a light mist of water mixed with a few drops of dish soap. Wipe the surface with a non‑abrasive sponge, focusing on visible crumbs and splatters.
For stubborn spots, dip the sponge in warm soapy water and scrub gently; avoid steel wool which can scratch the coating. Once clean, dry the rack with a clean kitchen towel to prevent rust formation.
Finally, slide the rack back into the oven while it is still warm, which helps any remaining residue evaporate. This quick‑wipe habit takes less than five minutes and dramatically reduces the need for intensive cleaning later, keeping the racks looking bright and extending their lifespan.
You can also keep a small bottle of white‑vinegar spray nearby; a quick spritz before wiping helps cut grease and leaves a fresh scent.
Monthly deep‑clean schedule
Set a calendar reminder to pull the oven racks out once a month for a thorough cleaning. Fill a large basin or bathtub with hot water, add a cup of baking soda and a splash of dish detergent, then submerge the racks for at least 30 minutes.
The alkaline mixture loosens baked‑on grime, while the detergent breaks down oily residues. After soaking, use a soft‑bristled brush to scrub each bar, paying special attention to the corners where grease tends to accumulate.
Rinse the racks under running water until no suds remain, then lay them on a drying rack or towel to air‑dry completely. For extra shine, polish the metal with a thin layer of mineral oil using a clean cloth; this step creates a protective barrier that repels future stains.
Completing this monthly routine prevents stubborn buildup, reduces the effort needed for spot cleaning, and keeps the racks looking like new for many baking cycles.
Preventing grease buildup with liners
One of the most effective ways to keep oven racks clean longer is to use reusable silicone or parchment liners that sit directly on the rack surface.
Before loading a tray, place a heat‑resistant liner on each rack; it catches drips, splatters, and melted cheese, preventing them from adhering to the metal. After cooking, simply lift the liner out, shake off excess crumbs, and wash it in the dishwasher or with warm soapy water.
Because the liner absorbs the mess, the rack itself only needs a quick wipe with a damp cloth, saving you time and harsh chemicals.
If you prefer a disposable option, cut a sheet of heavy‑duty aluminum foil to fit the rack and crumple it slightly to create pockets for grease; discard the foil after each use.
Regularly rotating the liners and ensuring they are fully dry before reuse also stops moisture‑related rust, extending the life of both the liners and the oven racks.
Frequently Asked Questions
What basic supplies do I need to clean oven racks?
You’ll need a sink or bathtub, dish soap or a gentle degreaser, baking soda, white vinegar, a scrub brush or non‑abrasive sponge, and optional rubber gloves.
Can I soak oven racks in hot water to remove grime?
Yes, fill a sink or bathtub with hot, soapy water and let the racks soak for 30‑60 minutes; this loosens baked‑on food and makes scrubbing easier.
How do I use baking soda and vinegar to clean stubborn residue?
Sprinkle baking soda over the rack, then spray or pour white vinegar; the fizzing reaction helps lift grime, after which you scrub with a brush and rinse thoroughly.
Is it safe to clean oven racks in the dishwasher?
Most metal racks are dishwasher‑safe, but place them on the top rack away from sharp objects; use a regular cycle and avoid high‑heat drying to prevent warping.
What method works best for heavily carbonized racks?
Create a paste of baking soda and water, apply it to the carbonized areas, let it sit for 15‑20 minutes, then scrub with a nylon brush; repeat if necessary and rinse well.
How should I dry oven racks after cleaning?
Pat them dry with a clean towel or let them air‑dry on a rack rack; ensure they are completely dry before reinstalling to prevent rust.
Can I use commercial oven cleaners on racks?
Yes, but follow the product’s instructions, wear gloves, and ensure the cleaner is safe for metal; rinse thoroughly to remove any chemical residue before using the oven again.
Conclusion
Remember to choose the right cleaning solution for your rack’s material, protect your hands, and avoid harsh chemicals that can damage finishes. With a little regular maintenance, your oven will heat more evenly, and cooking will stay hassle‑free. Give your racks the care they deserve!


