
How To Sterilize Sponges In The Microwave
Ever wonder if your kitchen sponge can be truly clean without harsh chemicals? In just a few minutes, you can sterilize it safely using your microwave. No guesswork—just a quick, reliable method that fits into any busy routine. Ready to get a fresh, germ‑free sponge? Let’s dive in! Follow these simple instructions and enjoy a spotless kitchen.
Understanding Why Microwave Sterilization Works
The science behind microwaves and bacteria
Microwaves generate energy at 2.45 GHz, causing water molecules inside a sponge to vibrate rapidly. This vibration produces heat that quickly raises the temperature throughout the sponge, reaching levels that denature bacterial proteins and disrupt cell membranes.
Rapid heating ensures that even the deepest layers of the sponge receive lethal temperatures, typically above 70 °C, which most common kitchen microbes cannot survive. Unlike surface‑only treatments, the microwave’s penetrative effect works uniformly because sponges are porous and retain moisture, providing the medium for energy absorption.
Moisture content is therefore crucial; a damp sponge will heat faster and more evenly than a dry one.
By understanding that microwaves target water‑based heat generation rather than directly killing microbes, you can optimize the process: soak the sponge, wring out excess water, then microwave for the recommended time to achieve reliable sterilization.
Benefits over other methods
Microwave sterilization offers several advantages compared with boiling, bleach soaking, or dishwasher cycles. Speed is a primary benefit: a fully wet sponge can be sanitized in 1–2 minutes, whereas boiling may require 10 minutes and chemical treatments need soaking and rinsing.
The method also avoids residual chemicals; unlike bleach, no harmful residues remain on the sponge, making it safe for food‑contact surfaces. Energy consumption is lower than heating an entire pot of water, and the process uses equipment already present in most kitchens, eliminating the need for special appliances.
Additionally, microwaves provide uniform heat distribution within the porous structure, reaching areas that may be missed by surface‑only cleaning. This consistency reduces the risk of surviving bacterial colonies, especially heat‑resistant spores that can linger after brief dishwasher cycles.
Overall, the microwave approach combines efficiency, safety, and thoroughness, making it an ideal routine for maintaining clean, hygienic sponges in busy households.
Safety considerations
While microwaving sponges is effective, it must be done safely to prevent fire hazards and material damage. Never place a dry sponge in the microwave; without moisture it can overheat and ignite within seconds.
Always soak the sponge thoroughly, then wring out excess water so it is damp but not dripping. Use a microwave‑safe container or a plain paper towel underneath to catch any steam and avoid direct contact with the turntable.
Limit the heating time to 1–2 minutes, checking the sponge after each 30‑second interval to ensure it does not become excessively hot or start to smoke. Allow the sponge to cool before handling, as the interior can retain temperatures above 70 °C.
Finally, inspect the sponge for signs of degradation—melting, discoloration, or a burnt smell—before reuse, and discard any that show damage. Following these precautions ensures a clean sponge without compromising kitchen safety.
Choosing the Right Sponge for Microwave Sterilization
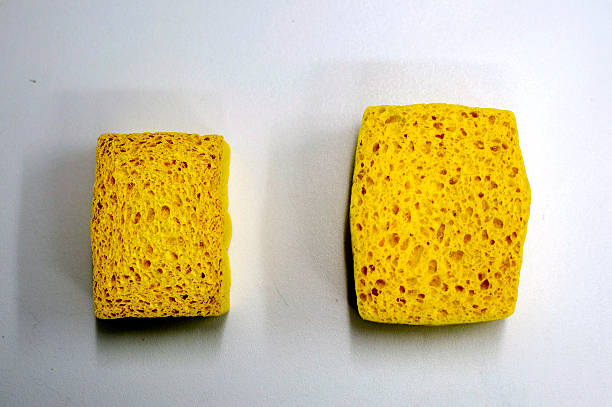
Types of kitchen sponges
When selecting a sponge for microwave sterilization, start by identifying the type that balances absorbency and durability. Cellulose sponges are made from natural fibers, absorb water well, and can tolerate high heat, making them ideal for quick sanitizing.
Synthetic sponges such as polyester or nylon often contain plastic binders that may melt, so they are less reliable. Scrubbing sponges with abrasive surfaces are useful for tough grime but should be free of metal particles that could spark.
Look for sponges labeled “microwave‑safe” or those without added dyes, as colorants can degrade under heat. Before each use, rinse the sponge thoroughly to remove food debris, then squeeze out excess water; a damp sponge heats more evenly and reduces fire risk.
By matching the sponge’s material to these criteria, you ensure effective sterilization without damaging the appliance.
Materials that are microwave-safe
Materials that are microwave‑safe include those that are primarily water‑based and free of metal or dense plastic components. Cellulose‑based sponges consist mainly of plant fibers and water, allowing them to absorb microwave energy and reach temperatures that kill bacteria.
Silicone sponges are heat‑resistant up to 250 °C and do not melt, making them a reliable alternative for longer cycles. Natural loofah pads, when fully saturated, can also be microwaved safely, but they must be free of any synthetic coating.
Avoid sponges that contain foam cores, plastic beads, or metallic scrubbing pads, as these can spark or release toxic fumes. Before microwaving, ensure the sponge is thoroughly wet—soak it for at least 30 seconds and wring out excess liquid to prevent drying out mid‑cycle.
Place the sponge on a microwave‑safe plate, set the timer for one to two minutes, and let it cool before handling. Following these material guidelines guarantees a hygienic result without compromising safety.
What to avoid
What to avoid when sterilizing sponges in the microwave includes any items that can cause fire, sparks, or chemical release. Dry sponges heat rapidly and can ignite, so always keep the sponge damp before microwaving.
Sponges with metal scrubbers or embedded wire loops create arcing, which can damage the microwave interior. Polyurethane foam sponges melt at relatively low temperatures and may emit harmful fumes; they should be excluded from microwave cycles. Additionally, avoid sponges with synthetic dyes that can leach chemicals when heated.
Do not use the microwave’s defrost setting for sterilization, as the lower temperature may not effectively kill microbes. After the cycle, allow the sponge to cool for at least 30 seconds before removal to prevent burns.
By steering clear of these hazards, you maintain both the longevity of your kitchen tools and the safety of your microwave appliance.
Preparing Your Sponge Before Microwaving
Rinsing and wringing out excess water
Begin by giving the sponge a thorough rinse under warm tap water. This step removes loose food particles, soap residue, and surface grime that could shield bacteria during heating. Scrub both sides with your fingers or a soft brush to dislodge hidden debris.
After rinsing, gently squeeze the sponge to expel as much water as possible without tearing the material. Wringing out excess water not only reduces the microwave time needed for heating but also prevents steam buildup that could cause uneven sterilization.
Place the sponge on a clean kitchen towel and press lightly to absorb remaining droplets. Ensure the sponge is damp, not dripping, before moving to the next preparation stage. This initial cleaning creates a uniform moisture level, allowing the microwave’s heat to penetrate evenly and destroy microbes effectively.
A well‑rinsed sponge also reduces the chance of unpleasant odors developing during the sterilization cycle, keeping your kitchen smelling fresh.
Wetting the sponge properly
After the initial rinse, the sponge must be evenly moistened to ensure consistent heat distribution in the microwave. Fully saturate the sponge by submerging it in a bowl of warm water for a few seconds, then lift it and let excess liquid drip off naturally.
Avoid soaking it to the point of dripping, as excess steam pockets that interrupt the sterilization process. Gently press the sponge against the side of the bowl to release surplus moisture while keeping the interior fibers damp.
This balanced wetness allows the microwave’s electromagnetic waves to excite water molecules throughout the sponge, generating the temperature needed to kill bacteria, viruses, and mold spores. Check the texture; the sponge should feel supple but not soggy.
If any dry spots remain, lightly mist them with a spray bottle of water. Uniform moisture is the key to achieving a reliable, thorough disinfection in just a few minutes.
Adding a small amount of water if needed
If after wetting the sponge you notice it feels too dry for effective microwave heating, add a modest amount of water to achieve the right consistency. Pour a teaspoon of water onto the sponge’s surface and gently fold it in, allowing the fibers to absorb the liquid evenly.
Avoid over‑saturating; the goal is a lightly damp sponge that releases steam gradually rather than a pool of water that could cause boiling or damage the microwave interior. For thicker or denser sponges, you may need to repeat the process with another half‑teaspoon until the sponge feels uniformly moist.
Once the appropriate moisture level is reached, place the sponge on a microwave‑safe plate and cover it loosely with a paper towel to contain splatters.
This small water addition ensures that the microwave’s energy can fully engage the sponge’s material, raising its temperature to the sterilization threshold of at least 70 °C (158 °F) for the recommended 1‑2 minutes.
Step‑by‑Step Guide to Sterilize a Sponge in the Microwave
Setting the microwave power and time
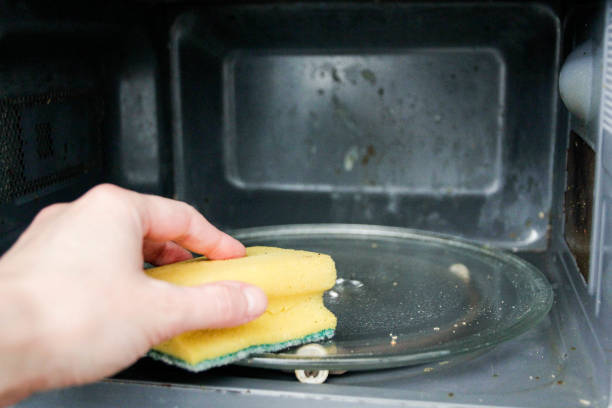
Begin by selecting a clean kitchen sponge that is free of visible debris. Wet the sponge thoroughly by running it under warm water and squeezing it until it is saturated but not dripping. Place the sponge on a microwave‑safe plate or a shallow dish to catch any excess moisture.
Set the microwave to high power (1000 W) if your model allows; lower‑wattage units can use the maximum setting available. Program the timer for one to two minutes depending on the sponge size—generally 60 seconds for a standard kitchen sponge and up to 120 seconds for a larger, thicker pad.
Avoid using the “defrost” or “reheat” modes, as they do not provide consistent heat. Before starting, ensure the microwave door closes securely and that no metal objects are inside. This initial setup creates the temperature needed to kill most bacteria, mold, and viruses embedded in the sponge fibers.
Monitoring the process
While the microwave is running, keep an eye on the sponge to prevent overheating or burning. Listen for a steady hum; a sudden silence may indicate that the timer has finished or that the microwave has shut off due to safety.
If you notice smoke, a strong odor, or the sponge turning dark brown, stop the cycle immediately and unplug the appliance. For added safety, consider placing a microwave‑safe cup of water beside the sponge; this helps distribute heat evenly and reduces the risk of hotspots.
Check the interior of the microwave through the glass door every 20‑30 seconds to verify that the sponge remains moist and that no sparks appear.
Remember that different microwaves have varying power outputs, so you may need to adjust the timing by 10‑15 seconds up or down after the first trial. Document the exact time and power level that produced a clean, steam‑filled environment without any signs of scorching.
Cooling and handling after sterilization
After the microwave cycle ends, allow the sponge to cool inside the appliance for at least one minute before removing it; this prevents sudden steam burns and lets residual heat finish the disinfection.
Using oven mitts or a thick kitchen towel, carefully lift the plate and place the hot sponge on a clean, dry surface. Let the sponge sit uncovered for 2‑3 minutes so excess moisture evaporates, which reduces the chance of bacterial regrowth.
Once it feels comfortably warm, gently squeeze out any remaining water and store the sponge in a dry, ventilated container or hang it from a hook to air‑dry completely. If you plan to reuse the sponge immediately, test its texture; it should be pliable, not brittle or charred.
For optimal hygiene, repeat this microwave sterilization once a week or whenever the sponge develops an unpleasant odor, and replace it entirely after several cycles if it shows signs of wear or persistent smell.
Frequency and Maintenance Tips
How often to sterilize
To keep kitchen sponges safe, sterilize them in the microwave at least once a week. If you use a sponge for heavy‑duty dishes or raw meat, aim for every three to four days.
Place the damp sponge on a microwave‑safe plate, then heat on high for 1‑2 minutes; the steam and heat will kill most bacteria. Always check that the sponge is thoroughly wet before microwaving to avoid fire hazards. After the cycle, let it cool for a minute before handling.
For households with children or immunocompromised members, increase the frequency to every two days. Pair this routine with regular rinsing and squeezing out excess water after each use to reduce moisture buildup, which speeds bacterial growth.
By sticking to a consistent schedule, you dramatically lower the risk of cross‑contamination while extending the useful life of your sponge.
Signs a sponge needs replacement
Watch for visual and tactile clues that indicate a sponge has outlived its sanitizing power. Foul odors that persist after microwaving are a red flag; they signal deep‑seated bacterial colonies.
If the sponge feels gritty, hard, or begins to crumble when you squeeze it, the fibers have broken down and can no longer trap moisture effectively. Discoloration, especially dark spots or yellowing, often means mold is growing inside.
A sponge that retains water for longer than a few seconds after a rinse is holding onto microbes. Finally, if you notice a sudden increase in dish residue or a lingering smell on cleaned dishes, replace the sponge immediately. In these cases, even regular microwave cycles won’t restore safety.
Keep a small stash of spare sponges on hand so you can swap them out promptly, ensuring your cleaning routine stays hygienic and efficient.
Combining microwave with other cleaning methods
Maximize sponge hygiene by pairing microwave sterilization with complementary cleaning steps. Start with a thorough rinse under hot water to remove food particles before heating; this prevents debris from shielding bacteria.
Follow the microwave cycle with a quick soak in a solution of one part white vinegar to four parts water for five minutes; the acidity breaks down bio‑film that heat alone may miss.
For extra disinfection, dip the sponge in diluted bleach (one tablespoon per quart of water) for one minute after microwaving, then rinse well. If you prefer chemical‑free options, a brief scrub with a dishwasher‑safe scrub brush and liquid soap adds mechanical action that loosens trapped grime.
Rotate these methods weekly: microwave on Monday, vinegar soak on Wednesday, bleach dip on Friday. Consistently alternating techniques ensures that stubborn microbes are eliminated, prolongs sponge performance, and reduces the likelihood of unpleasant odors developing over time.
Safety Precautions and Common Mistakes
Preventing fires and overheating
Before you place a sponge in the microwave, wet it thoroughly; a dry sponge can ignite from the intense heat. Squeeze the sponge until it’s dripping but not pooling, then fold it loosely to allow steam to circulate.
Set the microwave to medium power (50‑70%) and start with a short 30‑second interval. After the timer ends, carefully check the sponge—if it’s still damp, add another 15‑second burst, but never exceed 2 minutes total.
Keep a clear line of sight through the microwave window and stay nearby; if you notice any smoke or unusual smells, stop the cycle immediately. Using a microwave‑safe plate or a small bowl underneath the sponge helps catch any moisture and prevents the interior from getting too hot.
By controlling moisture, power level, and timing, you dramatically lower the risk of fire or overheating while still achieving effective sterilization.
Avoiding metal or non‑microwave‑safe sponges
Never use a sponge that contains metal fibers, scrubbers with embedded steel wool, or a plastic coating that isn’t labeled microwave‑safe; these materials can spark, melt, or release toxic chemicals. Inspect the packaging or the sponge’s surface for a small metallic shimmer or a rubbery feel—both are warning signs.
If you’re unsure, test a tiny corner in a low‑power setting for 10 seconds; any crackling or arcing means the sponge must be discarded. Choose sponges made from 100 % cellulose or natural sea‑sponge material, as they absorb water well and tolerate the steam generated during sterilization.
When you purchase a new sponge, look for the microwave‑compatible icon or a clear statement from the manufacturer. Avoid using kitchen sponges that have been treated with antibacterial chemicals unless the label explicitly confirms they can endure microwave heat, because some additives degrade and produce unpleasant odors or hazardous fumes.
What to do if the sponge smells burnt
If you notice a burnt odor after microwaving a sponge, stop using it immediately and discard it in a sealed bag to prevent the smell from spreading. The smell indicates that the sponge was overheated, which can break down its fibers and create harmful compounds.
First, ventilate the kitchen by opening windows and turning on an exhaust fan for several minutes. Then, wipe down the interior of the microwave with a solution of equal parts water and white vinegar, wiping with a soft cloth to remove any residue.
For lingering odors, place a bowl of fresh coffee grounds or a slice of lemon inside the microwave and run it on low power for one minute; the fresh scent will absorb remaining burnt notes.
Finally, review your sterilization routine: ensure the sponge is fully saturated, use shorter time intervals, and always monitor the process. Adjusting these steps will keep future cycles safe and odor‑free.
Frequently Asked Questions (FAQ)
Can I use the microwave for cloth towels?
Yes, you can safely disinfect cloth towels in the microwave, but you must follow a few precautions. First, ensure the towel is 100 % cotton and free of metal threads or decorations, as metal can spark. Wet the towel thoroughly; a damp towel heats evenly and prevents scorching.
Place it in a microwave‑safe dish and microwave on high for 1‑2 minutes per square foot, checking after the first minute. Let the towel sit for about 30 seconds before removing it with oven mitts, as it will be extremely hot. Allow it to cool and dry completely before reuse.
This method kills most bacteria and viruses, extending the towel’s life and keeping it hygienic for kitchen or bathroom use. Remember to repeat the process weekly or after heavy use to maintain optimal cleanliness. Avoid using towels with synthetic fibers, as they may melt.
Does sterilizing remove odors?
Sterilizing a sponge in the microwave primarily targets bacteria, viruses, and mold, which are the main sources of unpleasant smells. By destroying these microorganisms, the major odor‑causing agents are eliminated, often resulting in a noticeably fresher sponge.
However, the microwave does not break down residual food particles or oils that can also contribute to lingering odors.
To achieve a truly odor‑free sponge, rinse it thoroughly under running water before microwaving, and consider a brief soak in a mixture of water and a few drops of dish‑soap or vinegar.
After the microwave cycle—typically 1‑2 minutes on high—let the sponge cool, then squeeze out excess moisture and air‑dry it completely. Repeating this routine weekly will keep both microbial growth and odor levels low.
If a persistent smell remains despite regular sterilization, it may be time to replace the sponge, as the material itself can become degraded and retain odors.
How long does the sterilization remain effective?
The antimicrobial effect of a microwave‑sterilized sponge lasts only as long as the sponge stays free from new contamination. Immediately after a 1‑2 minute high‑power cycle, most bacteria and viruses are killed, giving you a clean surface for several hours.
However, once the sponge is exposed to kitchen debris, moisture, or humid environments, microbes can quickly recolonize, often within 4‑6 hours. To extend the period of effectiveness, store the sponge in a dry, well‑ventilated area and avoid leaving it in standing water.
You can also alternate sterilization with a daily rinse and a quick squeeze to remove excess liquid. For high‑risk tasks such as cleaning raw meat or disinfecting cutting boards, consider re‑sterilizing the sponge before each use.
In typical household use, a weekly microwave sterilization combined with proper drying keeps the sponge hygienic for up to a week, after which it’s best to replace it.
Frequently Asked Questions
Can I sterilize any type of kitchen sponge in the microwave?
Most cellulose or synthetic sponges can be microwaved, but avoid sponges with metal scrubbers or decorative elements, as they can cause sparks.
What preparation is needed before microwaving a sponge?
Wet the sponge thoroughly, then squeeze out excess water so it’s damp but not dripping; this prevents the sponge from catching fire.
How long should I microwave a sponge to sterilize it?
Heat the damp sponge on high power for 1 to 2 minutes. After the time is up, let it sit for a minute before removing it.
How do I know if the sponge is properly sterilized?
The sponge should be hot to the touch and may emit steam. A temperature of at least 160 °F (71 °C) inside the sponge indicates effective bacterial reduction.
Is it safe to use the microwave method repeatedly?
Yes, you can repeat the process weekly, but over‑microwaving can degrade the sponge’s structure, so replace sponges regularly.
What safety precautions should I follow?
Never leave the microwave unattended, keep the sponge moist, and allow it to cool before handling to avoid burns. Also, ensure the microwave interior is clean to prevent odors.
Conclusion
Using a microwave is a quick, inexpensive way to keep kitchen sponges germ‑free—just soak the sponge, microwave it for one to two minutes, and let it cool before handling. Remember to avoid metal sponges, replace the sponge regularly, and never leave the microwave unattended.