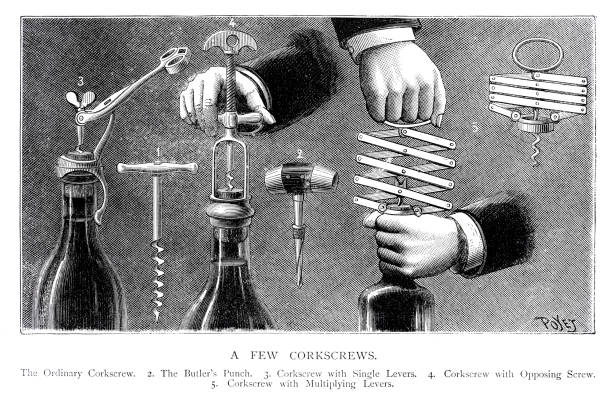
How To Open Wine Cork With Corkscrew
Struggling to open a wine bottle without making a mess? You’re not alone. No more broken corks or frustration. By the end of this guide, you’ll open any wine bottle like a pro—smoothly and confidently—every single time. Let’s get started.
How to Open a Wine Bottle with a Standard Corkscrew
Step-by-step guide using a waiter’s friend corkscrew
To open a wine bottle with a waiter’s friend corkscrew, start by removing the foil using the built-in knife—rotate the bottle, not the knife, for safety. Unfold the corkscrew spiral and position it centered on the cork.
Slowly twist the screw straight down into the cork, keeping it vertical to avoid splitting. Once the spiral is almost fully inserted—leave about one turn remaining—hook the lever over the lip of the bottle. Push the lever down to begin lifting, then pull upward steadily to remove the cork.
Use the second step of the lever if needed for extra leverage. This method ensures smooth, controlled extraction with minimal risk of breakage, making it ideal for both beginners and professionals.
How to position the corkscrew correctly
Correct positioning is crucial for a successful uncorking. Always center the corkscrew tip on the middle of the cork to ensure even pressure and prevent splitting. Insert the spiral at a perfectly vertical angle—tilting increases the risk of the cork breaking or leaking.
Begin twisting slowly with your wrist, applying gentle downward pressure. Only insert about 80–90% of the spiral; going too deep risks piercing through the cork’s bottom. If the spiral drifts off-center, stop and reposition. A well-aligned insertion allows the lever to work efficiently and reduces strain.
Practicing on older bottles with softer corks can help build confidence. Proper alignment ensures clean extraction and preserves wine quality.
Tips for pulling the cork smoothly
To pull the cork smoothly, maintain a steady, even pace—rushing can cause the cork to snap or wine to splash. After positioning the lever on the bottle’s lip, apply upward pressure gradually while supporting the bottle with your other hand.
Use the second notch of the lever if extra lift is needed, especially with longer corks. Keep the corkscrew perpendicular to the bottle throughout extraction. If resistance increases, pause and re-center before continuing. Holding a cloth over the cork as you pull helps catch any fragments and prevents mess.
Let the mechanical advantage of the lever do the work—avoid jerking or twisting. A smooth pull preserves the cork’s integrity and enhances the overall experience.
What to do if the cork breaks
If the cork breaks during extraction, stay calm—there are effective solutions. First, remove any remaining cork pieces from the bottle’s mouth using the corkscrew tip or clean tweezers. If part of the cork is still inside, reinsert the corkscrew slightly off-center into the remaining portion and pull gently.
Alternatively, use a second corkscrew or a cork extractor tool designed for broken corks. As a last resort, carefully push the cork into the bottle using a clean butter knife—though this may affect sediment in older wines.
Always strain the wine through a fine mesh or coffee filter when pouring to catch debris. With patience, most broken corks can be managed without spoiling the wine.
Types of Corkscrews and How to Use Each One
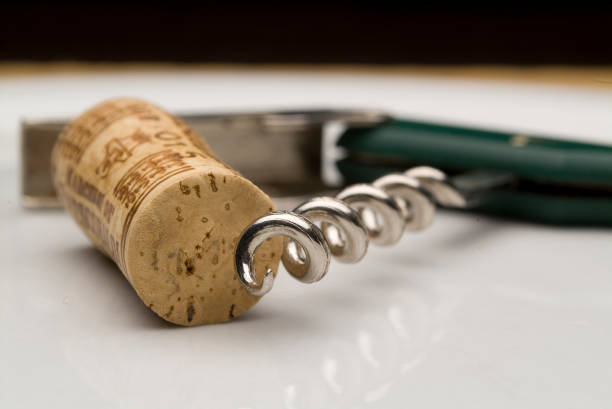
Using a winged corkscrew (butterfly opener)
To open a wine bottle with a winged corkscrew, start by removing the foil from the bottle’s neck. Place the corkscrew vertically in the center of the cork and turn the handle clockwise. As the screw goes in, the wings will rise automatically.
Once the screw is almost fully inserted, press down on both wings evenly to lift the cork smoothly out of the bottle. Apply steady pressure to avoid breaking the cork. This model is ideal for beginners due to its intuitive design and minimal effort required.
Always ensure the screw is centered to prevent cork damage. With practice, the butterfly opener offers quick, controlled extraction and is especially helpful for those with limited hand strength.
How to operate a lever pull corkscrew
A lever pull corkscrew, like the popular ‘Waiter’s Friend’, combines precision and portability. First, use the built-in foil cutter or knife to remove the seal. Fold out the long lever arm and position the tip of the screw just off-center on the cork.
Twist the screw in with the handle until the spiral is almost through the cork. Hook the lever over the bottle’s lip and pull upward steadily—the dual leverage system eases extraction. Controlled motion prevents slippage and cork breakage. This model is favored by professionals for its compact size and efficiency.
With practice, you can open a bottle in seconds. Always align the fulcrum properly for smooth, reliable performance across different bottle types.
Steps for using a T-handle corkscrew
To use a T-handle corkscrew, begin by peeling off the foil. Position the screw directly in the center of the cork and rotate the T-shaped handle clockwise to drive the worm deep into the cork. Maintain a straight angle to avoid piercing the side of the cork.
Once fully inserted, grip the T-handle and use the shaft as a lever to gently pull the cork upward. Some models include a collar that rests on the bottle’s lip for added stability. This traditional design offers excellent control and torque, ideal for older, fragile corks.
Avoid jerky movements to prevent breakage. With its ergonomic grip and mechanical advantage, the T-handle is a reliable choice for frequent wine users who value precision.
Comparing ease of use across models
When comparing corkscrew types, ease of use depends on experience, strength, and context. Winged corkscrews are beginner-friendly with automatic lift, but require two hands and can struggle with long corks. Lever pull models are compact, fast, and efficient, making them ideal for servers and travelers, though they demand some practice.
T-handle corkscrews offer maximum control and power, perfect for aged wines, but take more time and space. Electric corkscrews provide one-touch operation but rely on batteries. For most home users, the lever pull strikes the best balance of speed, portability, and reliability.
Choose based on your needs—frequent use favors durability and ease, while occasional use may favor simplicity and storage convenience.
Common Mistakes When Opening Wine with a Corkscrew
Inserting the corkscrew at the wrong angle
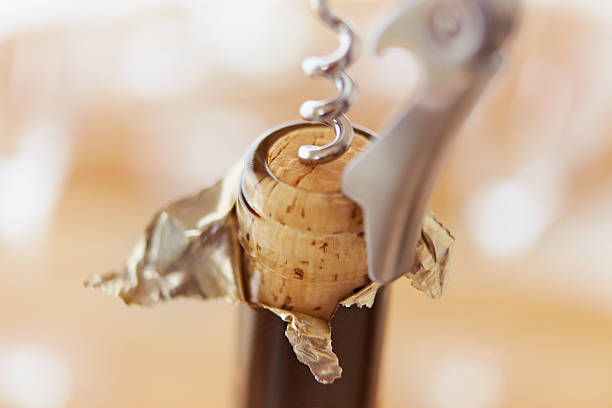
One of the most common mistakes when opening wine is inserting the corkscrew at an incorrect angle. Tilting the screw too much can cause it to pierce the side of the cork, leading to crumbling or leakage.
To avoid this, center the corkscrew vertically on the cork and apply gentle, even pressure as you begin twisting. Keep the screw straight throughout insertion to ensure it travels down the middle of the cork. A misaligned insertion not only risks damaging the cork but can also make extraction difficult.
Use a steady hand and align your tool with the bottle’s center axis for best results. Practicing proper alignment improves success and preserves the cork’s integrity for smooth pouring.
Twisting the bottle instead of the screw
A frequent error is rotating the wine bottle rather than the corkscrew during insertion and extraction. This puts unnecessary stress on the cork and increases the chance of breakage. Always hold the bottle securely with one hand and twist the corkscrew’s handle with the other.
This controlled motion ensures the screw moves smoothly through the cork without wobbling. Rotating the bottle can also lead to slipping, which may result in injury or spills. Keep your grip firm on the bottle’s base or body while turning the tool.
This technique provides better control and precision, making the opening process safer and more effective, especially with older or delicate corks.
Pulling too hard and breaking the cork
Applying excessive force when pulling the cork can cause it to snap, especially in older wines with fragile corks. Instead of yanking, use slow, steady pressure while leveraging the corkscrew’s mechanism.
If using a winged corkscrew or waiter’s friend, let the tool do the work—gradually lift the lever while maintaining control. Stop and reposition if you feel resistance rather than forcing it. For stubborn corks, twist slightly while pulling to ease it out.
Breaking the cork can push debris into the wine, affecting taste and clarity. By prioritizing patience and control, you minimize the risk of breakage and ensure a clean, elegant opening every time.
Not cleaning the bottle neck before opening
Skipping cleaning the bottle neck and cork surface before insertion can introduce dust, mold, or debris into your wine. Always wipe the top of the bottle with a clean, damp cloth to remove any residue, especially from aged bottles stored in cellars.
This simple step prevents contaminants from falling into the wine during opening. It also improves your grip on the bottle and enhances hygiene. Pay special attention to the underside of the capsule, where mold can accumulate. Cleaning not only ensures a safer pour but also elevates the overall wine experience.
Making this a standard practice reflects attention to detail and care in wine service.
How to Remove a Broken or Crumbled Cork
Using a cork extractor tool
A cork extractor tool is specifically designed to remove broken or crumbled corks without pushing them further into the bottle. These tools typically feature twin metal prongs that gently expand inside the remaining cork fragment.
To use, insert the prongs alongside the broken cork, twist gently, and pull upward to extract it intact. This method works best when at least an inch of cork remains above the bottle neck. Ensure a steady hand to avoid breaking the cork further.
Cork extractors are affordable, reusable, and highly effective, making them a must-have for wine enthusiasts. Always store the tool in your wine kit so it’s ready when needed. With practice, this technique preserves the wine’s quality and avoids contamination from cork debris.
Pushing the cork into the bottle safely
If the cork is already crumbling, pushing it gently into the bottle may be the safest option. Use the blunt end of a knife or a clean butter knife to carefully guide the cork downward without splintering it further.
Tilt the bottle slightly to allow the cork to fall cleanly into the wine. This method prevents cork fragments from blocking the pour. While it may seem counterintuitive, a submerged cork doesn’t spoil the wine. However, avoid using sharp objects that could damage the glass or introduce metal particles.
Once the cork is inside, proceed to pour the wine through a filter. This technique is ideal when traditional corkscrews fail and no extractor is available, ensuring you still enjoy the wine with minimal fuss.
Filtering wine to remove cork particles
After removing or displacing a broken cork, filtering the wine ensures a smooth, debris-free pour. Use a fine-mesh strainer, coffee filter, or cheesecloth placed over a decanter or glass. Slowly pour the wine through the filter to catch any cork fragments.
A coffee filter offers the finest filtration, removing even tiny particles. For faster results, a mesh strainer lined with cloth works well. Chill the wine slightly before filtering to reduce foaming. This step is crucial for both safety and enjoyment, as loose cork can affect texture and taste.
Filtering preserves the wine’s integrity and allows you to serve it confidently, especially during gatherings where presentation matters.
When to save the wine vs. when to discard it
Deciding whether to save or discard wine after a cork break depends on contamination and smell. If the cork crumbled but the wine smells fresh, fruity, and free of mustiness, it’s likely safe to filter and drink.
However, if the wine has a damp cardboard odor (signaling cork taint), discard it, as this flaw cannot be filtered out. Also, discard wine if the cork was moldy or the seal was compromised long-term. Visible debris alone isn’t a reason to throw it away—filtering resolves that.
When in doubt, taste a small amount after filtering. If the flavor is clean, enjoy it promptly. If off, it’s best not to risk it. Trust your senses—they’re your best guide.
Tips for Opening Old or Delicate Wine Bottles
Why older corks are more fragile
As wine ages, the cork naturally degrades due to prolonged exposure to moisture, temperature fluctuations, and the chemical environment inside the bottle. Older corks become drier, brittle, and less elastic, making them prone to crumbling when pressure is applied.
This is especially true for bottles stored upright for long periods, which can cause the cork to dry out unevenly. Avoid sudden twisting or excessive force when using a corkscrew, as this increases the risk of breakage.
Understanding the delicate nature of aged corks helps you choose the right tools and techniques. Inspect the cork before opening—any signs of damage or dryness mean extra caution is needed. Preserving the integrity of the cork ensures the wine remains uncontaminated and enjoyable upon opening.
How to gently extract a vintage wine cork
Opening a vintage wine requires patience and precision. Begin by cleaning the bottle neck to remove dust and mold. Use a screwpull corkscrew with a thin, sharp worm—preferably one designed for older bottles. Insert the screw slowly and center it perfectly to avoid splitting the cork.
Twist in just enough to grip the cork without going all the way through. Apply gentle, steady upward pressure using leverage, such as a double-hinged lever corkscrew. If resistance increases, pause and adjust. Never rush the process—if the cork starts to slip or crack, stop immediately.
Having a backup plan, like an Ah-So, on hand ensures you can adapt. The goal is a clean, intact extraction to preserve the wine’s quality and presentation.
Using a two-pronged cork puller (Ah-So)
The Ah-So is an excellent tool for removing fragile, aged corks without piercing them. It consists of two thin, flat prongs that slide between the cork and the glass.
To use it, gently twist the Ah-So as you insert it along the side of the cork, keeping it aligned with the neck. Once fully inserted, grasp the cork firmly with the prongs and slowly pull upward while rotating slightly to ease it out.
This method minimizes the risk of cork breakage and eliminates the need for a screw. Practice on younger bottles first to build confidence. With patience, the Ah-So allows for a clean, controlled extraction—ideal for valuable or sentimental vintages where preserving the cork is essential.
Storing wine bottles properly to preserve corks
Proper storage is critical to maintaining cork integrity over time. Store wine bottles horizontally to keep the cork in constant contact with the wine, preventing it from drying out and shrinking. Maintain a consistent temperature between 50–59°F (10–15°C) and humidity levels around 70% to prevent mold or excessive drying.
Avoid direct sunlight and vibrations, which can degrade both the wine and the cork. Never store bottles upright long-term, as this exposes the cork to air and accelerates deterioration. Using a dedicated wine cellar or cabinet helps create optimal conditions.
Well-preserved corks are easier to remove and better protect the wine’s flavor, ensuring a smoother opening experience years later.
Best Practices for Serving Wine After Opening
Wiping the bottle rim before pouring
Always wipe the bottle rim with a clean, dry cloth after removing the cork to ensure a clean pour and prevent any residue from entering the glass. Dust, cork fragments, or mold from the seal can affect the wine’s taste and presentation.
This step is especially important with older wines, where corks may crumble or the bottle neck can accumulate sediment over time. Holding the bottle at an angle while wiping helps access the inner rim easily.
A quick wipe also removes any moisture or wine drips that could drip down the side during serving. Maintaining hygiene at the rim enhances the overall tasting experience and shows attention to detail, whether you’re serving at home or in a professional setting.
Make this a standard step in your wine service routine.
Decanting wine to remove sediment
Decanting is essential for older red wines that may have developed sediment over time. To do it properly, stand the bottle upright for several hours before opening to let the sediment settle at the bottom.
Then, pour the wine slowly and steadily into a decanter, using a light source beneath the neck to spot when sediment reaches the shoulder of the bottle. Stop pouring once you see particles.
This process not only removes unwanted grit but also allows the wine to breathe, enhancing its aroma and flavor. Younger wines benefit from decanting too, as it accelerates aeration. Always use a clear glass decanter to monitor clarity and maximize presentation.
Serving temperature by wine type
Serving wine at the correct temperature enhances its flavor and aroma profile. Light white wines like Sauvignon Blanc or Pinot Grigio should be served chilled, around 45–50°F (7–10°C), to preserve their crisp acidity. Full-bodied whites such as Chardonnay taste best slightly warmer, around 50–55°F (10–13°C), to express their richness.
Light reds like Pinot Noir shine at 55–60°F (13–15°C), while fuller reds like Cabernet Sauvignon or Syrah are ideal at 60–65°F (15–18°C). Serving reds too warm dulls their structure, while whites served too cold mask their nuances.
Use a wine thermometer or timed fridge chilling for precision, and let bottles adjust slightly at room temperature if needed.
How to reseal and store an open bottle
To preserve an open bottle of wine, reseal it tightly with a cork or a wine stopper immediately after pouring. For best results, store the bottle upright in the refrigerator to minimize oxidation and slow spoilage.
White, rosé, and sparkling wines benefit most from cold storage, while reds can be kept refrigerated and briefly returned to room temperature before serving. Using inert gas sprays or vacuum pumps can further extend freshness by reducing air exposure.
Most wines stay drinkable for 3–5 days after opening when stored properly. Avoid leaving wine at room temperature for extended periods. Labeling the bottle with the opening date helps track freshness and avoid waste.
Alternative Ways to Open Wine Without a Traditional Corkscrew
Using a screwdriver and hammer safely
If you don’t have a corkscrew, a screwdriver and hammer can safely remove a wine cork with careful technique. Start by heating the screwdriver tip slightly (optional) to help it penetrate the cork smoothly.
Insert the screwdriver at a slight angle into the center of the cork, twisting gently until about two-thirds of the screw is embedded. Then, place the hammer’s claw under the lip of the bottle and use it as a lever to slowly pull the screw—and cork—upward.
Maintain control and apply steady pressure to avoid breaking the cork or damaging the bottle. This method works best with longer corks and sturdy screwdrivers. Always point the bottle away from yourself and others for safety.
While effective, it’s best used as a last resort when no proper tools are available.
The shoe method for emergency opening
The shoe method is a clever, no-tool technique that uses friction and impact to push the cork out gradually. Place the bottle inside a cloth or sock, then tuck it into the heel of a sturdy shoe.
Hold the bottle at a slight upward angle and repeatedly strike the shoe heel against a solid wall or floor—the impact forces the cork upward. After 10–20 hits, the cork should begin to emerge enough to pull out by hand.
Use a cloth to protect the glass and maintain a firm grip. This method works best with natural corks and still wines. Avoid using it on sparkling wine, as pressure buildup could cause the bottle to break.
It’s ideal for emergencies when no tools are available and preserves the wine’s integrity when done carefully.
Pushing the cork in with a wooden spoon
When a cork is crumbling or stuck, pushing it into the bottle with a wooden spoon can be a practical solution. Use the handle of a clean wooden spoon and gently insert it into the neck of the bottle.
Apply steady downward pressure to guide the cork into the wine, ensuring it doesn’t break apart excessively. Avoid metal objects that could react with the wine or scratch the glass.
Once the cork is submerged, the wine can still be safely consumed—simply pour through a fine mesh strainer or coffee filter to remove any small fragments. This method is best for natural corks that are too fragile to pull.
While not ideal, it’s a safe, low-risk workaround when traditional tools fail and prevents waste.
When to use improvised tools vs. buying a proper opener
Improvised tools should only be used in emergencies when a proper corkscrew isn’t available. Methods like the screwdriver, shoe, or spoon technique can work in a pinch but carry risks like broken glass, cork debris, or spilled wine. They also require more time and caution.
In contrast, a reliable corkscrew—such as a waiter’s friend or winged opener—ensures clean, consistent results and is inexpensive and portable. If you regularly enjoy bottled wine, investing in a proper opener is safer, faster, and more elegant. Reserve improvised methods for camping trips, power outages, or forgotten tools.
For daily use, a $10 corkscrew is a smarter, more dependable choice that preserves both the wine and your peace of mind.
Frequently Asked Questions
What is the correct way to insert a corkscrew into a wine cork?
Center the corkscrew over the middle of the cork and twist it straight down into the cork using steady pressure. Make sure to stop twisting when one or two spiral turns remain above the cork to avoid pushing it through.
How do I use a waiter’s friend corkscrew to open a wine bottle?
First, insert the corkscrew into the center of the cork by twisting it clockwise. Then, place the first lever on the lip of the bottle and pull up gently to remove the cork halfway. Finally, reposition the lever and pull the cork completely out.
What should I do if the cork breaks while opening?
If the cork breaks, push the remaining piece into the bottle gently and strain the wine through a coffee filter or cloth. Alternatively, use a cork puller or double-hinged corkscrew designed for broken corks.
Can I open a wine bottle with a screw and pliers instead of a corkscrew?
Yes, in an emergency, you can screw a long screw into the cork and pull it out with pliers. Be careful to twist slowly and pull straight up to avoid breaking the cork or spilling wine.
How do I prevent the cork from crumbling when opening?
Ensure the corkscrew is sharp and centered, and twist slowly and steadily. Older wines are more prone to crumbling, so use a two-stage corkscrew and apply gentle, even pressure.
Conclusion
Opening a wine cork with a corkscrew is simple once you know the right technique. Always position the corkscrew centered, twist smoothly, and pull steadily using leverage. Keep the bottle steady and avoid rushing to prevent spills or breakage. With practice, you’ll open wine confidently and elegantly. Don’t be discouraged by early mishaps—every sommelier started somewhere. Grab a bottle, use these tips, and enjoy the satisfying pop of success. Cheers to your next perfect pour!