How To Open A Bottle With A Corkscrew
Struggling to open a wine bottle with a corkscrew? You’re not alone—many people fumble with corks at first. The good news is, it’s easier than it looks! Whether you’re using a waiter’s corkscrew or a winged opener, we’ll walk you through the exact process to avoid broken corks and frustration. Get ready to pop that bottle open like a pro—your perfect pour starts right here.
What Is a Corkscrew and How Does It Work?
Types of Corkscrews Commonly Used
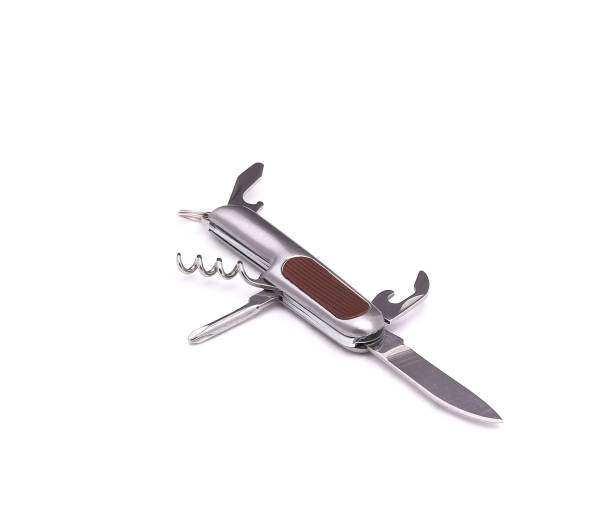
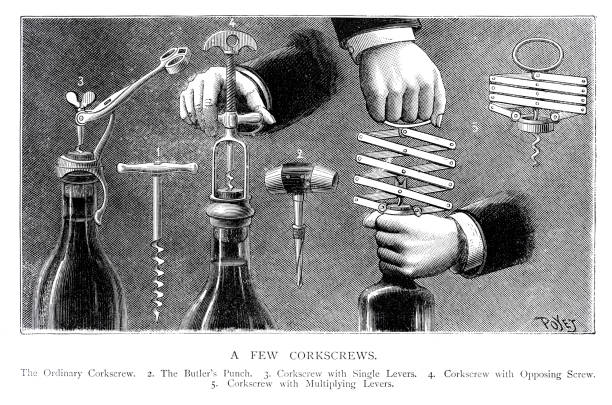
There are several types of corkscrews designed for different user preferences and bottle-opening scenarios. The most common is the double-hinged waiter’s friend, favored by professionals for its compact design and built-in bottle opener.
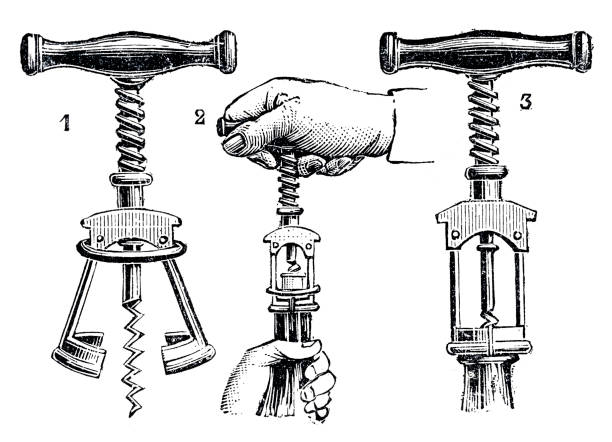
Another popular option is the screw-and-lever corkscrew, which uses a lever system to reduce the force needed, making it ideal for those with limited hand strength. Butterfly corkscrews feature two levers that rise as the screw enters the cork, offering a smooth, controlled extraction.
For speed and ease, electric corkscrews automatically remove the cork with the press of a button—perfect for opening multiple bottles. Twin-prong cork pullers, also called Ah-So openers, don’t pierce the cork but instead slide between the cork and bottle, preserving old or fragile corks.
Choosing the right type depends on frequency of use, bottle type, and user comfort. Each style ensures effective cork removal when used correctly.
Parts of a Standard Corkscrew
Understanding the key parts of a standard corkscrew helps ensure proper and safe bottle opening. The most critical component is the spiral worm, the helical metal screw that penetrates the cork. It should be centered and inserted slowly to avoid breaking the cork.
Attached to the worm is the handle, which provides grip and leverage during insertion and extraction. Many corkscrews, like the waiter’s friend, include a hinged lever or fulcrum that rests on the bottle’s lip to assist in pulling the cork out smoothly.
Another essential feature is the foil cutter, a small blade or notch used to slice off the foil or plastic seal covering the bottle’s top. Some models also have a bottle opener for crown caps. Proper alignment of these parts allows for controlled, efficient cork removal.
Familiarity with each component ensures confidence and prevents spills or cork damage during use.
How a Corkscrew Removes Corks Safely
Using a corkscrew to remove a cork safely involves a few precise steps to preserve both the cork and the wine. First, remove the foil seal using the foil cutter or a knife to expose the cork’s top.
Next, position the spiral worm at the center of the cork and twist it down steadily, ensuring it doesn’t go too deep—about five turns is usually sufficient. Once fully embedded, use the hinged lever or handle to slowly lift the cork upward.
For waiter’s friend corkscrews, engage the lever against the bottle lip and pull up in stages for even pressure. The goal is smooth, controlled extraction to avoid breaking the cork or pushing it into the bottle. If resistance is felt, pause and reposition.
Once removed, inspect the cork to ensure no fragments fell into the wine. This method preserves wine quality and enhances the opening experience.
How to Open a Bottle with a Waiter’s Friend
Step-by-Step Guide to Using a Waiter’s Corkscrew
Opening a wine bottle with a waiter’s friend corkscrew is simple when you follow the correct steps. Begin by folding out the lever arm and placing the sharp metal foil cutter (if present) around the bottle neck to slice off the foil.
Next, position the screw tip at the center of the cork and twist it in using steady, even pressure. Rotate clockwise until only one or two spirals remain exposed—this ensures full grip without pushing the cork into the bottle.
Then, place the lever arm’s first notch onto the lip of the bottle and use it as a fulcrum to pull the cork upward gradually. After lifting partway, reposition the lever to the second notch and continue pulling. This two-stage leverage makes extraction smooth and controlled.
With practice, this method becomes quick and reliable, ideal for both beginners and professionals in restaurants or at home.
Positioning the Corkscrew Correctly
Proper alignment of the corkscrew is crucial to avoid damaging the cork or bottle. Always center the screw tip precisely in the middle of the cork before twisting. An off-center insertion can cause the cork to split or jam.
Use a slow, steady motion to screw straight down without wobbling, ensuring the spiral follows a perpendicular path into the cork. Keep the bottle stable on a flat surface or between your knees for better control. Apply firm but gentle pressure—rushing can lead to misalignment.
The ideal depth is when one or two coils of the worm remain visible, providing enough grip to extract without over-penetrating. If the screw goes too deep, it may push the cork into the wine.
Correct positioning not only prevents spills but also preserves the integrity of the seal, ensuring a clean pour. This precision reflects the professional technique expected in fine dining settings.
Removing the Cork Without Breaking It
To safely extract the cork, use the two-step lever system of the waiter’s friend. After screwing in the worm, hook the first notch of the lever over the bottle’s lip and pull upward with controlled force. This initial lift brings the cork partway out.
Then, slide the lever down and engage the second notch for added leverage to complete the removal smoothly. Avoid jerky or sideways motions, as these increase the risk of breakage. If the cork resists, gently wiggle the corkscrew while maintaining upward pressure.
For older wines with fragile corks, extra caution is essential—consider using a longer spiral or alternative opener like a Durand. Once removed, inspect the cork; a clean extraction indicates proper technique. Preserving the cork intact not only prevents sediment from entering the wine but also reflects skill and care.
This method ensures a seamless, elegant opening every time.
How to Use a Twin Prong Corkscrew
Inserting the Prongs on Either Side of the Cork
Begin by positioning the twin prongs of the corkscrew on either side of the cork, ensuring they are aligned with the edge of the bottle neck. Hold the bottle firmly with one hand to maintain stability, while using the other to guide the prongs.
Gently press the prongs downward, allowing them to slide between the cork and the bottle neck. It’s important to apply even pressure to avoid breaking the cork or damaging the bottle.
The twin prongs are designed to grip the cork from both sides, so make sure they are fully seated on the outer edges. Keep the corkscrew perpendicular to the bottle to ensure a balanced insertion. Avoid forcing the prongs if resistance is felt—reposition and try again.
Proper alignment ensures a clean extraction. This method works especially well with older corks that may be fragile, as it minimizes direct penetration and reduces the risk of crumbling.
Twisting the Prongs for a Secure Grip
Once the prongs are positioned alongside the cork, gently twist the corkscrew handle to tighten the grip. Rotate slowly and steadily to allow the prongs to conform to the cork’s shape without applying excessive force.
This twisting motion helps the prongs dig slightly into the sides of the cork, creating a secure hold. Maintain control and balance throughout the twist to prevent slippage or cork breakage. If the cork is particularly dry or brittle, pause and adjust the angle slightly to ensure even pressure.
The goal is to achieve a firm, stable grip before attempting removal. Unlike spiral corkscrews, the twin prong relies on lateral pressure rather than penetration, making this step crucial for success. Take your time—rushing can lead to misalignment or cork damage.
A well-twisted grip ensures a smoother pull and preserves the integrity of both the cork and the wine.
Pulling the Cork Out Smoothly
With the prongs securely gripping the cork, begin pulling upward with a steady, even motion. Use your wrist and forearm to apply consistent force, keeping the corkscrew aligned with the bottle’s neck.
Avoid jerky movements or sudden tugs, as these can cause the cork to snap or the bottle to slip. Leverage your body posture—brace the bottle against a stable surface or hold it firmly on the table to gain better control.
As the cork starts to emerge, maintain the same pace until it clears the bottle entirely. Once free, carefully remove the cork from the prongs and inspect it for any fragments that may have broken off. Discard the cork properly and check the wine for sediment if necessary.
This smooth extraction preserves the wine’s quality and enhances the serving experience, especially with aged vintages.
How to Open a Bottle with a Lever-Style Corkscrew
Setting the Bottle in the Corkscrew Base
Begin by removing the foil from the top of the wine bottle using the built-in foil cutter on the corkscrew or a separate foil knife. This exposes the cork and ensures a clean insertion. Next, place the bottle upright on a stable, flat surface to prevent slipping during the process.
Open the lever-style corkscrew and position the metal base around the neck of the bottle, making sure it sits securely just below the lip. Align the spiral worm (or screw) directly over the center of the cork. Proper alignment is crucial to avoid splitting the cork or damaging the bottle.
Hold the corkscrew firmly with one hand while stabilizing the bottle with the other. Ensure the base is snug against the bottle neck so that when you begin turning, the mechanism operates smoothly. This stable setup allows for consistent pressure and control as you move to the next step.
Pushing the Lever Down to Insert the Worm
With the corkscrew base secured around the bottle neck, begin turning the handle clockwise while gently pressing down on the lever. This action drives the spiral worm into the center of the cork. Continue rotating steadily and evenly—avoid rushing to maintain control and prevent the worm from veering off-center.
The lever-style corkscrew is designed so that as you turn the handle, the worm automatically descends into the cork with minimal effort. Ensure the worm is fully embedded, ideally about ¾ of the way through the cork, to achieve a secure grip without piercing all the way through.
If the worm goes too deep, it may push fragments into the wine. Throughout this step, keep the corkscrew perpendicular to the bottle to maintain alignment. Once the worm is properly seated, you’re ready to extract the cork with the lever mechanism.
Lifting the Lever to Extract the Cork
After the worm is fully inserted, lift the lever upward slowly and steadily. The mechanical advantage of the lever-style corkscrew will begin to pull the cork from the bottle with minimal effort. Maintain a firm grip on both the corkscrew and the bottle to prevent slipping or wobbling.
As the lever rises, the cork should follow smoothly—do not jerk or rush the motion, as this could cause the cork to break. Once the lever reaches its full height, the cork should be almost completely removed.
At this point, use your fingers to gently pull the cork the rest of the way out. Inspect the cork to ensure no pieces have broken off and fallen into the wine. If necessary, use a wine filter when pouring. Finally, wipe the bottle’s rim before serving.
This method ensures a clean, efficient, and elegant opening every time.
Tips for Opening Old or Fragile Corks
How to Tell If a Cork Is Too Old to Pull Normally
Before attempting to open an older wine bottle, assess the cork’s condition to prevent breakage. Gently wiggle the neck of the bottle; if the cork moves or feels spongy, it may be too dry or degraded.
Look for signs of seepage or discoloration around the capsule—this can indicate a compromised seal. If the cork is visible above the bottle lip, press lightly with your fingertip; a firm cork usually pulls cleanly, but one that crumbles or sinks is too fragile.
Avoid standard corkscrews in these cases, as they can split the cork and push fragments into the wine. Instead, prepare alternative tools like a Butler’s Thief or Ah-So. Store bottles on their side to keep corks moist, minimizing this issue.
Recognizing early signs of cork deterioration helps you choose a gentler extraction method, preserving both the wine’s quality and your patience. When in doubt, proceed slowly and use tools designed for delicate corks.
Using a Butler’s Thief for Crumbly Corks
When dealing with fragile or aged corks, a Butler’s Thief (or cork puller) is one of the most effective tools. This two-pronged device slips between the cork and bottle neck, allowing you to gently lift the cork without twisting.
First, remove the capsule and align the prongs evenly on either side of the cork. Slowly insert them down the sides, keeping pressure outward to avoid puncturing the cork. Once the prongs are fully seated, use steady, even pressure to lever the cork upward.
If resistance occurs, pause and adjust the angle slightly. Patience is essential—rushing can cause the cork to snap. Unlike traditional corkscrews, the Butler’s Thief minimizes contact with the cork’s core, reducing the risk of breakage. With practice, this method becomes reliable for vintage bottles.
Always keep the tool clean and dry to prevent contamination. It’s a must-have for collectors handling older vintages.
Cleaning Residue After Extraction
After removing an old or crumbling cork, small fragments may fall into the wine, affecting taste and texture. To address this, avoid pouring immediately. Instead, let the bottle sit upright for a few minutes so debris settles at the bottom.
When ready, use a fine-mesh filter, cheesecloth, or coffee filter placed over a clean decanter or glass. Pour the wine slowly and steadily, stopping before the last ounce to leave sediment behind. Double filtering may be necessary for heavily fragmented corks.
Rinse the bottle neck with water if cork dust clings to the rim. Inspect the wine visually—cloudiness or particles indicate further filtering is needed. This step preserves the wine’s integrity and enhances enjoyment. Proper filtration ensures a smooth, sediment-free pour, especially crucial with aged wines.
Always handle gently to avoid disturbing settled particles. Clean tools immediately to prevent mold or residue buildup.
Common Mistakes When Using a Corkscrew
Inserting the Screw Off-Center
One of the most common mistakes when using a corkscrew is inserting the screw off-center, which can cause the cork to split or get pushed into the bottle. To avoid this, place the tip of the corkscrew’s worm (the spiral) directly in the middle of the cork before twisting.
Stabilize the bottle with one hand while using the other to begin turning the screw slowly and evenly. Keep your movements controlled and ensure the worm goes in straight—tilting can damage the cork or the bottle’s neck. If the screw starts to drift, stop and reposition.
A centered insertion ensures even pressure distribution during extraction, reducing the risk of breakage. This is especially important with older corks, which are more brittle. Taking a few extra seconds to align the corkscrew properly can save you from a ruined cork and potential wine loss.
Practice on a spare bottle if needed to build confidence and precision.
Pulling Too Hard or Too Fast
Many people assume that force equals success when opening a wine bottle, but pulling too hard or too fast can lead to broken corks or spills. Instead, use a steady, controlled motion to extract the cork.
After the screw is fully inserted, engage the lever or fulcrum of your corkscrew (if applicable) and apply gradual upward pressure. If using a winged corkscrew or waiter’s friend, let the tool do the work—rushing disrupts the mechanics and increases friction.
For winged models, allow the arms to rise slowly as the screw lifts the cork. With a waiter’s friend, use the hinge to rock the cork gently upward in stages. Patience prevents splinters and spills. If you feel resistance, pause and adjust your angle slightly.
A smooth, deliberate pull preserves the cork’s integrity and keeps your wine clean and ready to enjoy. Rushing this step undermines all prior care.
Not Securing the Bottle During Extraction
Failing to secure the bottle firmly during cork extraction is a frequent error that can result in slips, spills, or even injury. Always place the bottle on a stable, flat surface and grip it near the base with your non-dominant hand to prevent wobbling.
This is especially crucial when using leverage-based corkscrews like the waiter’s friend or twin-prong pullers. Without a stable base, the bottle may tip or twist, causing uneven pressure on the cork. Keep your wrist locked and your grip firm throughout the process. If the bottle moves, stop and reposition.
For added stability on slippery surfaces, use a non-slip mat or towel underneath. Securing the bottle ensures that force is applied directly upward, minimizing cork breakage and maximizing control. This simple step enhances safety and effectiveness, making the entire opening process smoother and more reliable.
Best Practices for Storing and Maintaining Corkscrews
Cleaning Your Corkscrew After Use
After each use, clean your corkscrew thoroughly to prevent residue buildup and maintain hygiene. Start by wiping the worm (the spiral part) with a damp cloth to remove wine or cork particles. For models with crevices or hinges, use a soft brush—like an old toothbrush—to dislodge trapped debris.
If your corkscrew is dishwasher-safe, place it on the top rack; otherwise, hand wash with mild soap and warm water. Avoid soaking wooden-handled models, as prolonged moisture exposure can cause warping or cracking. Dry all parts completely with a clean towel before storage.
Regular cleaning not only extends the tool’s lifespan but also ensures smooth operation during future use. A well-maintained corkscrew performs more reliably and reduces the risk of cork breakage. For lever-style or winged corkscrews with complex mechanisms, occasional lubrication with food-safe mineral oil keeps moving parts functioning smoothly.
Make cleaning a habit right after opening a bottle to keep your corkscrew in top condition.
Storing in a Dry, Accessible Place
To ensure long-term functionality, store your corkscrew in a dry, easily accessible location away from moisture and extreme temperatures. Humidity can corrode metal components, especially the worm, leading to rust and difficulty in use.
Choose a kitchen drawer, bar cart, or dedicated wine tool holder where airflow is adequate and spills are unlikely. Avoid leaving the corkscrew near the sink or dishwasher, as repeated exposure to water accelerates wear.
Keep it in a protective sleeve or case if stored with other utensils to prevent damage to the spiral or handle. For countertop storage, select a stylish stand that doubles as decor and protection. Easy access encourages proper use and maintenance, reducing the temptation to use subpar alternatives.
Magnetic strips or wall-mounted racks work well for quick retrieval and space-saving. Proper storage not only preserves appearance and function but also ensures your corkscrew is ready whenever you’re ready to enjoy a bottle of wine.
Replacing Worn or Damaged Parts
Over time, frequent use can lead to wear on critical components like the worm, hinge, or lever mechanism, compromising performance. Inspect your corkscrew regularly for signs of bending, dulling, or wobbling. A damaged worm may struggle to penetrate corks or cause them to fragment.
Replace worn parts promptly—many high-quality corkscrews offer manufacturer-replacement components, especially for models with modular designs. For winged or lever corkscrews, check screws and joints for looseness; tighten or replace as needed. If the handle is cracked or the foil cutter is dull, consider a full replacement for safety and efficiency.
Using a compromised corkscrew increases the risk of injury or spilled wine. Investing in spare parts or upgrading to a durable model saves money and frustration in the long run. Always follow the manufacturer’s guidelines for compatible replacements.
Maintaining your tool with fresh, functional parts ensures every bottle opens smoothly and safely, preserving both the wine and your confidence in the process.
Frequently Asked Questions
What is a corkscrew used for?
A corkscrew is a tool designed to remove cork stoppers from wine bottles. It typically features a pointed metal spiral (worm) that is inserted into the cork to pull it out smoothly.
How do I use a standard corkscrew to open a wine bottle?
First, remove the foil seal from the bottle neck. Then, position the corkscrew in the center of the cork and twist the worm down until only one coil remains. Use the lever or your hands to pull the cork straight up and out of the bottle.
What type of corkscrew is best for beginners?
A waiter’s friend (or wine key) is ideal for beginners because it’s compact, affordable, and effective. It includes a foldable corkscrew, a hinged lever, and a foil cutter for easy use.
How can I avoid breaking the cork while opening the bottle?
Insert the corkscrew straight down into the center of the cork to prevent uneven pressure. Twist slowly and steadily, ensuring the worm is fully embedded but not pushed through the bottom of the cork.
What should I do if the cork breaks during removal?
If the cork breaks, carefully insert the corkscrew into the remaining portion and pull gently. Alternatively, use a cork extractor tool or push the cork into the bottle if it’s safe to do so.
Do I need to remove the foil before using a corkscrew?
Yes, always remove or cut away the foil seal from the top of the bottle before inserting the corkscrew. This prevents foil fragments from falling into the wine and ensures a clean insertion.
Conclusion
Opening a bottle with a corkscrew is a simple skill that becomes effortless with practice. Remember to choose the right corkscrew, insert the worm straight, and twist smoothly to avoid breaking the cork. Use leverage wisely, especially with a waiter’s friend, and always keep the bottle steady. With patience and the right technique, you’ll open wine bottles confidently and elegantly every time. Cheers to your next successful pour!