How To Make Cold Espresso Without Machine
Craving a bold iced latte but don’t have an expensive espresso maker sitting on your counter? You are in luck. Achieving that signature rich, concentrated flavor at home is easier than you think. In this guide, we will show you exactly how to make cold espresso without machine equipment using simple tools like a French press, Moka pot, or even an Aeropress. We have rounded up the best foolproof methods to get your caffeine fix fast and flavorfully.
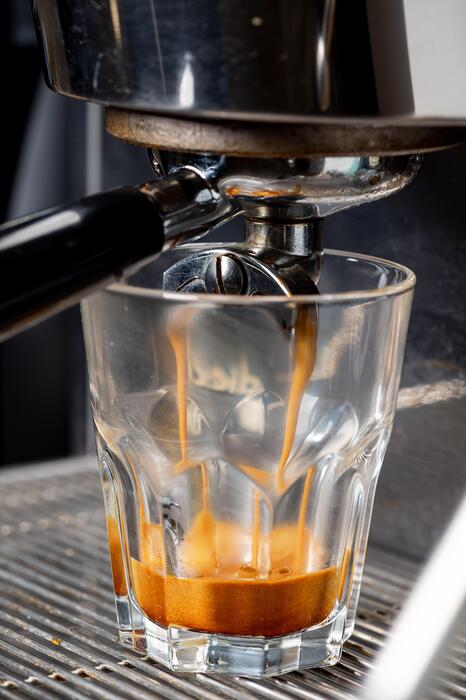
What is cold espresso and why make it at home?
The difference between cold espresso and iced coffee
Understanding the distinction between these two beverages is essential for achieving the perfect home brew.
While standard iced coffee is typically made by brewing hot drip coffee and pouring it over ice, cold espresso refers to a highly concentrated coffee shot that mimics the intensity and body of a traditional extraction.
The primary difference lies in the solids-to-water ratio, where cold espresso utilizes a much higher concentration of grounds to produce a syrupy, bold liquid. This intensity allows the coffee to maintain its flavor profile even when diluted with milk or sweeteners.
Unlike regular iced coffee, which can often taste thin or watery as the ice melts, a properly prepared cold espresso shot remains robust and punchy.
By focusing on a short extraction time or a pressurized immersion method, you can replicate the signature crema and deep aromatic complexity of a cafe-quality drink without needing the steam pressure of a commercial unit. This method ensures your homemade lattes and americanos have that authentic, professional depth of flavor.
Why you don’t need an expensive machine
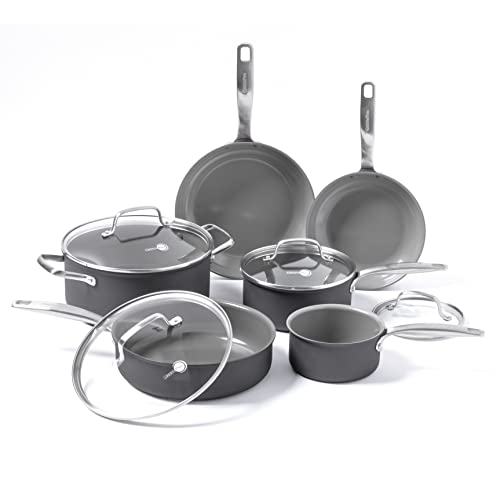
Many coffee enthusiasts believe a multi-thousand dollar espresso machine is the only way to enjoy a quality shot, but you can easily master cold espresso using simple tools like a Moka pot, AeroPress, or even a French press.
These manual methods rely on physical pressure or concentrated immersion to force water through fine grounds, resulting in a liquid that is remarkably similar to true espresso.
Using an AeroPress with a metal filter is one of the most effective ways to create a concentrated base because it allows you to apply manual pressure, mimicking the bars of pressure found in electric pumps.
Alternatively, a French press can produce a ‘cold brew concentrate’ that serves as an excellent espresso substitute when steeped for a shorter duration with a higher coffee-to-water ratio. By focusing on precise grind size and water temperature, you can bypass the need for expensive hardware.
Making it at home not only saves money but also gives you total control over the strength and acidity of your daily caffeine kick.
The best coffee beans for cold brewing
Selecting the right beans is the final step in perfecting your machine-free cold espresso. To achieve that signature bold taste, you should prioritize dark or medium-dark roasts with low acidity. These roasts typically feature chocolatey, nutty, and smoky notes that shine through when served chilled.
Because cold extraction processes can sometimes highlight bitterness, choosing a high-quality Arabica bean ensures a smoother finish compared to cheaper Robusta varieties.
It is also vital to use a freshly ground consistency tailored to your specific manual tool; for instance, a fine grind works best for an AeroPress, while a slightly coarser grind is ideal for a concentrated French press steep.
Look for beans labeled with ‘espresso’ or ‘French roast’ profiles, as these are developed to withstand the intensity of concentrated brewing.
By using fresh, oily beans and filtered water, you elevate the home experience, ensuring your cold espresso has a rich mouthfeel and a lingering, pleasant aftertaste that rivals any high-end coffee shop offering.
How to make concentrated coffee with a French Press
The correct coffee-to-water ratio for espresso strength
To achieve a bold, espresso-like profile using a French Press, you must deviate significantly from standard brewing ratios. While a typical cup uses a one-to-fifteen ratio, creating a cold espresso concentrate requires a much higher concentration of grounds.
Aim for a 1:4 coffee-to-water ratio to ensure the final liquid has the necessary body and intensity to mimic a traditional shot. For a standard small press, use approximately one cup of coarse coffee grounds to four cups of room temperature or cold filtered water.
Using a coarse grind size is essential here; if the grind is too fine, the water will over-extract during the long steeping process, resulting in a bitter, unpleasant taste.
This concentrated base allows you to enjoy the punchy flavor of espresso without a machine, providing a versatile foundation for iced lattes or Americanos. By prioritizing a high volume of quality grounds, you ensure the cold brew process extracts enough oils and solubles to stand up against milk or ice.
Step-by-step brewing instructions
Begin by adding your measured coarse coffee grounds into the bottom of the French Press carafe. Slowly pour filtered room temperature water over the grounds, ensuring every particle is fully saturated to promote even extraction.
Instead of plunging immediately, use a long spoon to gently stir the mixture, breaking up any dry clumps that might be trapped. Place the lid on top but keep the plunger in the up position to avoid premature pressure.
Allow the carafe to sit at room temperature or in the refrigerator for at least 12 to 18 hours. This extended contact time is what develops the deep, chocolatey notes associated with espresso without the need for high-pressure steam.
Once the steeping time is complete, slowly press the plunger down with steady, even force. Transfer the resulting concentrate into a glass jar immediately.
This cold-brewed concentrate can be served over ice or diluted with a small amount of hot water to create a smooth, low-acid alternative to a machine-pulled shot.
Tips for a sediment-free cup
One common challenge when using a French Press for espresso-style coffee is the presence of fine silt or sediment at the bottom of the glass. To achieve a cleaner, more refined mouthfeel, consider double-filtering your concentrate after the initial plunge.
You can pour the finished liquid through a secondary paper coffee filter or a fine-mesh sieve lined with cheesecloth to catch the micro-grounds that the metal mesh might miss.
Additionally, avoid the temptation to squeeze or press the grounds at the very bottom of the carafe, as this forces bitter tannins and fine dust into your brew.
When pouring the concentrate into your serving vessel, leave the last half-ounce of liquid in the press; this is where the majority of the sediment settles. Using a consistent burr grinder rather than a blade grinder will also help minimize ‘fines,’ ensuring your cold espresso remains crisp and professional.
These simple adjustments transform a rustic home brew into a high-quality, shop-level beverage that looks as good as it tastes.
How to use an AeroPress for quick cold espresso
The inverted method for maximum extraction
To achieve a concentrated shot that mimics espresso without a machine, the inverted AeroPress method is your best strategy. Start by placing the plunger into the chamber and flipping the device upside down so the open end faces upward.
This orientation allows for a full-immersion steep, ensuring that every coffee particle is completely saturated for a robust, intense flavor profile. Use a fine grind size, similar to table salt, and add approximately 18 to 20 grams of coffee.
By letting the grounds steep in a small amount of water for about two minutes, you facilitate a deeper extraction that is often lost in the standard upright method. This technique prevents premature leakage through the filter, giving you total control over the contact time.
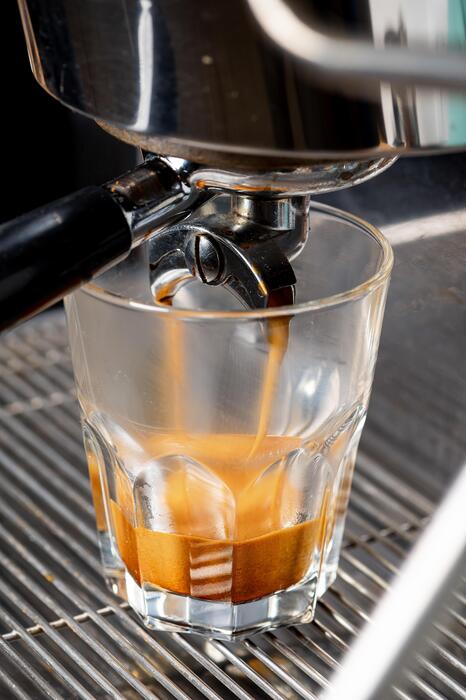
Once the timer is up, carefully screw on the cap with a rinsed paper filter, flip it over onto a sturdy glass filled with ice, and apply firm, steady pressure to plunge your concentrated cold base.
Using cold water vs. hot water bypass
When making cold espresso, you must choose between using cold water for the entire process or a hot water bypass technique. Brewing with room-temperature water requires a much longer steep time, often up to several hours, to pull the necessary oils from the beans.
However, for a quick solution, the flash-brew approach is superior. Use a small volume of hot water—around 200 degrees Fahrenheit—to extract the coffee quickly over sixty seconds. This hot water acts as a solvent to pull out the complex acids and sugars that cold water might miss.
Immediately after plunging the hot concentrate over a handful of ice cubes, the rapid chilling effect locks in the aromatic compounds while diluting the strength to an espresso-like consistency.
This bypass method is the fastest way to enjoy a chilled caffeine kick without waiting for a traditional cold brew cycle, providing a bright and balanced acidity that is perfect for iced lattes or Americanos.
How to create a faux-crema
While a manual press cannot generate the nine bars of pressure required for authentic crema, you can simulate a velvety faux-crema texture using a few clever tricks. First, ensure you are using two paper filters or a specialized metal disk to increase the resistance during the plunge.
As you press down, the increased back-pressure aerates the concentrated coffee oils, creating a thin layer of foam. To enhance this effect, leave a small pocket of air between the plunger and the water level before you flip the device.
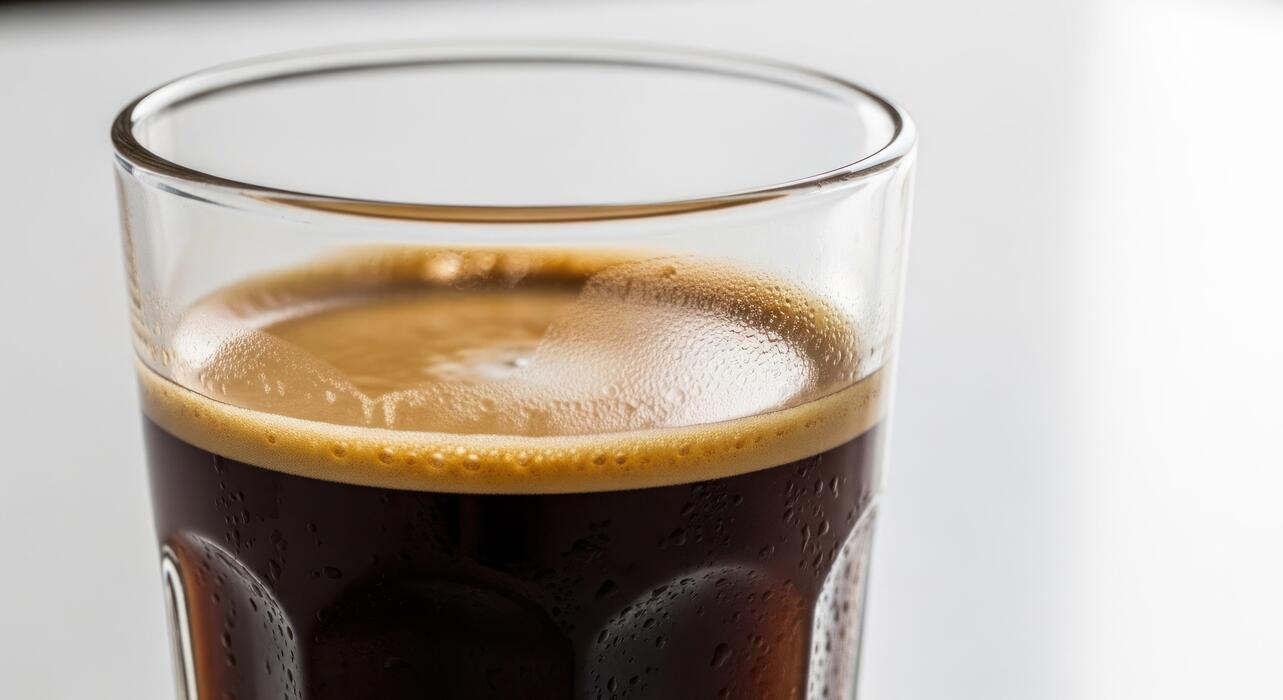
When you reach the end of the plunge, the final ‘hiss’ of air forced through the grounds creates a frothy emulsion on the surface of your drink.
For an even thicker consistency, you can vigorously shake the finished shot in a sealed mason jar with one small ice cube for ten seconds. This aeration process lightens the color and adds a creamy mouthfeel that beautifully replicates the aesthetic and sensory experience of a traditional machine-pulled espresso shot.
The Moka Pot method for stovetop espresso
How to brew high-pressure coffee on a stove
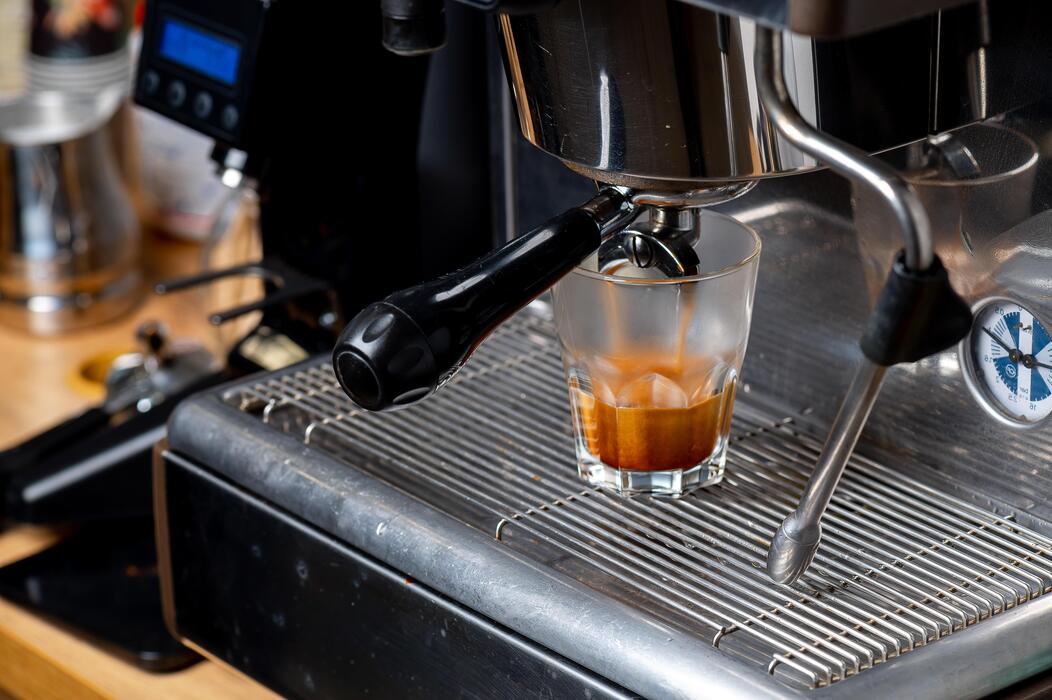
To replicate an espresso-style base without an expensive machine, the Moka Pot is your most effective tool.
Begin by filling the bottom chamber with preheated water up to the safety valve; using hot water prevents the coffee grounds from sitting on the stove for too long, which preserves the delicate oils.
Insert the filter funnel and fill it with a fine espresso-grind coffee, but ensure you do not tamp it down like a traditional machine portafilter. Simply level the surface and screw the top chamber on tightly using a towel to protect your hands from the heat.
Place the pot over a medium-low flame on your stovetop. As the water boils, the resulting steam pressure forces the water through the grounds, creating a concentrated, syrupy liquid that mimics the intensity of a true espresso shot.
Once you hear a gurgling sound, immediately remove the pot from the heat source to stop the extraction process and prevent any metallic or over-extracted flavors from ruining the batch.
Rapid cooling techniques to keep it cold
Since you are aiming for a cold beverage, the transition from boiling heat to icy temperatures must be handled carefully to avoid dilution. The most effective method is to utilize a pre-chilled metal cocktail shaker or a glass jar kept in the freezer.
Pour your fresh Moka Pot coffee directly into the cold container and stir it vigorously for thirty seconds before adding any ice. This initial drop in temperature ensures that when you finally add ice cubes, they do not melt instantly and turn your concentrated brew into a watery mess.
For an even more professional result, consider using coffee ice cubes made from a previous brew, which maintain the strength of your drink as they melt.
If you are in a rush, a shallow stainless steel bowl placed inside a larger bowl filled with ice and salt can act as a flash-chilling station, dropping the liquid temperature to near-freezing in under a minute. This preserves the bold profile necessary for iced lattes or Americanos.
Avoiding the bitter burnt taste
A common mistake when using a stovetop method is letting the coffee cook for too long, which results in a harsh, ashy flavor profile. To ensure your cold espresso remains smooth and sweet, you must master the thermal management of the pot.
Always start with filtered water to avoid mineral interference and remove the pot from the burner the moment the coffee stream turns a pale yellow honey color.
To instantly halt the brewing process, run the base of the Moka Pot under cold tap water; this prevents residual heat from pushing bitter, over-extracted compounds into your final cup.
Furthermore, ensure your equipment is meticulously cleaned, as old coffee oils trapped in the gasket can impart a rancid taste to fresh brews.
If your cold espresso still tastes too sharp, a tiny pinch of sea salt added to the finished liquid can neutralize bitterness and enhance the natural chocolate notes of the beans. Consistency in heat control is the ultimate secret to achieving a cafe-quality result without a machine.
How to make espresso concentrate with a Mason Jar
The 12-hour cold steep process
To replicate the intensity of espresso without a machine, start by grinding your coffee beans to a coarse consistency similar to sea salt. Use a high coffee-to-water ratio, specifically one part coffee to four parts filtered water, to ensure a robust concentrate.
Place the coffee grounds directly into your Mason jar and pour the room-temperature water over them slowly. Use a long spoon to stir the mixture thoroughly, ensuring every ground is fully saturated to prevent dry pockets that lead to uneven extraction.
Secure the lid tightly and let the jar sit on your counter at room temperature for exactly twelve hours. This extended contact time allows the water to pull out the rich oils and caffeine without the bitterness often associated with heat.
By choosing a dark roast bean, you will achieve those signature chocolatey and smoky notes found in traditional espresso. This passive steeping method is the most reliable way to create a powerful base for iced lattes or Americanos at home.
Filtering your concentrate without professional tools
Once your twelve-hour steep is complete, you need to separate the sludge from the liquid to achieve a clean, sediment-free concentrate. Since you are not using a professional espresso machine or a French press, you can utilize common kitchen items like a fine-mesh sieve and a paper coffee filter.
Place the sieve over a second clean Mason jar and line it with a dampened paper filter or a piece of cheesecloth. Pour the mixture through the filter slowly; do not be tempted to squeeze the grounds, as this will force fine particulates and bitter tannins into your drink.
If the flow slows down, gently stir the top layer of the grounds to clear the path. For the most professional results, you might consider filtering the liquid twice to remove the very fine silt that settles at the bottom.
This process ensures your cold espresso has a smooth mouthfeel and a clear appearance, making it indistinguishable from a shot pulled from an expensive high-pressure Italian machine.
Storing your cold espresso for the week
The primary advantage of the Mason jar method is the ability to meal-prep your caffeine for several days. Once filtered, seal your concentrate in a clean, airtight glass jar and place it immediately in the coldest part of your refrigerator.
Because this is a cold-extraction method, the flavor profile is significantly more stable than hot-brewed coffee that has been chilled. Your DIY espresso concentrate will remain fresh and vibrant for up to seven days, allowing you to simply pour and go during busy mornings.
When you are ready to drink it, remember that this liquid is highly concentrated; dilute it with two parts water or milk for a standard beverage. If you notice any sourness or a change in aroma after a week, it is time to brew a fresh batch.
You can even freeze the concentrate in silicone ice cube trays to use in blended drinks, ensuring your iced coffee never gets watered down as the ice melts. This storage efficiency makes the Mason jar technique a superior lifestyle choice.
Best ways to serve and flavor your cold espresso
Making a DIY Iced Americano
To create a refreshing Iced Americano using your concentrated stovetop or French press brew, start by filling a tall glass with large, slow-melting ice cubes to prevent unwanted dilution.
Pour approximately two to three ounces of your chilled espresso alternative over the ice, then slowly add four to six ounces of cold filtered water depending on your preferred strength.
The secret to a professional finish without a machine is the order of ingredients, as pouring the coffee over the ice first helps lock in the volatile aromatic compounds.
For a bolder profile, consider using coffee ice cubes made from leftover brew, which ensures your drink remains robust until the very last sip. If you find the flavor too intense, a tiny pinch of salt can effectively neutralize bitterness and enhance the natural sweetness of the beans.
This simple manual method yields a clean, crisp beverage that rivals any cafe-quality drink while remaining completely cost-effective and accessible for home baristas.
How to make a cold foam topping
Elevate your handmade cold espresso by adding a luxurious, velvety layer of cold foam using a simple handheld milk frother or a standard French press.
To achieve the perfect consistency, use cold non-fat milk or a barista-blend oat milk, as these options contain the specific protein structures necessary to hold stable air bubbles for longer periods.
Simply pour a small amount of milk into a carafe and aerate it for thirty seconds until the volume doubles and the texture becomes glossy. If you are using a French press, pump the plunger rapidly at the bottom for twenty strokes to incorporate air into the liquid.
You can easily customize this topping by adding a drop of pure vanilla extract or a dash of cinnamon before frothing. Gently pour this cloud-like mixture over your iced coffee to create a beautiful visual gradient.
This technique provides a creamy mouthfeel and sophisticated presentation that mimics high-end espresso machine capabilities using nothing more than basic kitchen tools.
Natural sweeteners that dissolve in cold liquid
When flavoring cold espresso made without a machine, traditional granulated sugar often fails to dissolve, leaving a gritty residue at the bottom of your glass.
The most effective solution is to utilize liquid-based natural sweeteners like 100% pure maple syrup or organic agave nectar, which integrate seamlessly into chilled beverages regardless of the temperature.
Maple syrup offers a deep, woodsy complexity that complements the roasted notes of the coffee, while agave provides a neutral profile with a lower glycemic index for those watching their sugar intake.
Another excellent option is creating a quick honey simple syrup by whisking equal parts honey and warm water until blended; this prevents the honey from seizing when it hits the ice. For a calorie-free alternative, liquid stevia or monk fruit drops are highly concentrated and disperse instantly.
Using these liquid formats ensures every sip is perfectly balanced and consistently sweet, allowing you to enjoy a gourmet flavored experience without the need for heat or specialized stirring equipment.
Common mistakes when making espresso without a machine
Using the wrong grind size
One of the most frequent errors when attempting a manual espresso substitute is using a standard medium grind intended for drip machines. To achieve that concentrated, bold flavor profile required for cold espresso drinks, you must utilize a fine, powdery grind similar to table salt.
This increased surface area is essential because you lack the nine bars of atmospheric pressure found in a professional machine to force water through the grounds.
If your grind is too coarse, the water will pass through too quickly, resulting in a weak, watery liquid that lacks the body needed to stand up to ice and milk.
Conversely, if you are using an AeroPress or Moka pot to create your base, ensuring a consistent fine texture prevents channeling and ensures every drop of water extracts maximum oils and caffeine.
Investing in a quality burr grinder allows you to dial in this specific coarseness, ensuring your DIY cold espresso has the rich intensity and syrupy mouthfeel that characterizes a true cafe-style beverage.
Using tap water vs. filtered water
Many home baristas overlook the fact that espresso is roughly ninety-eight percent water, making the quality of your source critical for a clean taste.
Using unfiltered tap water is a major mistake because it often contains high levels of chlorine, fluoride, and heavy minerals that can impart a metallic or chemical aftertaste to your concentrated brew.
These impurities become even more noticeable when the coffee is served cold, as lower temperatures can highlight off-flavors that heat might otherwise mask. To achieve a professional result at home, always use freshly filtered or bottled spring water with a balanced mineral content.
This ensures that the delicate floral or nutty notes of your coffee beans are the primary focus rather than the additives in your local water supply.
By using purified water at the correct temperature, you facilitate a more efficient extraction process, resulting in a smoother, sweeter cold espresso that tastes vibrant and refreshing without the harshness associated with common municipal tap water sources.
Over-extracting the coffee grounds
In an effort to make their manual brew as strong as possible, many people leave the grounds in contact with hot water for too long, leading to extreme over-extraction.
This mistake introduces harsh, bitter tannins and astringent flavors that can ruin a cold coffee drink, making it taste burnt rather than bold.
When you are mimicking espresso using a French press or AeroPress, precision in timing is vital; even an extra thirty seconds can turn a balanced concentrate into something undrinkable. You should aim for a short, controlled steep time followed by an immediate plunge or filtration to stop the brewing process.
Once the extraction is complete, it is helpful to chill the concentrate rapidly or pour it over a specific amount of ice to lock in the desired flavor profile.
Avoiding the temptation to ‘squeeze’ the last bit of liquid out of the grounds also prevents the release of silty sediment, ensuring your final cold espresso remains crisp, clean, and naturally sweet without needing excessive sugar to mask bitterness.
Frequently Asked Questions
Can I make espresso-style coffee without a machine?
Yes, while a true espresso requires high pressure, you can create a concentrated ‘espresso-style’ coffee using a Moka pot, AeroPress, or a French press. These methods produce a strong, bold base that mimics the intensity of espresso for cold drinks.
How do I use an AeroPress for cold espresso?
To make a cold espresso alternative, use a fine grind and a small amount of hot water (about 2 ounces). Press firmly into a glass filled with ice to instantly chill the concentrated brew without over-diluting it.
What is the best way to make cold espresso with a French press?
Use a 1:4 coffee-to-water ratio with very hot water and let it steep for 4 minutes before plunging. Immediately pour the concentrate over a large amount of ice or shake it with ice in a mason jar to create a frothy, cold texture.
How can I make cold espresso using instant coffee?
Mix two teaspoons of high-quality instant coffee or espresso powder with just one tablespoon of hot water to dissolve it. Once dissolved, stir in ice cubes and a splash of cold water to achieve an instant cold espresso shot.
Can I use the cold brew method for espresso?
You can make a cold brew concentrate by steeping coarse grounds in a small amount of water for 12-24 hours. Because it is highly concentrated, it serves as an excellent low-acid substitute for espresso in iced lattes or Americanos.
How do I get a ‘crema’ on my handmade cold espresso?
To mimic crema without a machine, pour your concentrated coffee into a jar with ice and shake vigorously for 30 seconds. The agitation creates a foamy, aerated top layer that resembles the natural crema found on a machine-pressed espresso.
What coffee-to-water ratio should I use for a machine-free espresso?
Aim for a very high concentration, typically a 1:2 or 1:3 ratio. For example, use 20 grams of coffee to 40-60 grams of water to ensure the flavor remains bold and intense even after adding ice.
Conclusion
Making a delicious cold espresso without a machine is both simple and rewarding. By using common kitchen tools like a French press, Aeropress, or even a simple glass jar, you can achieve a bold, concentrated brew that rivals any coffee shop. Experiment with different coffee beans and brewing times to find your perfect flavor profile. Now that you have these techniques, you can enjoy a refreshing, professional-quality caffeine kick anytime from the comfort of home.