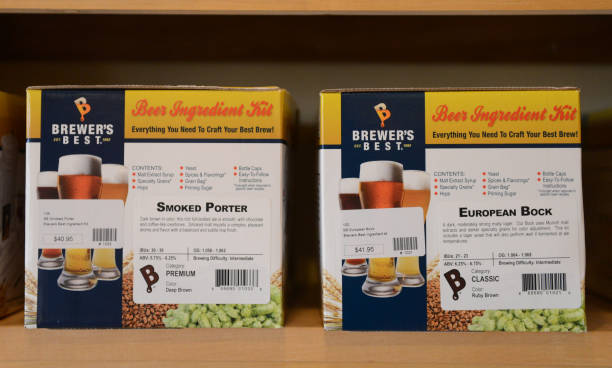
Easy Beer Brewing Kit
If you’ve been wondering how to start brewing beer without a chemistry degree, an easy beer brewing kit is the perfect solution. In just a few hours you’ll have everything you need to answer the “easy beer brewing kit” question quickly, so grab a kit, follow the guide, and enjoy your first homemade pint.
What Is an Easy Beer Brewing Kit
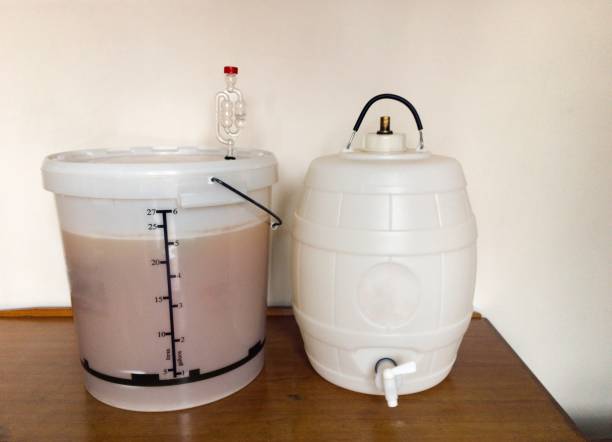
Key Components Included
An easy beer brewing kit typically bundles the essential gear needed to transform malt, hops, yeast, and water into a satisfying brew.
Bold key points include a fermenter with an airtight lid, a sanitized siphon tube for transferring liquid, a bottling bucket with a spigot, and a set of brewing-specific bottles or caps.
Many kits also provide a brewing kettle or pot for heating water and a thermometer to monitor temperature accurately during the mash and boil stages. A hydrometer helps track specific gravity, ensuring fermentation progresses as expected.
Bold key points often feature a detailed recipe card outlining ingredient quantities, step‑by‑step instructions, and suggested fermentation times. Some kits add a sanitizer solution, priming sugar, and a basic cleaning brush to simplify post‑brew cleanup.
By consolidating these items, beginners avoid purchasing each piece separately, reducing upfront costs and eliminating the guesswork of assembling compatible equipment. This all‑in‑one approach lets newcomers focus on mastering the brewing process rather than sourcing mismatched parts.
Why Choose a Beginner Kit
Selecting a beginner kit streamlines the learning curve for newcomers eager to explore home brewing. Bold key points highlight reduced complexity, as the kit’s curated components eliminate the need to research individual parts and their compatibility.
The included step‑by‑step guide demystifies processes like mashing, boiling, and fermentation, allowing novices to follow clear instructions without prior expertise. Kits often feature forgiving recipes designed for lower alcohol levels, minimizing the risk of off‑flavors that can discourage first‑time brewers.
Bold key points also emphasize cost‑effectiveness; buying a starter set is usually cheaper than purchasing equivalent equipment piecemeal. Additionally, many kits come with customer support or online tutorials, providing extra assistance when questions arise.
This supportive ecosystem builds confidence, encouraging hobbyists to experiment with different styles while knowing they have reliable resources at hand. Ultimately, a beginner kit transforms an intimidating hobby into an accessible, enjoyable pastime.
Types of Starter Kits Available
The market offers several distinct starter kits to match various preferences and brewing goals. Bold key points include extract kits, which use pre‑made malt extracts and simplify the process by skipping the mash step, ideal for those seeking quick results.
All‑grain kits provide raw grains and require a mash tun, offering a more authentic brewing experience but with a steeper learning curve. Partial‑mash kits blend extract convenience with a small grain component, giving beginners a taste of grain handling without overwhelming complexity.
Some kits are themed, focusing on specific beer styles such as amber ale, wheat beer, or IPA, each with tailored hop selections and flavor profiles. Others are “no‑sparge” kits that streamline water management, reducing the need for precise temperature control.
Bold key points also highlight kits with different fermentation vessels, ranging from plastic buckets to glass carboys, and varying bottle counts from 12 to 24 bottles.
Choosing the right type depends on personal interest, desired involvement level, and budget, ensuring every novice can find a kit that aligns with their brewing aspirations.
How to Choose the Right Kit
Match Your Skill Level
Choosing a kit that aligns with your brewing expertise ensures a smooth, enjoyable experience. Beginners should opt for all‑in‑one starter kits that include pre‑measured malt extracts, yeast, and hop packets, eliminating the need for complex calculations.
These kits typically require only a large pot, a fermenter, and basic sanitization tools, making them ideal for first‑time brewers. Intermediate hobbyists can consider partial‑mash or mini‑brew kits, which introduce grain steeping and more nuanced flavor control while still providing clear instructions.
Advanced brewers might prefer ingredient‑only kits, allowing full recipe customization and experimentation with specialty malts and unique hop varieties. Always review the kit’s difficulty rating and included support materials, such as step‑by‑step guides or video tutorials, to gauge whether the process matches your current confidence level.
Matching skill level reduces frustration, increases success rates, and builds confidence for future brewing projects.
Consider Beer Style Preferences
Your personal taste drives the selection of a kit that delivers the desired flavor profile. If you crave a crisp, light lager, choose kits labeled for American Light Lager or Pilsner, which typically use low‑gravity malt extracts and minimal hop bitterness.
For a richer, more complex experience, Amber Ale or Porter kits incorporate higher‑gravity malt blends and caramel notes, offering a balanced malt‑hop interplay. IPA enthusiasts should look for kits featuring hop‑forward extracts or separate hop additions, ensuring a pronounced citrus or pine character.
Additionally, consider seasonal or regional styles like Hefeweizen for wheat‑based fruitiness or Stout for deep chocolate and coffee undertones. Matching your preferred style to the kit’s recipe guarantees that the final product aligns with your expectations, making the brewing process more rewarding and the tasting experience more satisfying.
Check Equipment Quality
The reliability of your brewing kit hinges on the durability and performance of its components. Inspect the fermenter for food‑grade plastic or glass construction, ensuring it can maintain a consistent temperature and prevent contamination.
Verify that the included brewing pot is thick enough to avoid scorching during boil, and that it has a sturdy handle for safe handling. Look for precision‑calibrated thermometers and hydrometers, as accurate temperature and gravity readings are crucial for proper fermentation and carbonation.
Confirm that all seals, such as airlocks and bottle caps, are made from high‑quality silicone or rubber to prevent leaks.
Finally, assess the clarity of instructions and the availability of replacement parts; reputable kits often provide spare seals and extra hop packets, extending the kit’s lifespan and supporting future brews with minimal hassle.
What You Need to Brew Beer
Basic Brewing Ingredients
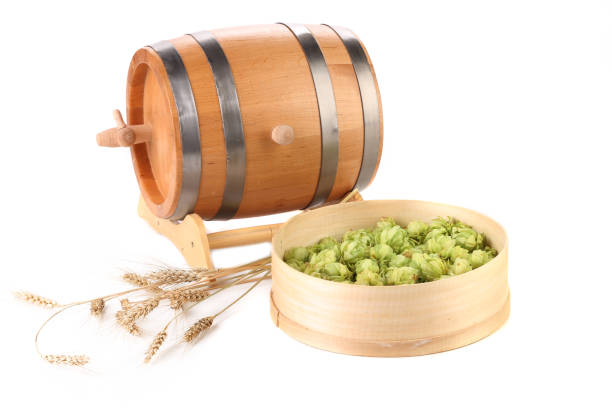
To brew beer, you need a few core components that provide flavor, fermentable sugars, and structure. Malted barley is the most common grain source, offering enzymes that convert starches into fermentable sugars during the mash. Hops contribute bitterness, aroma, and flavor, balancing the malt sweetness.
Yeast is essential for fermentation, turning sugars into alcohol and carbon dioxide. Water makes up the bulk of the brew, so its mineral content can affect the final taste.
For an easy beer brewing kit, these ingredients are usually pre‑measured in a single‑step extract or all‑grain package, simplifying the process for beginners. Using high‑quality, fresh ingredients ensures a clean, consistent flavor profile, while proper storage and handling prevent contamination.
Understanding the role of each ingredient helps you adjust recipes and troubleshoot issues, making the brewing experience more rewarding and predictable.
Essential Tools and Accessories
A reliable brewing setup includes a few key tools that streamline the process and ensure consistent results. A large brew kettle (at least 5 gallons) is needed to boil the wort and add hops. A fermenter—glass carboy or food‑grade plastic bucket—provides a sanitary environment for yeast activity.
An airtight lid with a fermentation lock prevents contamination while allowing CO₂ to escape. A thermometer and hydrometer help monitor temperature and specific gravity, guiding fermentation and carbonation. A stirring spoon or paddle ensures even mixing of grains and hops.
For an easy kit, many of these items are bundled together or available as compact starter kits, reducing the need for separate purchases. Proper sanitation of all equipment is critical; even minor lapses can spoil the batch. Keeping tools organized and accessible makes each brewing session smoother and more enjoyable.
Optional Add‑Ons for Better Results
While the basics get you started, optional accessories can elevate your beer’s quality and flavor complexity. Specialty grains like wheat, rye, or caramel malt add unique color, body, and taste nuances. Dry‑hopping additions after primary fermentation boost aroma without extra bitterness.
Temperature‑controlled fermentation chambers maintain ideal yeast conditions, especially for lagers. Advanced filtration systems clarify the beer, removing haze and unwanted particles. Carbonation stones or forced carbonation setups give precise control over fizz. Digital brewing software helps track recipes, fermentation timelines, and adjustments.
These add‑ons are not mandatory, but they allow experimentation and refinement, turning a simple batch into a more polished, professional‑grade brew. Investing in a few quality accessories early can save time and improve consistency as you gain experience.
Step‑by‑Step Brewing Process
Preparing the Wort
Begin by gathering a clean fermenter, sanitized brewing pot, and brewing kettle. Heat 2–3 gallons of water to 160°F (71°C) and steep grains in a grain bag for 20 minutes to extract sugars.
Remove the grains, bring the liquid to a boil, and add your pre‑measured malt extract while stirring continuously. Boil for 60 minutes, adding hops at specific intervals to control bitterness and aroma. After boiling, chill the wort rapidly to below 70°F (21°C) using an ice bath or wort chiller.
Transfer the cooled wort to the fermenter, top up with cold water to reach your target volume, and take a gravity reading to confirm sugar concentration. Finally, aerate the wort by shaking or using an oxygen stone to ensure yeast has enough oxygen for healthy fermentation.
This step sets the foundation for flavor, clarity, and alcohol strength in your easy beer brewing kit.
Fermentation Basics
Pitch dry yeast or rehydrated liquid yeast into the cooled wort, ensuring the temperature is within the yeast’s optimal range—typically 65–70°F (18–21°C) for ales. Seal the fermenter with an airlock to allow CO₂ to escape while keeping contaminants out.
Store the fermenter in a stable, temperature‑controlled environment away from direct sunlight. Monitor the fermentation process daily: you’ll see bubbles in the airlock and notice a decrease in specific gravity over 7–14 days. When the gravity stabilizes for two consecutive days, fermentation is complete.
At this point, swirl the fermenter gently to mix settled yeast and add priming sugar for carbonation if you plan to bottle. This controlled fermentation phase develops the beer’s alcohol content, flavor profile, and clarity, making it essential for a successful easy beer brewing kit.
Bottling and Carbonation
Transfer the finished beer to a bottling bucket using a sanitized siphon, taking care not to disturb the trub at the bottom. Dissolve the correct amount of priming sugar in a small volume of boiled water, then mix it into the bottling bucket.
Fill each bottle with the beer‑sugar mixture, leaving about 1 inch of headspace. Cap the bottles securely with a bottle capper and store them upright at room temperature for 1–2 weeks. During this time, the residual yeast consumes the priming sugar, producing natural carbonation.
After carbonation, refrigerate the bottles for 2–3 days to stabilize the flavor and chill the beer. Finally, sample a bottle to check carbonation level and taste—adjust future priming sugar amounts if needed. This simple bottling method ensures a crisp, fizzy result from your easy beer brewing kit.
Tips for Successful Brewing
Maintain Sanitation
Sanitation is the foundation of every successful brew, preventing unwanted bacteria and wild yeast from spoiling your batch. Always sanitize every piece of equipment that contacts the wort after the boil, including fermenters, airlocks, spoons, and thermometers.
Use a no-rinse sanitizer like Star San or iodophor, ensuring full coverage and letting it sit for the recommended contact time. Clean as you go to avoid cross‑contamination, and never introduce unsterilized items into the fermentation vessel.
Keep your workspace tidy, and store sanitized tools in a clean container until needed. A single missed spot can lead to off‑flavors, hazy beer, or complete fermentation failure.
By rigorously maintaining sanitation, you protect the integrity of your ingredients and give your yeast the clean environment it needs to thrive, resulting in a crisp, consistent final product.
Control Temperature
Temperature control directly influences yeast activity, flavor development, and overall beer quality. Keep fermentation within the recommended range—typically 65‑72°F for ales and 50‑55°F for lagers—to avoid stalled fermentation or unwanted esters. Use a dedicated fermentation fridge or a temperature‑controlled room, and consider a simple swamp cooler for budget setups.
Monitor regularly with a reliable thermometer, adjusting cooling or heating as needed. Fluctuations can cause off‑flavors, so aim for stability. For extract kits, pitching yeast at the right temperature is equally crucial; too hot can shock the cells, while too cold slows metabolism.
By mastering temperature control, you ensure consistent fermentation, clear flavor profiles, and a beer that matches the style you intended.
Monitor Fermentation Health
Tracking fermentation health helps you catch issues early and avoid wasted time or ingredients. Watch for signs of active fermentation—bubbling airlock, krausen formation, and consistent gravity readings—typically starting within 12‑24 hours. Use a hydrometer to record original and final gravity, confirming attenuation and calculating alcohol content.
Check for off‑flavors like sour or phenolic notes, which may indicate contamination. Maintain a stable temperature and avoid opening the fermenter unnecessarily to prevent oxidation. If fermentation stalls, gently stir the yeast slurry or consider repitching.
Regular monitoring allows you to adjust conditions, troubleshoot problems, and ensure a healthy, complete fermentation that yields a clean, flavorful beer every time.
Best Ways to Store and Enjoy Your Brew
Proper Storage Conditions
Store your brew in a cool, dark place to preserve flavor and prevent spoilage. Keep the temperature between 45°F and 55°F to slow oxidation and maintain carbonation. Avoid direct sunlight or fluorescent lighting, which can cause skunking and alter taste.
Use airtight containers to lock in freshness and prevent oxygen exposure. Label each batch with brew date to track aging and ensure timely consumption. If you have limited fridge space, consider a dedicated beer fridge or a cellar with controlled humidity. Store bottles upright to minimize cap degradation and leakage.
For long-term aging, aim for 65-70% humidity to prevent cork drying. Monitor temperature fluctuations during seasonal changes; a stable environment is key. Avoid storing near strong odors that can permeate the brew. When transferring to secondary vessels, use sanitized equipment to prevent contamination.
Regularly check seals and replace damaged caps promptly. By following these steps, you’ll enjoy consistent quality and extend shelf life.
When to Drink Your Beer
The ideal drinking window varies by style and fermentation method. Most ales are best within 2-4 weeks after bottling, while lagers may need 4-6 weeks for proper conditioning. Check carbonation levels by observing bubble formation when opening the bottle; a steady stream indicates readiness.
Taste test a small sample to confirm flavor balance and clarity. If the brew tastes flat or overly yeasty, give it more time to carbonate. For seasonal brews, plan consumption around holidays or gatherings to maximize enjoyment. Monitor for off-flavors such as sour or metallic notes, which signal potential spoilage.
Keep a brewing log to track aging and identify optimal drinking periods for each recipe. When in doubt, err on the side of waiting; over‑carbonation is easier to correct than under‑carbonation. Enjoy your beer at its freshest for the most vibrant taste and aroma.
Serving Recommendations
Serve your brew at the appropriate temperature for its style to highlight flavors. Lagers and pilsners taste best chilled between 38°F and 45°F, while ales and stouts prefer 45°F to 55°F. Use a clean glass to avoid diluting aromatics and create proper head retention.
Pour gently at a 45-degree angle to preserve carbonation and encourage a smooth head. For kegged beer, maintain consistent pressure settings to ensure steady flow. Avoid shaking or tapping the container, which can disturb sediment and reduce quality.
If serving from a tap, prime the system and clean lines regularly to prevent flavor loss. Pair your brew with complementary foods such as pretzels, grilled meats, or cheeses to enhance the experience. Enjoy responsibly and share with friends to celebrate your brewing success.
Common Mistakes to Avoid
Skipping Sanitization Steps
When using an easy beer brewing kit, skipping sanitization can lead to unwanted bacteria or wild yeast contaminating your batch, resulting in off-flavors, hazy appearance, or even complete fermentation failure. Always sanitize every piece of equipment that contacts the wort or beer after boiling, including fermenters, airlocks, spoons, and tubing.
Use a no-rinse sanitizer like Star San or iodophor for simplicity and safety. Remember that even small amounts of unclean surfaces can introduce harmful microbes that compete with your intended yeast, slowing fermentation or producing sour, vinegary notes.
Proper sanitization is a quick, essential step that ensures a clean slate for your yeast to thrive, ultimately delivering the intended flavor profile of your chosen beer style. Make it a habit to sanitize before and after brewing to maintain consistency and avoid costly mistakes.
Using Incorrect Ingredient Ratios
Accurate ingredient ratios are critical for achieving the desired flavor, color, and alcohol content in your homebrew. An easy beer brewing kit often includes pre-measured malt extracts, hops, and yeast, but slight deviations can significantly alter the final product.
Overusing hops may create an excessively bitter brew, while underusing them can result in a dull, unbalanced taste. Similarly, adding too much or too little malt extract will affect sweetness and body.
Always follow the kit instructions precisely, and consider using a brewing calculator to verify proportions if you plan to adjust. Measure ingredients with a digital scale for consistency, and remember that even small changes can accumulate over multiple batches.
Keeping ratios correct ensures a smooth, predictable brewing process and helps you replicate successful results every time.
Neglecting Fermentation Time
Fermentation time is a key factor in developing the right flavor and clarity in your beer. An easy beer brewing kit typically provides a recommended fermentation window, but rushing or extending this period can cause issues.
Insufficient fermentation may leave residual sugars, leading to a sweet, under-attenuated beer that lacks crispness. Conversely, over-fermenting can strip away desirable esters and result in a thin, overly dry brew. Monitor gravity readings with a hydrometer to confirm when fermentation has stabilized, usually after 1–2 weeks for most ales.
Maintain a consistent temperature within the yeast’s optimal range to avoid stalled or stressed fermentation. Patience is essential; allowing the full recommended time ensures complete conversion of sugars and proper flavor maturation, giving you a well-balanced, professional-quality beer.
Frequently Asked Questions
What is an easy beer brewing kit?
An easy beer brewing kit is a beginner-friendly package that includes all necessary ingredients, equipment, and step-by-step instructions for making beer at home with minimal setup and complexity.
What are the main components of an easy beer brewing kit?
Typically, the kit contains malt extract, hops, yeast, a fermenter, sanitizer, a brewing bag, instructions, and sometimes a bottle filler or caps for creating your first batch.
How much time does it take to brew beer with an easy kit?
Brewing usually takes 2-3 hours for the active steps, followed by 1-2 weeks of fermentation and carbonation before the beer is ready to drink.
Do I need special brewing equipment to start?
An easy kit provides the essential equipment, but you’ll also need a large pot, a thermometer, and basic kitchen utensils you likely already have.
What types of beer can I brew with an easy kit?
Most kits make common beer styles like amber ales, pilsners, wheat beers, or stouts, with some allowing you to customize flavors using included hop varieties.
Is home brewing beer legal in most countries?
Yes, home brewing for personal consumption is legal in many countries, including the US, Canada, EU nations, and Korea, often with limits on batch size.
How long will the beer last after brewing?
Store-bottle brews can stay fresh for 2-3 months, while kegged or refrigerated brews may last 6 months or longer if sealed properly.
Where can I buy an easy beer brewing kit?
Kits are available online from major retailers like Amazon, homebrew specialty stores, and local brewing supply shops worldwide.
Conclusion
The kit’s user‑friendly design makes brewing accessible for beginners while delivering professional‑grade results. Start your brewing journey today and taste the satisfaction of creating your own beer.