How To Make Vanilla Syrup At Home
If you’ve been searching for how to make vanilla syrup at home, you’ve likely found store-bought versions too sugary, expensive, or filled with artificial flavors. You want a simple, real-vanilla alternative that works for coffee, cocktails, or pancakes—without the hassle. You’re in the right place. This method uses just three ingredients and takes under ten minutes, giving you total control over sweetness and quality. Let’s get straight to it.
What You Need to Make Vanilla Syrup at Home
Key ingredients for homemade vanilla syrup
To make vanilla syrup at home, you need just three simple ingredients: granulated white sugar, water, and vanilla. The standard ratio is 1 cup of water to 1 cup of sugar, which creates a classic simple syrup base.
For the vanilla flavor, you have two excellent options: 2-3 teaspoons of pure vanilla extract or 1-2 whole vanilla beans. If using extract, choose pure vanilla extract rather than imitation for the richest, most authentic taste.
For vanilla beans, split them lengthwise to release the tiny seeds, which add beautiful specks and deeper flavor. You can also combine both for an extra-layered taste. For a thicker, richer syrup, use a 2:1 sugar-to-water ratio, ideal for cocktails or drizzling over pancakes.
Avoid using raw or brown sugar unless you want a caramel-like variation, as it changes the flavor profile. These ingredients are pantry staples, making this recipe incredibly accessible for anyone wanting to elevate their coffee, desserts, or cocktails with homemade vanilla syrup.
Essential kitchen tools for simple syrup
Making vanilla syrup at home requires minimal, common kitchen tools. You’ll need a small saucepan to combine the sugar and water over heat. A medium-sized saucepan works well for a standard batch, ensuring the mixture heats evenly without scorching.
A wooden spoon or silicone spatula is essential for stirring until the sugar fully dissolves. For measuring, use liquid measuring cups for water and dry measuring cups for sugar to ensure accuracy.
After dissolving the sugar, a fine-mesh strainer is useful if you used vanilla beans, as it catches any stray pod fragments. A glass jar or bottle with an airtight lid is perfect for storing your finished syrup. A funnel makes transferring the syrup into the storage container neat and easy.
If using vanilla beans, a sharp paring knife is needed to split them lengthwise. No special equipment like a candy thermometer is required, as the syrup doesn’t need to reach a specific temperature—just a gentle simmer. These tools are likely already in your kitchen, making this a truly beginner-friendly project.
Choosing between vanilla extract and vanilla beans
Your choice between vanilla extract and vanilla beans impacts flavor, appearance, and cost. Pure vanilla extract is the most convenient option: it’s readily available, shelf-stable, and requires no prep—just stir it into your cooled syrup. It delivers a consistent, robust vanilla flavor that works perfectly in coffee, cocktails, and baking.
For a more gourmet experience, vanilla beans offer intense, complex flavor with visible vanilla specks that create a visually stunning syrup. To use, split the bean lengthwise, scrape the seeds into the sugar-water mixture, and add the pod for infusion.
Simmer gently, then let it steep for 30 minutes before straining. Vanilla beans are pricier but can be reused (rinse, dry, and store in sugar) for vanilla sugar. For everyday use, extract is faster and more economical. For special occasions or gifting, beans elevate the syrup’s quality and presentation.
Both produce delicious results, so choose based on your time, budget, and desired aesthetic. You can even use half a bean plus a teaspoon of extract for a balanced approach.
How to Make Basic Vanilla Syrup with Extract
Step-by-step instructions for extract-based syrup
To make a basic vanilla syrup using extract, start by combining 1 cup of water and 1 cup of granulated sugar in a medium saucepan. Place the saucepan over medium-high heat and stir occasionally until the sugar fully dissolves and the mixture comes to a gentle boil.
This usually takes about 3-5 minutes. Once boiling, reduce the heat to low and let it simmer for 1-2 minutes to ensure a smooth consistency. Remove the saucepan from the heat and allow the simple syrup to cool for 5 minutes at room temperature.
Then, stir in 2 tablespoons of high-quality vanilla extract (pure or imitation based on preference). Avoid adding the extract while the syrup is still hot, as heat can diminish the vanilla flavor. Pour the finished syrup into a clean, airtight glass bottle or jar using a funnel.
Let it cool completely before sealing. This extract-based method is quick, reliable, and yields a clear syrup perfect for sweetening coffee, cocktails, or desserts without any additional steps.
Ratios of sugar to water for perfect sweetness
The ideal ratio for a basic vanilla syrup is 1:1 sugar to water, which creates a standard simple syrup with balanced sweetness and a light, pourable consistency.
For a richer, more concentrated syrup that adds robust sweetness to beverages, use a 2:1 ratio (e.g., 2 cups sugar to 1 cup water). This thicker syrup requires slightly more heating to dissolve the sugar completely but offers a longer shelf life and intense flavor.
If you prefer a milder sweetness, try a 1:2 ratio (1 cup sugar to 2 cups water) for a thinner syrup that blends easily into cold drinks. Always measure ingredients precisely using dry measuring cups for sugar and liquid cups for water.
Adjust the ratio based on your intended use: a 1:1 syrup works well for everyday coffee or tea, while a 2:1 is ideal for cocktails or sweetening large batches.
Remember that the vanilla extract added later will not significantly alter the sweetness, so focus on the base ratio for perfect results.
Storage tips for extract-based vanilla syrup
Proper storage ensures your homemade vanilla syrup stays fresh and flavorful for weeks. First, always use a clean, airtight glass bottle or jar with a tight-fitting lid. Glass is preferred over plastic because it won’t absorb odors or leach chemicals.
After the syrup has cooled completely, seal it tightly and store it in the refrigerator at a consistent temperature between 35°F and 40°F. Refrigeration is essential since the syrup contains water and sugar, which can spoil if left at room temperature.
When stored correctly, extract-based vanilla syrup typically lasts 2-4 weeks. To extend freshness, consider adding 1 tablespoon of vodka or lemon juice per cup of syrup as a natural preservative, though this may slightly alter the taste.
Always use a clean spoon or pour directly from the bottle to avoid contamination. Before each use, check for signs of spoilage like cloudiness, mold, or off odors. Discard immediately if any appear.
For longer storage, you can freeze the syrup in ice cube trays and thaw individual portions as needed.
How to Make Vanilla Syrup with Vanilla Beans
Splitting and scraping vanilla beans for maximum flavor
To unlock the full potential of your vanilla beans, start by splitting them lengthwise with a sharp paring knife. Lay each bean flat on a cutting board and press down gently along the seam to create a clean split, leaving the ends intact.
Next, use the back of the knife to scrape the tiny black seeds from the inside of each half; these seeds carry concentrated flavor and aroma. Don’t discard the pods—they still hold plenty of essence.
For an even stronger infusion, consider chopping the empty pods into small pieces to increase surface area. This simple technique ensures your syrup captures the rich, complex vanilla taste without waste. Always use fresh, pliable beans for best results—dry beans can be brittle and less flavorful.
By properly preparing your beans, you set the stage for a syrup that rivals any store-bought version.
Simmering method for bean-infused syrup
In a medium saucepan, combine 1 cup of water, 1 cup of granulated sugar, and your prepared vanilla beans (both seeds and pods). Stir gently to dissolve the sugar, then bring the mixture to a gentle simmer over medium heat—avoid a rolling boil, as that can alter the flavor.
Simmer for 10 to 15 minutes, stirring occasionally, until the liquid reduces slightly and becomes fragrant. Keep the heat low enough to prevent excessive evaporation, which could make the syrup too thick.
For a deeper infusion, turn off the heat and let the beans steep for an additional 30 minutes as the syrup cools. This slow extraction draws out the subtle floral and creamy notes.
If you prefer a stronger taste, you can add a second vanilla bean or extend the steeping time. The goal is a balanced sweetness that complements the vanilla without overpowering it.
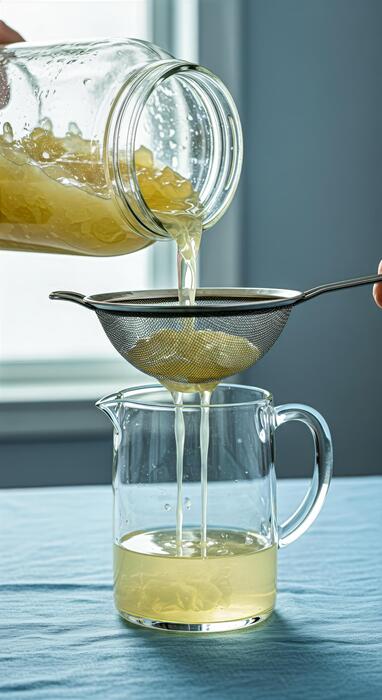
Straining and bottling bean-based syrup
After steeping, place a fine-mesh strainer over a heatproof bowl or liquid measuring cup. Pour the syrup through the strainer to catch all solid bits, including pod pieces and any stray seeds (though you can keep seeds for visual appeal if desired).
For a crystal-clear syrup, line the strainer with cheesecloth or a coffee filter. Let the syrup cool to room temperature before transferring it to a sterilized glass bottle or jar with an airtight lid. Use a funnel to avoid spills.
For longer storage, add 1 tablespoon of vodka or vanilla extract as a preservative—this won’t affect the flavor noticeably. Label the bottle with the date; the syrup will keep in the refrigerator for up to 6 months. Shake gently before each use, as natural separation may occur.
This homemade syrup is perfect for coffee, cocktails, or drizzling over desserts.
Tips for Customizing Your Vanilla Syrup
Adding other flavors like cinnamon or lavender
Elevate your homemade vanilla syrup by infusing complementary flavors. For a cinnamon vanilla syrup, simply add 2-3 cinnamon sticks to the saucepan while simmering your sugar and water. Let them steep for 5-10 minutes after boiling, then remove the sticks before adding vanilla extract.
This creates a warm, spicy undertone perfect for coffee or oatmeal. For a floral lavender vanilla syrup, add 1-2 tablespoons of dried culinary lavender buds during the simmering process. Be cautious not to over-steep, as lavender can become bitter; remove the buds after 5 minutes.
Strain the syrup through a fine-mesh sieve to ensure a smooth texture. Other excellent additions include vanilla bean pods (split and scraped), citrus zest (lemon or orange), or fresh ginger slices. Always adjust steeping times based on intensity—start with less and taste as you go.
These customizations transform a basic syrup into a signature ingredient for cocktails, teas, and desserts, allowing you to experiment with seasonal flavors or create gifts for friends.
Adjusting sweetness with alternative sugars
Tailor your vanilla syrup’s sweetness profile by substituting traditional white sugar with healthier or more flavorful alternatives.
For a less refined option, use honey or maple syrup in a 1:1 ratio by volume, but reduce the water slightly (e.g., 1 cup sweetener to ¾ cup water) since these are already liquid.
Coconut sugar creates a rich, caramel-like syrup with a lower glycemic index; use equal parts and simmer a bit longer to dissolve completely. For a sugar-free version, try erythritol or allulose—these measure like sugar but require a pinch of xanthan gum (¼ teaspoon per cup) to mimic the syrup’s thickness.
Stevia is potent, so start with ¼ teaspoon liquid stevia per cup of water, adjusting to taste. Remember that alternative sugars can alter flavor and texture: honey adds floral notes, while maple syrup brings woodsy depth. Always taste and adjust after cooling, as sweetness may intensify.
These swaps let you control calorie intake or cater to dietary needs without sacrificing the vanilla essence, making your syrup versatile for various recipes.
Making a rich vanilla syrup with more sugar
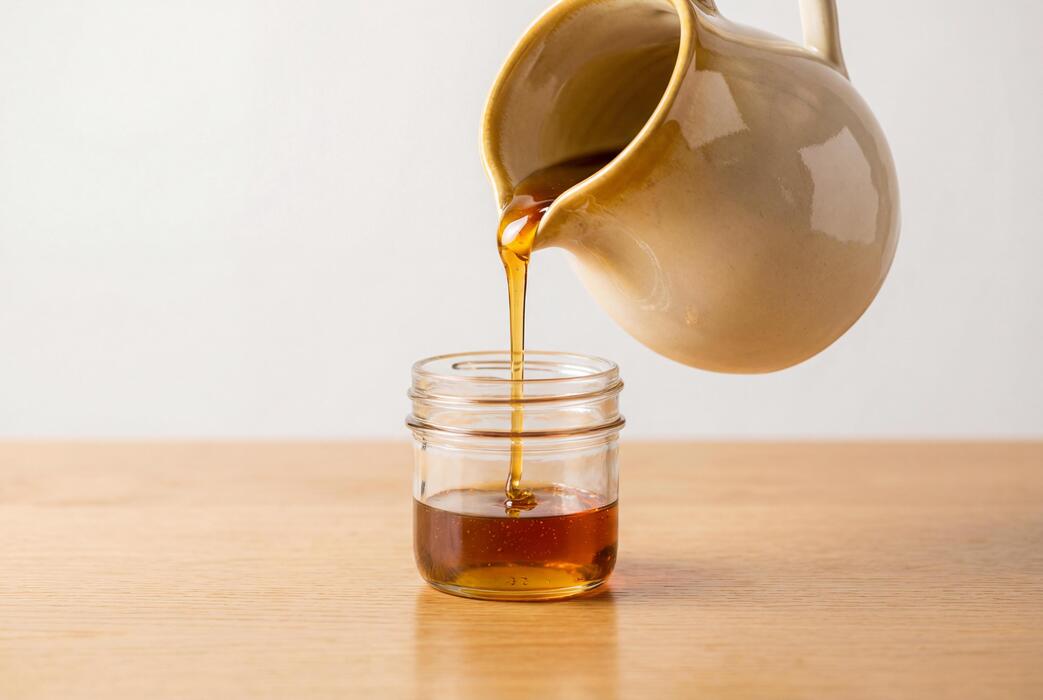
For a decadent, restaurant-style rich vanilla syrup, increase the sugar-to-water ratio to create a thicker, more intensely sweet syrup ideal for specialty drinks. Use a 2:1 ratio of sugar to water (e.g., 2 cups sugar to 1 cup water) instead of the standard 1:1.
This yields a saturated solution that coats the palate, perfect for flavoring iced lattes, milkshakes, or drizzling over pancakes. To make it, bring the water to a boil, then stir in the sugar until fully dissolved—this may take a few extra minutes.
Add double the vanilla extract (2 tablespoons per cup of syrup) to balance the sweetness. For an even more luxurious texture, use vanilla bean paste or scrape a whole vanilla pod into the mixture.
The resulting syrup is viscous and glossy, storing well in the fridge for up to a month. Be mindful that the higher sugar content can crystallize; add a teaspoon of lemon juice or corn syrup to prevent this.
This rich version intensifies vanilla flavor without watering down your beverages, making it a staple for gourmet home baristas.
Best Ways to Store Homemade Vanilla Syrup
Choosing the right bottle or jar
For storing homemade vanilla syrup, glass bottles or jars are your best option because they are non-porous and won’t absorb flavors or odors. Choose a container with a tight-sealing lid—either a swing-top (like a Grolsch bottle) or a screw-cap.
Avoid plastic, as it can degrade over time and leach chemicals, especially if the syrup is stored for more than a few weeks. For everyday use, a 12- to 16-ounce glass bottle with a pour spout is ideal for easy dispensing into coffee or cocktails.
If you plan to gift or store larger batches, use a 32-ounce mason jar and decant into smaller bottles as needed. Before filling, sterilize the bottle by boiling it in water for 10 minutes or running it through a dishwasher on a high-heat cycle.
Allow it to air-dry completely to prevent any moisture from diluting the syrup. A clean, dry container is critical to prevent mold or bacterial growth from the start.
How long vanilla syrup lasts in the fridge
Homemade vanilla syrup, when stored properly in an airtight container in the refrigerator, will typically last 2 to 4 weeks. The high sugar content acts as a natural preservative, but because it lacks commercial preservatives, it won’t stay fresh indefinitely.
For best quality, use within 2 weeks for optimal flavor and texture. If you want to extend its shelf life, you can increase the sugar ratio (use a 2:1 sugar-to-water ratio instead of 1:1) to create a richer syrup that lasts up to 6 weeks.
Another option is to add 1 tablespoon of vodka or vanilla extract per cup of syrup—the alcohol helps inhibit microbial growth without altering the taste. Always label your container with the date you made it, and never leave the syrup at room temperature for more than 2 hours.
If you notice any cloudiness, sediment, or off-smells, discard it immediately, even if it’s within the time frame.
Signs your syrup has gone bad
Even with proper refrigeration, homemade vanilla syrup can spoil. The first sign is visual changes: look for cloudiness, floating particles, or a layer of mold on the surface—usually green, white, or black. If the syrup appears cloudy when it was clear when made, it’s likely contaminated.
Next, smell is a key indicator: a fresh vanilla syrup has a sweet, aromatic scent. If you detect any sour, yeasty, or fermented odor, it means bacteria or yeast have started to grow, and the syrup should be discarded immediately.
Texture changes are also a red flag—if the syrup becomes sticky, stringy, or develops a slimy film, it’s no longer safe to use. Finally, taste is a last resort: if you see and smell nothing wrong but the flavor is off (e.g., slightly alcoholic or acidic), throw it out.
To prevent spoilage, always use clean utensils and avoid dipping fingers or dirty spoons into the syrup. When in doubt, remember: when in doubt, throw it out.
How to Use Vanilla Syrup in Drinks and Desserts
Adding to coffee, lattes, and iced coffee
Elevate your morning brew by substituting vanilla syrup for plain sugar. For a hot latte, add 1 to 2 tablespoons of your homemade syrup directly into the espresso before adding steamed milk—this ensures even sweetness.
In iced coffee, the syrup dissolves instantly, so simply stir it into cold brew or chilled coffee. For a creamy iced latte, combine 2 tablespoons of syrup with milk and ice, then top with espresso.
The syrup also enhances mochas and cappuccinos; try pumpkin spice or caramel syrups as a flavor twist. To avoid overpowering, start with a smaller amount and adjust to taste.
Store your syrup in the fridge for up to a month, and shake before each use as natural vanilla sediment may settle. This simple addition transforms everyday coffee into a café-quality treat without artificial flavors.
Using in cocktails like vanilla old fashioned
Homemade vanilla syrup brings a rich, aromatic sweetness to cocktails, especially the classic Old Fashioned. To make a Vanilla Old Fashioned, muddle 1 teaspoon of syrup with 2 dashes of Angostura bitters and a twist of orange peel.
Add 2 oz of bourbon or rye whiskey, stir over ice, and strain into a rocks glass with a large ice cube. The syrup’s subtle vanilla notes complement the whiskey’s caramel and spice, creating a smoother, more complex sip.
It also works beautifully in vanilla martinis—shake 1.5 oz vodka, 1 oz vanilla syrup, and 0.5 oz lemon juice with ice, then strain. For a refreshing summer cocktail, mix syrup with lemonade and sparkling water for a non-alcoholic spritzer.
Always use real vanilla extract in your syrup for the best flavor. Experiment with ratios: start with 0.5 oz per drink and adjust to your sweetness preference.
Drizzling over pancakes, ice cream, and cakes
Transform simple desserts into gourmet treats with a drizzle of homemade vanilla syrup. For pancakes or waffles, warm 2 to 3 tablespoons in the microwave for 15 seconds, then pour over the stack—it seeps into the nooks for even sweetness.
On ice cream, the syrup creates a silky sauce that hardens slightly on cold scoops; try vanilla bean syrup over chocolate or strawberry flavors for a classic pairing. For cakes, brush syrup onto cooled layers before frosting to add moisture and vanilla depth—especially effective for sponge or pound cakes.
You can also mix syrup into whipped cream or frosting for extra flavor. For a quick dessert, drizzle over fresh berries or grilled fruit with a dollop of yogurt.
The syrup keeps well in a sealed jar in the fridge for up to three weeks, so you can always have a versatile sweetener on hand for last-minute cravings.
Common Mistakes When Making Vanilla Syrup
Overheating the sugar mixture
One of the most frequent missteps is boiling the sugar and water beyond a gentle simmer. High heat can cause the sugar to caramelize, introducing a burnt, bitter flavor that masks the delicate vanilla.
To avoid this, heat the mixture only until the sugar fully dissolves, which typically happens just before it reaches a boil. Use medium-low heat and stir occasionally. Once the liquid is clear and no granules remain, remove it from the heat immediately.
If you see the mixture turning golden or smelling like caramel, you’ve gone too far. For consistent results, use a candy thermometer and stop heating at 240°F (115°C). Allowing the syrup to cool slowly at room temperature also prevents unwanted crystallization.
Remember, the goal is a sweet, clear base that lets the vanilla shine, not a cooked sugar syrup. Overheating not only ruins the taste but can also make the syrup thick and sticky, reducing its versatility in drinks and desserts.
Using low-quality vanilla extract
The essence of your syrup hinges on the vanilla’s quality, so never substitute imitation vanilla or cheap extracts that often have a harsh, artificial aftertaste. These products rely on synthetic vanillin, which lacks the complex, floral notes of real vanilla.
Instead, invest in pure vanilla extract or, for an even richer flavor, scrape the seeds from a whole vanilla bean. If using extract, choose one with visible vanilla specks and a deep, aromatic scent.
For a budget-friendly yet effective option, make your own extract by steeping vanilla beans in vodka for a few weeks. When adding extract to your syrup, do so after removing it from heat to preserve its volatile oils.
A good rule is 1 tablespoon of pure extract per cup of syrup, but adjust to taste. High-quality vanilla elevates the syrup from a simple sweetener to a gourmet ingredient, enhancing coffees, cocktails, and baked goods with a genuine, nuanced flavor profile.
Not sterilizing your storage container
Skipping sterilization invites spoilage, as residual bacteria or mold can quickly turn your syrup cloudy, fermented, or unsafe. Always wash your bottle or jar with hot, soapy water and rinse thoroughly.
For proper sterilization, submerge the container and lid in boiling water for 10 minutes, or run them through a dishwasher on a sanitize cycle. Allow them to air dry completely on a clean rack.
Pour the cooled syrup into the sterile container using a funnel to avoid contamination from your hands. Seal tightly and refrigerate immediately. Even with sterilization, homemade vanilla syrup lasts only about 2-4 weeks in the fridge, so label the container with the date.
If you notice any off-smells, mold, or cloudiness, discard the batch. Taking this simple step ensures your syrup stays fresh and safe, ready to enhance your beverages without any unwanted surprises. A clean container is the foundation of a successful homemade syrup.
Frequently Asked Questions
What is the basic recipe for homemade vanilla syrup?
Combine 1 cup water, 1 cup granulated sugar, and 1 tablespoon vanilla extract in a saucepan. Heat over medium, stirring until sugar dissolves, then simmer for 2-3 minutes. Cool before using.
Can I use a vanilla bean instead of extract?
Yes, split one vanilla bean lengthwise and scrape the seeds into the sugar-water mixture. Simmer with the pod for 5-10 minutes, then strain out the pod pieces. This gives a richer, more complex flavor.
How do I make a sugar-free vanilla syrup?
Replace granulated sugar with an equal amount of a 1:1 granulated sweetener like erythritol or allulose. Follow the same heating and stirring process, but note that some sweeteners may crystallize when cooled.
How should I store homemade vanilla syrup and how long does it last?
Store in a sealed glass jar or bottle in the refrigerator. It will keep for 1-2 months, but always check for mold or off smells before use.
Can I adjust the sweetness or consistency of the syrup?
Yes, adjust the sugar-to-water ratio. For a thinner syrup, use 3/4 cup sugar per cup of water; for a thicker, richer syrup, use 1.5 cups sugar. You can also add a pinch of salt to balance sweetness.
What are common uses for homemade vanilla syrup?
It’s perfect for sweetening coffee, lattes, iced tea, cocktails, lemonade, or drizzling over pancakes, waffles, and ice cream. It can also be used in baking to add moisture and vanilla flavor.
Why did my vanilla syrup crystallize after cooling?
Crystallization usually happens if too much sugar is used or if the syrup wasn’t stirred enough during heating. To fix, gently reheat with a splash of water and stir until dissolved, then cool again.
Can I add other flavors to my vanilla syrup?
Absolutely. Infuse the syrup with cinnamon sticks, lavender buds, or citrus zest while simmering. Strain out solids before storing for a custom flavored vanilla syrup.
Conclusion
Making vanilla syrup at home is simple, cost-effective, and allows you to control ingredients, avoiding artificial additives. By combining equal parts sugar and water with real vanilla extract or a split bean, you create a rich, versatile sweetener for coffee, cocktails, or desserts. Store it in the fridge for up to a month. Ditch the store-bought bottles and try this easy recipe today—your taste buds will thank you for the homemade touch.