Craft A Brew Cider Kit
Ready to make your own delicious cider at home without the hassle? Whether you’re a beginner or a seasoned home brewer, this kit gives you everything you need—no extra gear or guesswork. In this guide, we’ll walk you through exactly how to use the Craft a Brew cider kit, so you can enjoy fresh, homemade cider faster than you thought possible.
What Is a Craft a Brew Cider Kit?
Components of the Craft a Brew Cider Kit
The Craft a Brew Cider Kit includes all the essential tools and ingredients needed to make fresh, homemade cider in just a few weeks. At its core, the kit features a concentrated cider base made from real apple juice, which simplifies the fermentation process without sacrificing flavor.
It also comes with brewer’s yeast specifically selected for cider production, ensuring a clean fermentation and balanced alcohol content. You’ll receive sanitizing tablets to prepare your equipment safely and prevent contamination. A plastic fermenter with airlock allows gases to escape while keeping unwanted microbes out during fermentation.
The kit includes a siphon tube and bottling wand for easy transfer, along with bottles and caps for storage. Clear, step-by-step instructions guide beginners through each stage. With no specialized skills required, this kit makes cider crafting accessible, consistent, and enjoyable for first-time and casual brewers alike.
How the Kit Compares to Other Cider Making Methods
Compared to traditional cider making, the Craft a Brew Cider Kit offers a faster, more reliable, and beginner-friendly experience. Traditional methods require sourcing fresh apples, juicing, and careful yeast management, which can be time-consuming and inconsistent.
In contrast, this kit uses a pre-balanced juice concentrate, eliminating guesswork and reducing preparation time. Unlike wild fermentation, which risks off-flavors or spoilage, the kit provides laboratory-tested yeast for predictable results. It’s also more convenient than all-grain or scratch brewing, which demands specialized equipment and sanitation knowledge.
The Craft a Brew Kit streamlines the process while maintaining quality, making it ideal for home enthusiasts without access to orchards or professional tools. It produces consistent, drinkable cider in 2–4 weeks, versus months for traditional methods.
For those seeking flavor control and simplicity, this kit outperforms DIY approaches, offering a reproducible foundation that can later be customized with additives like spices or extra fruit.
Types of Ciders You Can Make
With the Craft a Brew Cider Kit, you can create a variety of cider styles by customizing the base recipe. The standard kit produces a crisp, semi-sweet traditional apple cider, but small modifications open up broader possibilities.
For a dry cider, extend fermentation time to let the yeast consume more sugar. Adding specialty ingredients like cinnamon, ginger, or citrus zest during secondary fermentation creates unique seasonal flavors. After the initial brew, you can blend in fruit purees such as raspberry, pear, or blackberry to make fruit-infused ciders.
Using different yeast strains—available separately—can yield sparkling, farmhouse, or hazy ciders with distinct aromas and mouthfeels. For stronger versions, include extra fermentable sugar to boost alcohol content safely. The kit is also a great starting point for hard cider cocktails or low-alcohol refreshers when diluted and carbonated.
Whether you prefer bold, tart profiles or smooth, sweet finishes, this kit offers a versatile foundation for experimentation while ensuring consistent results every time.
How to Use a Craft a Brew Cider Kit
Step-by-Step Setup Instructions
To begin using your Craft a Brew Cider Kit, start by thoroughly sanitizing all equipment, including the fermenter, airlock, stirring spoon, and stopper, to prevent contamination. Open the cider concentrate pouch and pour it into the sanitized fermenter.
Add 4 liters of warm water (not boiling) to help dissolve the concentrate completely, then top up with cold water to reach the 23-liter mark. Stir the mixture gently but thoroughly. Sprinkle the included yeast packet evenly over the surface—do not stir after adding.
Seal the fermenter with the lid and insert the airlock filled with water. Place the fermenter in a dark, temperature-stable area between 18–24°C. Proper sanitation and accurate water temperature are critical for a clean fermentation. Within 12–36 hours, you should see bubbles in the airlock, indicating fermentation has started.
Fermentation Process Explained
Once fermentation begins, the yeast converts sugars from the concentrate into alcohol and carbon dioxide. This process typically takes 7 to 14 days, depending on room temperature and yeast activity. Keep the fermenter sealed and undisturbed in a consistent environment—avoid temperature swings which can stall fermentation.
Check activity by observing the airlock; when bubbling slows to less than one bubble per minute, fermentation is likely complete. Use a hydrometer to confirm: a stable reading of 0.990–1.000 over two consecutive days indicates readiness. Do not open the fermenter unnecessarily, as this increases contamination risk.
After fermentation finishes, the cider will clear as yeast settles. This clarity is natural and improves flavor. Patience is key—rushing this stage can result in off-flavors or incomplete fermentation. Once confirmed, proceed to bottling for best results.
Bottling and Carbonation Tips
Before bottling, sanitize all bottles, caps, and siphon equipment. Transfer the cider from the fermenter to a bottling bucket, avoiding the sediment at the bottom. Add priming sugar (usually ½ cup corn sugar boiled in 2 cups water) to the bottling bucket to ensure consistent carbonation.
Gently stir to mix without introducing oxygen. Use a siphon and bottling wand to fill each bottle, leaving 2.5 cm of headspace. Cap bottles securely. Store them upright in a warm, dark place (18–22°C) for 10–14 days to carbonate.
After this period, chill one bottle and test it—proper carbonation means lively bubbles and crisp taste. If flat, wait a few more days. Once carbonated, store bottles in a cool, dark place. Refrigerate before serving for best flavor. Enjoy your homemade cider within 6 months for peak freshness.
Ingredients Included and What to Add
Review of Pre-Measured Ingredients
The craft a brew cider kit comes with pre-measured ingredients designed to simplify the brewing process for beginners and ensure consistency for experienced brewers. Typically, this includes a concentrated cider base, yeast sachet, and sometimes fining agents to clarify the final product.
These components are precisely calibrated to yield a balanced, crisp cider with minimal effort. Before starting, inspect each component for expiration dates and packaging integrity to ensure quality fermentation.
The concentrated base contains the essential apple must and natural sugars needed for fermentation, while the included yeast strain is selected for its ability to produce clean, fruity notes without overpowering the cider’s character. Follow the kit instructions closely to maintain the intended flavor profile.
Understanding what’s included helps you decide what additional ingredients—like extra sugar or fruit—may enhance your cider without disrupting the fermentation balance.
Choosing the Right Sugar or Sweetener
To achieve your desired alcohol content and sweetness, selecting the right sugar or sweetener is crucial when using a craft a brew cider kit. While the kit provides a base with some fermentable sugars, adding extra sugar can boost alcohol levels and body.
Plain white granulated sugar is the most common and fermentable option, ensuring a clean fermentation. For more complexity, consider brown sugar, honey, or maple syrup, which contribute unique flavors but may alter yeast performance.
Avoid artificial sweeteners unless used post-fermentation for sweetness, as they don’t ferment and can hinder yeast activity. Dissolve any added sugar completely in warm water before mixing to prevent clumping and ensure even fermentation. Monitor specific gravity with a hydrometer to track sugar conversion and avoid over-fermentation or off-flavors.
The right sweetener choice enhances your cider’s profile while maintaining fermentation health.
Adding Fruits and Flavors for Customization
Customizing your cider with fresh fruits, juices, or natural flavorings allows for creative expression and unique taste profiles. After primary fermentation slows, typically around day 5–7, add pasteurized fruit juice or sanitized fresh fruit like apples, cherries, or berries to introduce complexity.
Freezing and thawing fruit helps break down cell walls, releasing more flavor and juice. For citrus notes, consider zested lemon or orange peel—use sparingly to avoid bitterness. Spices such as cinnamon or cloves can be added in small amounts during secondary fermentation for seasonal variations.
Always sanitize additions thoroughly to prevent contamination. Straining the cider after flavor infusion ensures a smooth final product. These enhancements let you tailor the cider to your preference, transforming the basic kit into a personalized, artisanal beverage with minimal risk to fermentation success.
Fermentation Timeline and Conditions
Ideal Temperature for Fermenting Cider
Maintaining the ideal fermentation temperature is crucial when using a craft brew cider kit. For most cider kits, the optimal range is between 60°F and 70°F (15°C–21°C). Temperatures below this range can cause sluggish or stalled fermentation, while higher temperatures may produce off-flavors like sulfur or excessive alcohol heat.
Use a fermentation chamber or temperature-controlled space to maintain consistency, especially in fluctuating environments. Avoid placing your fermenter near heat sources or in direct sunlight. If fermenting in a cooler area, consider using a brewing heater belt to keep temps stable.
Consistent temperature ensures healthy yeast activity, leading to a clean, balanced cider. Always refer to your kit’s instructions, as some specialty yeasts may have unique temperature needs. Monitoring with a fermentation thermometer strip or digital probe helps prevent issues and supports reliable results.
How Long Fermentation Takes
Fermentation time for a craft brew cider kit typically ranges from 1 to 2 weeks, depending on temperature, yeast strain, and sugar content. Primary fermentation usually finishes within 5–7 days, during which vigorous bubbling in the airlock indicates active yeast converting sugars into alcohol.
After this phase, the cider should sit undisturbed for a few more days to allow yeast to settle and complete secondary fermentation. Some kits may recommend a full two-week fermentation for optimal clarity and flavor development. Avoid rushing the process—patience ensures quality.
Factors like cooler temperatures or higher starting gravity can extend fermentation. Use a hydrometer to confirm completion by checking specific gravity readings two days apart; if they’re stable and near 1.000, fermentation is likely done. Never bottle too early, as residual sugars can cause overcarbonation or bottle bombs.
Signs Your Cider Is Ready to Bottle
Knowing when your cider is ready to bottle prevents spoilage and ensures a safe, enjoyable product. The first clear sign is the absence of airlock bubbling for at least 48 hours, indicating fermentation has slowed or stopped.
Confirm this with a hydrometer reading—a stable specific gravity between 0.990 and 1.010 over two consecutive days confirms fermentation completion. Additionally, the cider should appear clearer than at the start, with yeast and sediment settled at the bottom. Avoid disturbing the sediment during transfer.
If the cider still tastes sweet or smells overly yeasty, it may need more time. Once these signs align, your cider is ready for bottling or bulk aging. Use sanitized equipment to siphon the cider into bottles, leaving sediment behind.
Proper timing ensures consistent carbonation, safety, and flavor in your finished craft cider.
Troubleshooting Common Issues
Fixing Off Flavors in Cider
Off flavors in cider often stem from poor yeast health, contamination, or improper fermentation temperatures. Monitor fermentation temperature closely, as temperatures that are too high can produce fusel alcohols and solvent-like aromas, while too low can stall fermentation and leave unwanted sweetness.
If your cider tastes sour or vinegary, it may be infected with acetobacter—ensure all equipment is sanitized with a no-rinse sanitizer before use. Use fresh, high-quality yeast and consider repitching with a neutral strain like SafCider or EC-1118 if off-flavors persist.
For musty or barnyard notes, check for wild yeast or bacteria; these can be avoided by maintaining strict sanitation. If the cider tastes overly bitter or astringent, it could be from over-extraction of tannins—limit fruit contact time during fermentation.
Aging the cider can mellow harsh flavors, and using fining agents like gelatin or isinglass can help clarify and smooth the final product.
Dealing with Slow or Stalled Fermentation
A slow or stalled fermentation is a common issue when crafting brew cider kits, often due to low temperatures, nutrient deficiency, or old yeast. Ensure the fermentation environment stays between 65–72°F (18–22°C), as colder temps can put yeast into dormancy.
If fermentation has stalled, gently stir the must to rouse the yeast and check the specific gravity with a hydrometer to confirm activity has stopped. Add yeast nutrient if not already included in the kit, as apple juice lacks essential nitrogen for robust fermentation.
Consider making a yeast starter with a more vigorous strain like Lalvin EC-1118 to repitch into the cider. Rehydrate dry yeast properly in warm water before adding. Avoid drastic temperature swings and keep the fermenter sealed with a functioning airlock.
Patience is key—some ciders ferment slowly, especially in cooler conditions, but intervention may be needed if gravity remains unchanged for over a week.
Preventing Contamination and Spoilage
Preventing contamination is critical when crafting cider from a kit, as spoilage organisms can ruin an entire batch. Sanitize all equipment thoroughly before and after use—this includes fermenters, airlocks, siphons, and bottles. Use a food-grade, no-rinse sanitizer to eliminate bacteria and wild yeast.
Always seal your fermenter with an airlock to allow CO2 to escape while keeping oxygen and microbes out. Avoid opening the fermenter unnecessarily, especially post-fermentation, to reduce exposure. Use fresh, properly stored ingredients and check expiration dates on yeast and additives.
If using additional fruit or flavorings, freeze them first to kill potential microbes. Maintain clean workspaces and wash hands before handling equipment. If you detect mold, a sharp vinegar smell, or unusual cloudiness, the batch may be compromised—discard it to avoid health risks.
Consistent sanitation habits ensure a clean, safe, and delicious cider every time.
Best Practices for Clear, Crisp Cider
Tips for Achieving Clear Cider
To achieve a clear, visually appealing cider, start by maintaining sanitary conditions throughout the brewing process—contamination can lead to haze and off-flavors. Choose high-quality ingredients, especially fresh apple juice with minimal pulp, as suspended solids contribute to cloudiness.
After fermentation, allow the cider to rest for an extended period, giving yeast and particles time to settle naturally. Use proper fermentation temperatures; too warm can stress yeast and create byproducts that cloud the cider. Rack carefully between vessels, leaving sediment behind without disturbing the lees.
Consider using gelatin or isinglass finings during the final stages to help bind and drop haze-forming particles. Avoid over-stirring or agitating the cider post-fermentation. Finally, patience is essential—rushing the process often sacrifices clarity.
With attention to detail and consistent technique, even beginner brewers can produce brilliantly clear cider using a craft brew kit.
When to Use Finings or Filtering
Finings and filtering are powerful tools for clarifying cider, but knowing when to apply them ensures optimal results. Add finings like potassium metabisulfite with gelatin or isinglass 3–5 days before bottling or kegging, allowing time for particles to bind and settle.
Finings work best in a stable, fully fermented cider—avoid using them during active fermentation, as CO₂ can disrupt their effectiveness. For homebrewers using a craft brew cider kit, finings are often sufficient for clarity without extra equipment.
However, if a crystal-clear finish is desired, filtering through a plate or membrane filter post-fermentation can remove remaining haze. Be cautious: filtering may strip subtle flavors or aromas, so use cold-stabilized cider and sanitize all filter components thoroughly.
Ultimately, finings are ideal for most home setups, while filtering suits advanced brewers seeking professional-grade clarity.
Cold Crashing for Better Results
Cold crashing is a simple yet highly effective method to improve cider clarity by encouraging yeast and proteins to flocculate and settle. After fermentation is complete and any finings have done their work, gradually cool the cider to near-freezing temperatures (32–40°F or 0–4°C) for 24–72 hours.
This temperature drop causes particles to clump together and drop to the bottom, making racking easier and cleaner. Always cold crash in a sealed, sanitized fermenter to prevent oxidation and contamination. For best results with a craft brew cider kit, perform cold crashing just before bottling or kegging.
It enhances not only clarity but also flavor stability by reducing potential haze later. Avoid rapid temperature changes, which can shock the cider. When combined with finings, cold crashing dramatically improves brightness. This technique is low-cost, easy to implement, and highly recommended for brewers seeking crisp, professional-looking results.
Serving, Storing, and Sharing Your Cider
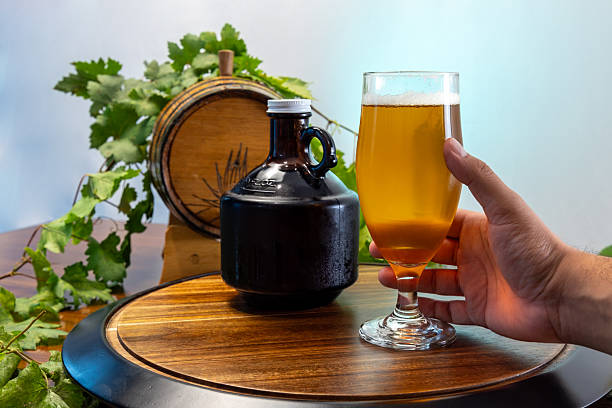
How to Serve Homemade Cider
To serve your homemade cider at its best, chill it thoroughly before opening—ideally for at least 24 hours in the refrigerator. Cold temperatures enhance flavor clarity and reduce foam when pouring. Use clean, chilled glasses to preserve carbonation and aroma.
For still ciders, a wide-mouthed wine glass works well to release subtle notes, while sparkling ciders shine in fluted glasses or pint mugs. Pour slowly and at an angle to minimize excessive fizz, then straighten the glass for a full pour.
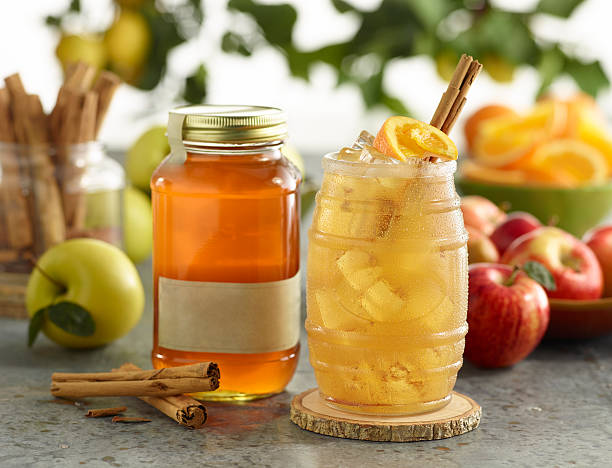
If your cider has sediment, avoid shaking the bottle and pour steadily, leaving the last ounce behind. For extra appeal, consider garnishes like apple slices, cinnamon sticks, or citrus twists, especially with spiced or fruit-infused batches.
Serving temperature matters—light ciders taste best at 40–45°F (4–7°C), while fuller-bodied versions can be slightly warmer. Always taste before serving to ensure balance and freshness, adjusting presentation to match your cider’s character.
Storage Tips for Longevity
Proper storage is essential to maintain flavor and prevent spoilage in your craft cider. Store bottled cider upright in a cool, dark place with stable temperatures around 50–55°F (10–13°C)—ideal conditions mimic a cellar. Avoid sunlight and heat fluctuations, which degrade quality and accelerate oxidation.
If your cider is carbonated, ensure bottles are sealed tightly to preserve carbonation and prevent leaks. For long-term aging (6+ months), monitor corks or caps for integrity and consider using oxygen-absorbing caps. Unopened bottles of still cider can last 1–2 years, while sparkling versions are best consumed within 9–12 months.
Refrigerate after opening and consume within 3–5 days to retain taste. Avoid freezing, as it can alter texture and burst containers. Label each batch with the brew date to track aging progress and identify peak flavor windows.
With careful storage, your craft cider can develop complex notes over time while staying safe and delicious.
Creative Ways to Share or Gift Your Cider
Sharing your craft cider is a rewarding way to celebrate your brewing success. Personalize your bottles with custom labels that include the cider name, brew date, ABV, and a heartfelt note—this adds charm and professionalism.
Package bottles in recycled or decorative gift boxes, possibly paired with cider-friendly treats like artisanal cheese, spiced nuts, or dark chocolate. For gatherings, create a mini tasting flight with sample-sized bottles of different batches or flavors, complete with tasting notes cards.
Host a ‘Cider & Sip’ night where friends bring food pairings and compare notes. You can also donate a batch to community events or enter homebrew competitions to gain feedback. For holidays, assemble seasonal gift baskets featuring spiced cider, cinnamon sticks, and mugs.
Sharing your cider fosters connection and encourages others to explore the art of fermentation, turning your hobby into a meaningful tradition.
Frequently Asked Questions
What is a Craft a Brew cider kit?
A Craft a Brew cider kit is a homebrewing kit that allows you to make your own cider at home using concentrated apple juice and added flavorings. It typically includes all necessary ingredients and instructions for fermentation and bottling.
How do I use a Craft a Brew cider kit?
To use the kit, mix the concentrated juice with water, add the included yeast, and ferment for 7–10 days. After fermentation, bottle the cider and let it condition for another 1–2 weeks before drinking.
How long does it take to make cider with this kit?
The total time to make cider with a Craft a Brew kit is typically 2 to 4 weeks, including fermentation and bottle conditioning. Some kits offer fast-start options that can be ready in as little as 14 days.
Do I need additional equipment to use the kit?
Yes, you’ll need basic homebrewing equipment like a fermentation bucket or carboy, airlock, sanitizer, bottles, and a bottling wand. These are not included in the kit but are reusable for future batches.
Can I customize the flavor of my cider?
Yes, you can customize your cider by adding fruits, spices, or extra sugar during fermentation. Many homebrewers experiment with ingredients like cinnamon, ginger, or berries to create unique flavor profiles.
Is the Craft a Brew cider kit suitable for beginners?
Yes, the Craft a Brew cider kit is designed for beginners with clear instructions and reliable results. It’s a great introduction to homebrewing with minimal setup and effort.
Conclusion
Crafting cider with the Brew Cider Kit is simple, rewarding, and perfect for beginners and seasoned enthusiasts alike. With minimal equipment and easy-to-follow instructions, you can create delicious, personalized cider at home. The kit offers consistency, quality, and the joy of homemade fermentation. Whether you’re experimenting with flavors or enjoying a crisp classic, the Brew Cider Kit makes it accessible and fun. Start your cider-making journey today and savor the satisfaction of every homemade sip.