How To Set Clock On Cuisinart Air Fryer
In just a few clicks you’ll learn which buttons to press, how to adjust hours and minutes, and how to confirm the setting. This quick guide answers the exact question you asked, giving you a clear, hassle‑free solution without any guesswork. Your fryer’s clock will be perfectly synced, ready for any recipe today.
Understanding Your Cuisinart Air Fryer Model
Identifying the model number
Start by locating the model number on your Cuisinart air fryer; it is usually printed on a metal plate inside the lid, on the back panel, or on the bottom of the appliance.
Write down the exact series and digits (e.g., CFX‑200, TOA‑60) because the clock‑setting procedure can vary between models. Checking the manual ensures you follow the correct button sequence and avoid resetting cooking presets unintentionally.
If the model number is missing, look for a QR code or barcode that can be scanned for a digital copy of the guide. Knowing the precise model eliminates guesswork and speeds up the clock‑adjustment process, especially for newer versions that incorporate touch‑screen menus.
Additionally, verify whether your unit features a reset button near the control panel; pressing it briefly may reveal a hidden clock‑setting mode. Some models also display the model code on the LCD screen during startup, which can be cross‑referenced with online tutorials for visual guidance.
Differences between digital and analog displays
Understanding whether your Cuisinart air fryer uses a digital panel or an analog timer knob is crucial for setting the clock correctly.
Digital models typically feature an LCD screen with icons and a ‘Clock’ or ‘Timer’ button; you press and hold this button for a few seconds until the time digits flash, then use the ‘+’ and ‘‑’ keys to adjust hours and minutes, confirming with the ‘Start’ or ‘OK’ button.
In contrast, analog‑type units rely on a rotary dial that doubles as a timer; to set the clock you turn the knob to the desired hour position while the display shows a blinking colon, then fine‑tune minutes by rotating the dial in short increments.
Some hybrid models combine a small digital read‑out with a mechanical knob, requiring you to first select the ‘Clock’ mode via the button and then adjust with the dial. Recognizing these differences prevents accidental changes to cooking presets and ensures the clock reflects the correct time for scheduling meals.
Features that include a built‑in clock
Not every Cuisinart air fryer comes with a built‑in clock, but several premium lines do, offering convenience for timed cooking and meal planning.
Models such as the CFX‑200, CFX‑300, and the TOA‑60 integrate a 24‑hour digital clock that can be accessed via the ‘Clock’ icon on the main menu; once activated, the display shows hours and minutes, and you can set it by holding the ‘Clock’ button while the digits blink.
Some units also provide a ‘Auto‑Start’ feature, allowing you to program the fryer to begin heating at a specific time, which relies on the internal clock being correctly set.
To verify if your appliance includes this capability, consult the specification sheet or look for a small clock symbol on the control panel.
When present, the clock can be synchronized with daylight‑saving changes by simply adjusting the hour forward or backward using the same button sequence, ensuring accurate timing for all recipes.
Why Setting the Clock Matters
Impact on cooking timers
Setting the clock on your Cuisinart air fryer is the first step to reliable cooking timers. When the internal time is correct, preset programs that rely on countdowns start and finish exactly when you expect, preventing under‑ or over‑cooking.
For example, if you schedule a 20‑minute chicken batch and the clock is five minutes fast, the fryer will shut off prematurely, leaving the meat raw. Conversely, a slow clock can cause the appliance to run longer, wasting energy and potentially burning food.
By synchronizing the clock via the digital display—press the “Clock” button, use the “+” and “–” keys to adjust hours and minutes, then confirm with “Set”—you create a trustworthy baseline for all timer‑based functions.
This consistency also helps when you use multiple recipes in a row, as each step builds on the accurate start time, ensuring repeatable results and reducing the need for manual time checks.
Energy efficiency benefits
Accurate clock settings directly influence the energy efficiency of a Cuisinart air fryer. When the internal time aligns with real‑world time, the appliance can execute its programmed cycles without unnecessary extensions.
For instance, many models offer a “Keep Warm” function that activates after the main cooking period; if the clock is off, the fryer may keep the food warm for longer than intended, consuming extra electricity.
By setting the clock correctly—press the “Clock” icon, adjust using the “+” and “–” buttons, and lock in the time—you enable the device to calculate precise start‑up and shut‑down moments, minimizing idle run time.
This precision also allows you to schedule cooking during off‑peak hours, taking advantage of lower utility rates. Over time, these small savings add up, reducing your household’s overall power draw while still delivering the crisp, evenly cooked results you expect from an air‑fried meal.
Synchronizing with recipe apps
Modern cooking often involves digital recipe apps that send timed alerts or automatically start appliances via smart plugs. To make this workflow seamless with a Cuisinart air fryer, the internal clock must be synchronized with the app’s schedule.
Begin by setting the fryer’s clock to the exact hour and minute displayed on your smartphone—press the “Clock” button, use the “+” and “–” keys, and confirm with “Set”.
Once the times match, you can program the app to trigger a 15‑minute preheat or a 25‑minute roast at a specific clock time, and the fryer will respond without lag.
This alignment eliminates the need to manually start the device, reduces the chance of missed steps, and ensures that temperature ramps occur exactly when the recipe expects them.
Additionally, consistent timing helps you log cooking data for future tweaks, making it easier to replicate successful dishes and share precise instructions with fellow home chefs.
Locating the Clock Controls
Finding the clock icon on the control panel
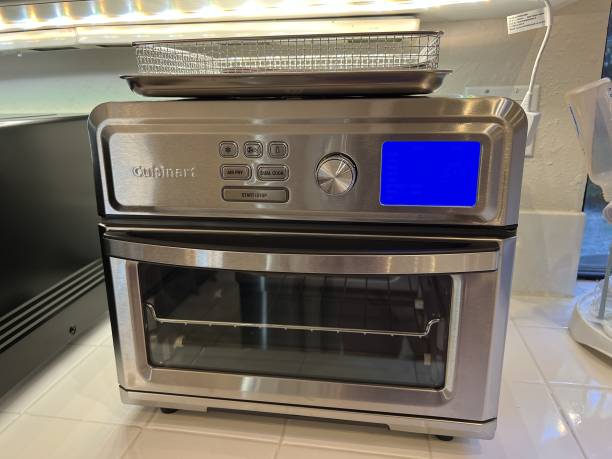
Start by unplugging the Cuisinart air fryer for safety, then plug it back in and allow the display to initialize. Look at the front panel; most models place a small clock symbol near the digital timer or temperature readout.
If you see a tiny watch‑shaped icon, that is the clock control. On models without a visible icon, press the “Timer” or “Clock” button—often labeled with a clock face—until the time digits begin to blink. Bold key points: locate the clock icon, press the appropriate button, watch the digits flash.
Once the digits are flashing, you can adjust hours and minutes using the “+” and “–” buttons or the touchscreen arrows. Confirm the setting by pressing “Start” or “OK”. The clock will now stay synchronized even after the unit powers off, giving you accurate cooking timers for every recipe.
Using the touchscreen vs. button interface
Determine whether your Cuisinart air fryer uses a capacitive touchscreen or a traditional button layout. Touchscreen models let you tap the clock icon directly, then swipe up or down to change hours and minutes, which feels intuitive and fast.
Button‑based units require you to press the “Clock” or “Timer” key, then use the “+” and “–” buttons to increment each digit. Bold key points: touchscreen = tap and swipe; buttons = press and hold for rapid changes.
For touchscreens, a long‑press on the hour field speeds up adjustment, while a quick tap moves to the next field. On button models, holding the “+” button for three seconds will auto‑repeat the increment, reducing the number of presses.
Both interfaces display the updated time in real‑time, so you can verify accuracy before confirming with “OK” or “Start”. Choose the method that matches your comfort level for the quickest clock setup.
Accessing the settings menu
Open the main menu by pressing the “Settings” or “Menu” button on the Cuisinart air fryer. Navigate using the arrow keys or swipe gestures until you highlight the “Clock” option, then select it with “Enter” or a tap. Bold key points: access Settings, locate Clock, confirm selection.
The screen will now show hour and minute fields that blink, indicating they are ready for input. Use the “+”/“–” buttons or the on‑screen arrows to set the correct time, remembering to switch between AM and PM if your model uses a 12‑hour format.
After adjusting, press “Save”, “OK”, or the “Start” button to lock in the changes. The new time persists through power cycles, ensuring that timers and delayed‑start functions reference the accurate clock. If you encounter an error, repeat the steps or consult the user manual’s troubleshooting section for reset instructions.
Step-by-Step Guide to Setting the Clock
Turning the fryer on and entering setup mode
Begin by plugging the Cuisinart air fryer into a grounded outlet and pressing the power button. The display will light up, showing the default screen. To enter the clock‑setting mode, hold the Timer button for three seconds until the colon on the digital readout begins to blink.
If your model uses a Setup or Clock icon, press that key instead. The fryer now accepts input for hours and minutes. Ensure the appliance is on a stable surface and that no cooking basket is obstructing the control panel.
This initial step prepares the unit to receive the correct time values before you start adjusting them.
Adjusting hours and minutes
Once the colon is blinking, use the + and – buttons to set the hour value. Press + repeatedly to increase the hour, and – to decrease; the display wraps from 12 back to 1 for 12‑hour models or from 23 to 0 for 24‑hour versions.
After the correct hour appears, press the Timer or Set button to lock the hour and move to minutes. Again, use + and – to adjust the minutes, watching the tens and ones digits change.
Aim for the exact current time, remembering to select AM or PM if your fryer distinguishes them. This precise adjustment ensures the clock reflects real‑world time for accurate cooking schedules.
Saving and confirming the time
After setting both hour and minute, confirm the time by pressing the Start or Enter button. The fryer will flash the full time for a few seconds, then the display will stabilize, showing the newly programmed clock.
On some models, you must hold the Start button for two seconds to lock the settings; a brief beep often signals successful saving. If the time reverts, repeat the process and ensure you release the button only after the beep.
This step finalizes the clock configuration, preventing the fryer from defaulting to 00:00 after power cycles. Keep the manual handy for model‑specific nuances, but the general procedure remains consistent across Cuisinart air fryers.
Verifying the clock after a test cycle
To verify the clock is set correctly, run a short test cycle such as a 2‑minute preheat or a simple reheating program. Observe the digital display at the start of the cycle; the time should continue counting down from the set value, confirming the internal clock is active.
After the cycle ends, check that the clock returns to the current time rather than resetting to 00:00. If the time is off, repeat the earlier steps, paying close attention to AM/PM selection. Regular verification after cleaning or moving the appliance helps maintain accurate timing for all future recipes.
You can also compare the displayed time with a smartphone clock to ensure perfect synchronization.
Common Issues and Troubleshooting
Clock resets after power loss
If the clock jumps back to 12:00 or clears after the unit is unplugged, it’s usually because the Cuisinart air fryer does not have an internal backup battery.
Plug the appliance back in and immediately press the “Clock” button, then use the “+” and “–” keys to set the correct hour and minute. Confirm the setting by pressing “Start/Stop” or the designated “Set” icon.
To prevent future resets, avoid turning off the power strip or unplugging the fryer unless necessary.
Some models allow you to store the time in memory by keeping the unit on standby mode; check the user manual for a “Power‑Save” or “Eco” setting that retains the clock while the fryer is idle.
If the clock still resets after each power loss, consider contacting Cuisinart support, as a faulty power‑reset circuit may need professional repair.
Incorrect time zone settings
Even when the numbers look right, the displayed time can be off by several hours if the fryer’s time‑zone preset does not match your location. First, locate the “Settings” or “Clock” menu on the control panel; many Cuisinart models use a long‑press of the “Clock” button to enter advanced options.
Once inside, look for a “Time Zone” or “12/24‑Hour” toggle. Select the appropriate zone (e.g., EST, PST, GMT) and confirm with the “Set” command. If your model only shows a 12‑hour format, double‑check the AM/PM indicator after setting the hour.
After adjusting, press the “Start/Stop” button to exit the menu and let the fryer run for a minute to lock the new configuration.
For households that travel frequently, you may want to keep a quick‑reference cheat sheet of the button sequence so you can re‑program the clock in under a minute. Should the time continue to drift, verify that the appliance’s firmware is up‑to‑date by visiting Cuisinart’s support site.
Unresponsive buttons or touchscreen
When the clock button or the touchscreen does not respond, the issue is often caused by residual moisture, a dirty surface, or a temporary software glitch. Start by unplugging the air fryer for at least 60 seconds; this power‑cycle clears the internal cache and can revive frozen controls.
While the unit is disconnected, wipe the control panel with a soft, lint‑free cloth slightly dampened with water or a mild electronics cleaner. Avoid excess liquid and ensure the area is completely dry before plugging it back in.
If the display still ignores input, press and hold the “Clock” button for 5‑7 seconds to trigger a factory reset (consult the manual for the exact reset code). After the reset, re‑enter the time using the standard “+” and “–” keys.
Should the problem persist after these steps, the keypad or touch‑sensor may be defective, and you’ll need to contact Cuisinart customer service for a warranty repair or replacement part.
Tips for Maintaining Accurate Time
Using a backup power source
To keep your Cuisinart air fryer clock accurate, start by connecting the appliance to a reliable backup power source such as an uninterruptible power supply (UPS) or a battery‑operated surge protector.
Plug the fryer into the UPS before you begin any cooking session; this prevents sudden power loss that can reset the internal timer.
When you first set the clock, press and hold the “Timer” button for three seconds until the display flashes, then use the “+” and “‑” buttons to adjust hours and minutes, confirming with the “Set” button. Record the correct time on a sticky note near the kitchen for quick reference.
If the power briefly flickers, the UPS will maintain voltage, ensuring the clock stays set. Regularly test the backup unit by unplugging the fryer for a few seconds and confirming the time remains unchanged. This simple habit eliminates the frustration of repeatedly resetting the clock after outages.
Regularly syncing with a smartphone
Synchronizing your Cuisinart air fryer’s clock with a smartphone ensures consistent timing without manual adjustments. First, download the official Cuisinart Kitchen Companion app from the App Store or Google Play, then enable Bluetooth on both your phone and the fryer.
Open the app and select “Clock Sync”; the interface will display the current device time and offer a one‑tap update. Confirm the match and the fryer will automatically align its internal clock to your phone’s system time, which is usually network‑synchronized.
For best results, perform this sync weekly or whenever you travel across time zones, as the app will detect discrepancies and prompt you to correct them. Keep your phone’s clock set to automatic time zone updates to avoid mismatches.
If the Bluetooth connection drops, simply restart the app and repeat the pairing process. This routine reduces the need for manual entry, keeping cooking schedules accurate and preventing over‑ or under‑cooking caused by clock drift.
Cleaning the control panel to avoid misreads
Keeping the control panel of your Cuisinart air fryer clean is essential for accurate time display and button responsiveness. Over time, oil splatters and food particles can settle on the digital screen, causing misreads or delayed inputs when you try to set the clock.
To clean safely, first unplug the appliance and let it cool completely. Use a soft, lint‑free microfiber cloth lightly dampened with a mixture of equal parts water and white vinegar; avoid soaking the cloth to prevent moisture from seeping into the electronics.
Gently wipe the screen and surrounding buttons, paying special attention to the “Timer” and “Set” keys. Dry the panel with a separate dry cloth before plugging the fryer back in.
Perform this cleaning routine weekly, or after any particularly greasy cooking session, to ensure the clock remains legible and the controls function smoothly. A clear panel reduces the chance of accidental time changes and helps maintain consistent cooking results.
Frequently Asked Questions
Can I set a 24‑hour clock?
Yes, most Cuisinart air fryers allow you to switch to a 24‑hour display. Begin by pressing the Clock button until the time digits start flashing. Use the + and – buttons to adjust the hour, remembering that values above 12 automatically convert to 24‑hour mode.
Once the correct hour appears, press the Set button to lock it, then repeat the process for the minutes. After both fields are set, press Start or wait a few seconds for the display to stabilize.
If your model includes a digital touchscreen, tap the Settings icon, select Clock, toggle the 24‑Hour switch, and confirm with OK. Always refer to the user manual for model‑specific button labels, as some older units may require holding the Timer button for three seconds to access the clock menu.
Double‑check the display after power‑cycling the appliance to ensure the setting persists.
What if the clock won’t stay set?
If the clock on your Cuisinart air fryer keeps resetting, start by unplugging the unit for at least one minute to clear any residual charge. Re‑plug it and immediately set the time following the standard procedure.
Persistent issues often stem from a weak or depleted internal battery that maintains settings during power loss; many models use a small coin‑cell battery located behind the control panel. Consult the service manual to locate and replace it with a CR2032 or equivalent.
Additionally, ensure that the appliance is not placed near strong electromagnetic sources, such as microwaves or large metal objects, which can interfere with the digital circuitry. Check that the clock button isn’t stuck or that debris isn’t causing false inputs.
If after battery replacement the clock still drifts, contact Cuisinart customer support for a possible firmware reset or hardware inspection.
Do firmware updates affect the clock?
Firmware updates for Cuisinart air fryers are released to improve cooking performance, add new presets, and occasionally fix timing bugs.
When you install an update—usually via a USB stick or through the Cuisinart app—the system rewrites the internal software, which can reset the clock to 00:00 or revert to a 12‑hour default. After the update completes, follow the usual clock‑setting steps to re‑establish the correct time and preferred format.
Record the current time before starting the update so you can quickly re‑enter it. Some newer models retain the clock setting automatically, but older units rely on the internal backup battery, so a low‑charge battery may cause the clock to lose its value after an upgrade.
If you notice the time changing after each firmware flash, replace the backup battery or contact technical support for a version‑specific patch that preserves the clock setting.
Frequently Asked Questions
How do I set the clock on my Cuisinart air fryer?
Press the ‘Timer’ button, then use the ‘+’ and ‘-‘ buttons to adjust the hour and minute, and press ‘Start’ to confirm.
What models of Cuisinart air fryers have a clock feature?
Most recent Cuisinart models like the TOA-60, TOA-65, and the CDF-200 have a built-in digital clock that can be set via the control panel.
Can I reset the clock after a power outage?
Yes. After plugging the fryer back in, press and hold the ‘Timer’ button for 3 seconds to enter clock setting mode, then adjust the time as usual.
Why isn’t the clock displaying the correct time?
If the display shows ’00:00′ or an incorrect time, ensure the appliance is plugged directly into a stable outlet, then re‑set the clock using the steps above.
Does the clock affect cooking timers?
The clock is separate from the cooking timer; setting the clock does not change preset cooking times, but it helps you track total cooking duration.
How do I change the clock from 12‑hour to 24‑hour format?
Hold the ‘Clock’ button for 5 seconds to toggle between 12‑hour (AM/PM) and 24‑hour display modes.
Conclusion
Setting the clock on your Cuisinart air fryer is quick and ensures accurate cooking times, especially for timed programs. Remember to locate the clock button, press and hold it, use the +/- keys to adjust hours and minutes, and confirm with the start button. Once set, the display will stay synchronized even after power cycles. Keep this simple routine handy, and enjoy perfectly timed meals every time you cook.