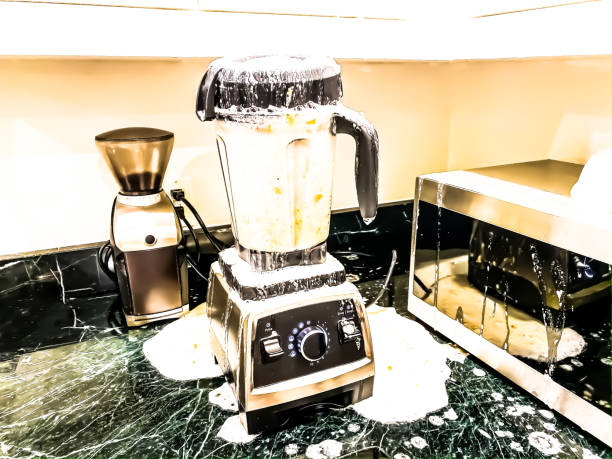
How To Wash Vitamix Blender
In this guide we’ll walk you through the quickest rinse‑and‑clean method, show how to tackle stubborn stains, and share tips for keeping the motor base fresh.
Preparing Your Vitamix for Cleaning
Unplug and Disassemble
Before you start any cleaning routine, always unplug the Vitamix to eliminate any risk of electric shock. Next, carefully remove the blade assembly by twisting it counter‑clockwise; most models have a quick‑release mechanism that lets you pull the jar off the base without tools.
Set the blade and jar aside on a stable surface, making sure the blades are pointing upward to avoid accidental cuts. If your model includes a tamper, detach it as well.
This initial step not only protects you but also gives you clear access to every interior surface, ensuring that no food particles are trapped during the wash.
Remember to check the base for any loose screws or accessories that might have come loose during use, and keep them handy for reassembly later. Dry each component with a soft towel before storing to prevent moisture buildup.
Remove the Lid and Plug
Once the jar is separated, take off the lid and any attached plug or sealing ring. Rinse the lid under warm running water, using a soft sponge to scrub away any stuck sauce or oil.
For stubborn spots, apply a few drops of mild dish soap directly onto the sponge and gently rotate the lid to reach the corners where the sealing gasket meets the container. Avoid using abrasive pads, as they can scratch the plastic or silicone.
If your Vitamix features a detachable plug, pull it straight out and give it a quick rinse as well; many users find that a brief soak in warm, soapy water helps dissolve residue that has hardened over time.
After cleaning, dry the lid and plug thoroughly with a lint‑free cloth to stop water from seeping into the motor housing when you reassemble the blender.
Check for Residue
After the lid and plug are clean, inspect the jar and blade assembly for any remaining food particles or oily film. Hold the jar up to a bright light and look along the inner walls, paying special attention to the area around the blades where residue often hides.
If you notice streaks, fill the jar halfway with warm water, add a teaspoon of baking soda, and run the Vitamix on low speed for 30 seconds; this self‑cleaning trick loosens grime without disassembling the unit.
For persistent buildup, use a soft‑bristled brush to gently scrub the blade hub and the underside of the jar, being careful not to press too hard on the sharp blades.
Once you are satisfied that the interior is spotless, wipe the exterior of the base with a damp cloth, avoiding any openings that could let moisture reach the motor. This thorough final check ensures your Vitamix stays hygienic and ready for the next recipe.
Quick Rinse Method for Everyday Use
Fill with Warm Water and Soap
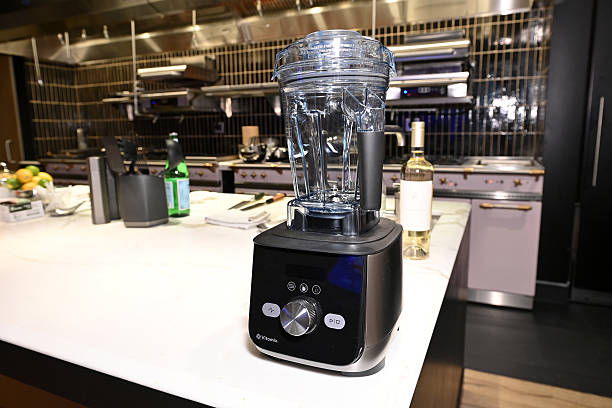
Start by disassembling the Vitamix: remove the lid, tamper, and any accessories. Fill the container about three‑quarters full with warm water, then add a few drops of mild dish soap. Swirl the water to create suds, ensuring the soap reaches the blades and the container walls.
Let the mixture sit for 30 seconds to a minute; this loosens residue from smoothies or soups. While the water is still warm, gently tap the base of the jar on the countertop to help dislodge any stubborn particles.
This quick‑soak step prepares the blender for the next cleaning phase and prevents dried‑on buildup, making the overall process faster and more efficient for everyday use.
You can also place the lid in the same water, using a soft sponge to scrub the gasket and the measuring cup, but avoid abrasive pads that could scratch the plastic.
Blend on Low Speed
Reassemble the Vitamix with the lid securely tightened, then activate the low speed (usually speed 1) while the soapy water is still inside.
Let the blender run for about 30 to 45 seconds; the gentle vortex pushes the cleaning solution through the blades and the tight spaces near the container’s base. This action breaks down any remaining film from oils, protein, or fruit pulp that may cling to the blade assembly.
If you notice thicker residues, increase the run time by another 15 seconds, but keep the speed low to avoid splashing. The low‑speed blend is safe for the motor and effectively circulates the soap, making the cleaning process quick and hands‑free for daily use.
After the blend, pause and use a soft brush to gently scrub the jar’s interior, focusing on the corners where the blade meets the container, ensuring no residue remains. This step adds a quick manual touch that guarantees a spotless finish without disassembling the blade.
Rinse Thoroughly
Once the soapy blend is complete, pour out the sudsy water and fill the container with fresh, cool tap water.
Secure the lid and run the Vitamix on low speed for 20 to 30 seconds to rinse the interior, allowing the clean water to swirl around the blades and wash away any remaining soap.
Open the jar and inspect the walls; if any bubbles persist, repeat the rinse cycle once more. For the lid and tamper, rinse them under running water, using a small brush to clean the gasket and any crevices.
Finally, set all parts on a dish rack to air‑dry completely before the next use, preventing moisture buildup that could lead to odors or mold.
If you prefer a sparkling finish, add a splash of white vinegar to the rinse water; the acidity helps eliminate lingering odors and brightens the glass. Dry the base with a clean towel to remove any water that may collect in the motor housing vents.
Deep Cleaning for Stubborn Stains

Soak the Container
Begin by disassembling the Vitamix. Remove the lid, lid plug, and any removable parts, then place the container upside‑down in a large basin or sink. Fill the basin with warm water and add a few drops of mild dish soap.
Let the jar soak for 10‑15 minutes; this loosens dried fruit pulp, oil, and coffee grounds that cling to the walls. While it soaks, gently agitate the water to help the soap penetrate stubborn spots.
After soaking, use a soft‑sponged brush or a non‑abrasive scrubber to glide around the interior, focusing on the base where stains often accumulate. Rinse thoroughly under running water until no suds remain. Finally, dry the container on a clean towel or let it air‑dry on a dish rack.
This initial soak prevents the need for harsh chemicals and prepares the jar for deeper stain‑fighting methods.
Use Baking Soda Paste
Create a gentle yet effective cleaning paste by mixing one tablespoon of baking soda with just enough warm water to form a thick, spreadable consistency. Apply the paste to the interior surfaces of the Vitamix container, concentrating on discolored rings, coffee stains, or dried vegetable residue.
Let the mixture sit for 5‑10 minutes; the mild alkaline action of baking soda lifts pigments without scratching the polished plastic. Using a soft silicone spatula or a non‑scratch brush, gently scrub in circular motions, paying special attention to the corners where the blade hub meets the jar.
For particularly stubborn spots, re‑apply a thin layer of paste and extend the dwell time by another few minutes. After scrubbing, rinse the container thoroughly with warm water, ensuring all baking‑soda residue is removed.
Dry the jar completely before reassembly to avoid water spots, and you’ll notice a brighter, stain‑free interior ready for the next blend.
Clean the Blades Safely
Cleaning the Vitamix blades requires caution because they spin at high speeds and have sharp edges. First, unplug the machine and remove the container from the base. Fill the jar halfway with warm water, add a splash of dish soap, and reattach the lid securely.
Blend on low for 10‑15 seconds; the vortex action loosens food particles clinging to the blades without you having to reach inside. Pour out the soapy water and rinse the blade area with a gentle stream, using a soft brush to sweep away any remaining debris.
For persistent grease, dip a cotton swab in a few drops of white vinegar and carefully wipe each blade edge, avoiding direct contact with your fingers. Finally, dry the blades with a clean microfiber cloth and reassemble the unit.
This method keeps the blades sharp, prevents corrosion, and ensures the next blend is smooth and hygienic.
Cleaning the Base and Motor Housing
Wipe with Damp Cloth
After each use, unplug the blender and let the base cool for a few minutes. Then take a soft, lint‑free cloth that is only slightly damp with warm water. Wipe the exterior surface in gentle, circular motions, paying special attention to the control panel, splash guard, and any food‑spatter zones.
Avoid using abrasive pads that could scratch the finish. If stubborn residue appears, add a drop of mild dish soap to the cloth, but be sure to rinse the cloth thoroughly before the next pass so no soap remains on the base.
Finally, dry the area with a clean towel to prevent water spots. This quick routine removes most crumbs and prevents buildup that could affect the motor’s ventilation over time.
You can also lightly spray the cloth with a mixture of one part white vinegar and two parts water for extra degreasing power, but always test a small hidden spot first to ensure the finish isn’t affected. Regularly inspecting the base for dust accumulation helps keep the appliance running efficiently.
Avoid Excess Moisture
Moisture is the biggest enemy of the Vitamix motor housing because it can seep into electrical components and cause corrosion. Never submerge the base in water or place it under a running faucet.
Instead, use a lightly dampened cloth and limit the liquid to the outer shell only, steering clear of seams, vent openings, and the power cord entry point.
If you notice droplets collecting in the ventilation slots, gently tilt the unit to let them drain, then wipe them away with a dry microfiber towel. For deeper cleaning, unplug the blender, remove the jar, and let the base air‑dry for at least ten minutes before reassembly.
Avoid using steam cleaners or pressure washers, as the high pressure can force water into hidden cavities. By keeping the base dry and free of standing water, you protect the motor’s lifespan and maintain optimal performance.
Clean the Ventilation Slots
The ventilation slots on the base allow heat to escape, so they must stay clear of food particles and grease that can block airflow. Use a soft‑bristled brush or a clean, dry paintbrush to sweep across each slot, loosening any crumbs that have settled during use.
For stubborn residue, dip a cotton swab lightly in isopropyl alcohol, squeeze out excess liquid, and gently run it along the edges of the vents; the alcohol evaporates quickly, leaving no moisture behind. After brushing, wipe the surrounding area with a dry microfiber cloth to capture dislodged debris.
It’s a good habit to perform this step once a week, especially after blending thick sauces or nut butters, because those mixtures tend to splatter into the vents. Maintaining unobstructed ventilation not only keeps the motor cool but also reduces noise and extends the overall durability of your Vitamix.
Dishwasher Compatibility and Tips
Which Parts Are Dishwasher Safe
Identify the components that can safely endure a dishwasher cycle before cleaning. The pitcher, lid, and the detachable blade assembly are generally dishwasher‑safe when placed on the top rack, but always verify the specific model’s manual.
The motor base, control panel, and any electronic displays must never be submerged; wipe them with a damp cloth instead. Remove the tamper and any rubber seals, as they can warp or degrade in high heat. Before loading, rinse off large food particles to prevent clogging the dishwasher’s filter.
If your Vitamix has a stainless‑steel pitcher, it tolerates the heat better than plastic, yet repeated cycles may cause slight clouding over time. By confirming which parts are safe, you avoid costly repairs and keep the blender performing at peak efficiency.
Also, ensure the dishwasher’s detergent is mild to preserve the finish.
Placement in Dishwasher
Arrange the Vitamix components to maximize cleaning efficiency while protecting delicate surfaces. Place the pitcher, lid, and blade assembly on the top rack, keeping them upright so water can flow freely around every angle.
Avoid stacking heavy pots on top of the pitcher, as pressure can crack the base or warp the plastic. Secure the tamper and any small accessories in the utensil basket or a mesh cup to prevent them from rattling and hitting the dishwasher walls.
If your machine uses a glass pitcher, position it away from the spray arm’s strongest jets to reduce the risk of chipping. Use a short, low‑temperature cycle for routine cleans; reserve the high‑heat sanitize option for occasional deep cleans only when the manufacturer explicitly recommends it.
Proper placement reduces wear and ensures all residues are flushed out without manual scrubbing.
Best Practices to Prevent Damage
Adopt habits that extend the lifespan of your Vitamix beyond dishwasher use. Rinse the pitcher immediately after each blend to stop food from drying and sticking, which makes dishwasher cleaning more effective.
For stubborn residues, fill the pitcher with warm water, a drop of dish soap, and blend on low for 30 seconds before running the cycle; this pre‑clean step loosens particles and protects the blades.
Never place the motor base in the dishwasher; instead, wipe it with a soft, damp cloth and dry it thoroughly to avoid moisture seeping into electronic components. Periodically inspect the gasket and blade assembly for wear, replacing them as recommended to maintain a tight seal and optimal performance.
Finally, limit the use of high‑heat sanitize cycles to once a month, as excessive heat can warp plastic pitchers and degrade seals over time.
Maintaining Your Vitamix for Longevity
Regular Descaling
Begin each cleaning session by unplugging the Vitamix and disassembling the removable parts. Remove the container, lid, and tamper, then rinse them under warm running water to eliminate loose debris. Fill the container halfway with warm water, add a drop of mild dish soap, and securely replace the lid.
Run the blender on its highest setting for 30‑45 seconds; the vortex will scrub the blades and interior without manual effort. Rinse thoroughly and set aside to air‑dry.
For occasional mineral buildup, perform a descaling cycle: blend one cup of white vinegar with two cups of water on high for one minute, then follow with a plain water rinse. Never submerge the motor base and always wipe it with a damp cloth.
This routine keeps the vessel sparkling, prevents odor, and extends the motor’s lifespan.
Inspecting Seals and Gaskets
Regularly examine the Vitamix’s sealing ring and gasket for cracks, discoloration, or food particles that can harbor bacteria. Detach the lid and pull out the silicone seal, then rinse it under warm water while gently rubbing with a soft brush to remove residue.
If any wear is visible, replace the seal promptly to maintain a tight, leak‑free fit. Inspect the container’s threading where the lid screws on; clean any buildup to ensure smooth operation. Wipe the base’s vent openings with a dry cloth to prevent dust from entering the motor.
Avoid using abrasive cleaners or metal scouring pads, as they can damage the seal material. By keeping these components pristine, you protect the blender’s performance, prevent unwanted odors, and ensure every blend remains consistent and safe for your family.
Perform this check at least once a month to catch issues early.
Storing Properly
After washing, allow every component of your Vitamix to dry completely before reassembly to avoid moisture buildup that can cause rust or motor problems. Place the container upside down on a clean towel and let it air‑dry for several minutes, or gently pat it dry with a soft cloth.
Keep the motor base on a dry countertop and wipe any water from its surface with a lint‑free rag. When storing, position the blender upright with the lid removed to promote airflow and prevent trapped steam.
If you need to store it for an extended period, cover the base with a breathable fabric to keep dust away while allowing ventilation. Never store the blender in a sealed plastic bag, as trapped humidity can damage internal components.
This careful storage routine ensures your Vitamix remains ready for the next blending task without degradation.
Troubleshooting Common Cleaning Issues
Persistent Odors
To eliminate lingering smells, disassemble the jar immediately after each use. Rinse the container, lid, and tamper with warm water, then fill the jar halfway with hot water, add a tablespoon of dish soap, and run the blender on high for 30 seconds.
The vortex action loosens food particles stuck near the blades. Next, pour out the soapy mixture, rinse thoroughly, and repeat the cycle using white vinegar or lemon juice instead of soap for a natural deodorizing boost.
Let the jar air‑dry upside down on a rack to prevent moisture buildup, which can trap odors. For stubborn perfume, sprinkle baking soda inside the dry jar, swirl, and let sit for 15 minutes before rinsing.
Regularly cleaning the gasket and the blade housing with a soft brush also stops odor‑causing residue from accumulating effectively.
Streaky or Cloudy Containers
Streaky or cloudy jars usually result from mineral deposits or soap residue. Begin by rinsing with warm water to remove loose particles, then fill the container with equal parts water and white vinegar. Run the blender on low for 20 seconds, pause, and swirl the mixture to reach every corner.
Empty, rinse, and repeat the cycle using a few drops of lemon juice instead of vinegar for added brightness. After the acid rinse, thoroughly wash with a mild dish detergent, scrubbing the interior with a non‑abrasive sponge to dissolve any remaining film.
Rinse several times until no suds remain, then dry the jar upside down. For persistent cloudiness, create a baking‑soda paste (baking soda mixed with a little water) and gently rub the affected areas before the final rinse.
Maintaining a routine of a quick acid rinse after each use prevents mineral buildup and keeps the container crystal clear.
Blade Rust Prevention
Blade rust can develop when moisture lingers in the blade housing. After each blend, remove the blade assembly if your model allows, and rinse it under running water. Pat the blades dry with a clean towel, then apply a thin layer of food‑grade mineral oil to create a protective barrier.
If the assembly cannot be detached, fill the jar with equal parts water and white vinegar, run the blender on high for 15 seconds, and immediately pour out and dry the mixture, ensuring no water remains near the metal.
Occasionally, soak the blades for a few minutes in a solution of one tablespoon baking soda per cup of water to neutralize any acidic residues that accelerate corrosion. Store the blender with the lid slightly ajar or the container upside down to promote air circulation.
Regularly inspecting the blades for tiny spots and treating them promptly keeps the cutting edge sharp and rust‑free for years.
Frequently Asked Questions
How do I clean the Vitamix container after blending?
Rinse the container immediately, then fill it halfway with warm water, a drop of dish soap, and blend on low for 30 seconds. Dump the soapy water and rinse thoroughly.
Can I wash the Vitamix container in the dishwasher?
Yes, the container, lid, and tamper are dishwasher‑safe on the top rack. Place them securely to avoid wobbling, but avoid the motor base.
What’s the best way to clean the Vitamix blades?
The blades are self‑cleaning when you blend soapy water. For stubborn residue, use a soft brush or a non‑abrasive sponge while the container is filled with water and soap.
How often should I deep‑clean my Vitamix?
Perform a deep clean weekly if you use it daily, or after making sticky or strongly colored recipes. Use a mixture of one part vinegar to three parts water, blend for a minute, then rinse.
Is it safe to submerge the Vitamix motor base in water?
No. The motor base is not waterproof. Wipe it with a damp cloth and avoid any liquid entry to the base or control panel.
How do I remove stubborn stains or odors from the container?
Soak the container in a solution of warm water and baking soda (1 tablespoon per cup) for 15‑20 minutes, then blend briefly. Rinse well and let air dry.
Conclusion
For stubborn stains, use a blend of baking soda and vinegar, and always disassemble the blade assembly for a thorough scrub. Regular maintenance keeps performance optimal and extends the machine’s life—so give your Vitamix the care it deserves after every use.