Supplies For Making Wine
Ready to start making your own wine at home? You’re in the right place. The supplies for making wine are simpler than you think, and getting started doesn’t have to be overwhelming. From fermenters and airlocks to bottles and corks, we’ll walk you through every essential item you’ll need—plus a few helpful extras. Whether you’re a beginner or looking to upgrade your setup, this guide gives you exactly what’s required to turn grapes (or kits) into delicious homemade wine. Let’s get brewing!
Essential Equipment for Making Wine at Home
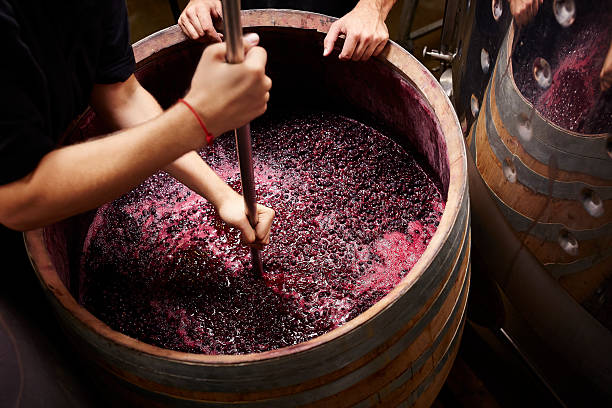
Fermentation Vessels and Carboys
Choosing the right fermentation vessel is critical for successful home winemaking. Food-grade plastic buckets or glass carboys are the most common options, each offering distinct advantages. Plastic buckets are lightweight, inexpensive, and easy to clean, making them ideal for primary fermentation where vigorous bubbling occurs.
Glass carboys, while heavier and more fragile, provide an excellent airtight seal and are non-porous, reducing the risk of contamination during secondary fermentation. Ensure your vessel has a capacity of at least 6–7 gallons for a standard 5-gallon batch to prevent overflow.
Always sanitize thoroughly before use to protect your wine from unwanted bacteria and wild yeast that could spoil the flavor and clarity.
Airlocks and Stoppers
An airlock and stopper system is essential for allowing carbon dioxide to escape during fermentation while preventing oxygen and contaminants from entering. The stopper fits snugly into the carboy’s mouth, and the airlock, typically filled with water or sanitizer, creates a one-way valve.
Three-piece and S-shaped airlocks are popular choices—both work well, but the three-piece is easier to clean. Make sure the stopper size (usually #6 or #7) matches your carboy’s opening. This simple yet vital setup maintains a controlled fermentation environment, protecting your wine from spoilage and oxidation.
Check the airlock regularly to ensure it’s functioning and hasn’t dried out, especially during long secondary fermentation periods.
Siphoning Tools and Tubing
Transferring wine between containers without disturbing sediment requires reliable siphoning tools and tubing. Use food-grade vinyl or silicone tubing (typically 3/8-inch diameter) paired with a racking cane or auto-siphon for efficient, splash-free transfers.
An auto-siphon is highly recommended for beginners—it simplifies starting the siphon with a pump action, reducing the risk of contamination from mouth-starting. Always sanitize all components before use.
When racking, position the receiving vessel lower than the source and place the cane’s tip above the lees to avoid stirring up sediment. Proper siphoning preserves wine clarity and minimizes oxidation, ensuring a cleaner, more professional result before bottling.
Bottling Equipment and Caps
The final step in home winemaking requires dependable bottling equipment and closures. A bottle filler—a spring-loaded tube that dispenses wine on contact—helps fill bottles evenly and with minimal oxidation. Pair it with a bottling bucket and racking setup for smooth flow.
Choose between corks and screw caps based on your wine type and aging plans; natural or synthetic corks require a corker, with floor-standing models offering the most consistent seal. Always use sanitized bottles, preferably dark glass to protect from light. Proper sealing ensures longevity and prevents spoilage.
Label your bottles with vintage and variety for organization and presentation, completing your homemade wine with a professional touch.
Types of Grapes and Juice for Wine Making
Fresh Grapes vs. Concentrated Juice
When starting out, choosing between fresh grapes and concentrated juice depends on your time, space, and equipment. Fresh grapes offer the most authentic winemaking experience and allow full control over the process, but they require immediate processing after harvest, proper sanitation, and significant physical effort for crushing and pressing.
They’re ideal for seasonal batches and those with access to vineyards. On the other hand, concentrated juice—often sold as frozen juice or juice kits—comes pre-pasteurized and ready to ferment, reducing preparation time and mess. It’s perfect for beginners or urban winemakers with limited space.
Concentrates maintain consistent sugar and acid levels, making fermentation more predictable. While fresh grapes provide a deeper connection to terroir, juice concentrates ensure reliable results with minimal equipment. For your supplies, ensure you have a primary fermenter, airlock, siphon, and hydrometer regardless of your choice.
Best Grape Varieties for Beginners
Selecting the right grape variety is crucial for successful first-time winemaking. Beginners should focus on universally adaptable, disease-resistant grapes that ferment predictably and require minimal intervention. Varieties like Concord (for bold, fruity reds) and Niagara (for aromatic whites) are excellent choices, especially for those in cooler climates.
These native American grapes are hardy, widely available, and forgiving of minor mistakes. For a more traditional profile, Chambourcin and Cayuga White offer balanced acidity and complexity with less sensitivity to temperature swings.
Each variety brings distinct aroma, tannin, and sugar levels, so pairing them with the correct yeast strain is essential. Use a wine acid test kit and hydrometer to monitor progress. Starter supplies should include sanitized fermentation buckets, wine bottles, corks, and a corker.
Choosing beginner-friendly grapes ensures consistent fermentation and enjoyable results, building confidence for future batches.
How to Source Quality Juice Kits
For hassle-free winemaking, high-quality juice kits are a smart supply choice. These kits typically include sterilized grape juice concentrate, yeast, nutrients, and fining agents—everything needed for fermentation. To source the best, look for reputable suppliers like **Musto Wine Grape, Austin Homebrew Supply, or E.C.
Kraus, which offer kits by region and varietal. Check that the juice is flash-pasteurized and frozen immediately** after pressing to preserve freshness. Kits range from beginner-friendly 1-gallon sets to full 6-gallon batches, allowing scalability. Read reviews for feedback on clarity, flavor, and fermentation success.
Ensure the kit includes detailed instructions and target alcohol content. Pair your kit with basic winemaking tools: a fermentation carboy, airlock, siphon, and bottles. Avoid kits with added preservatives unless you’re using wine yeast specifically designed to handle them.
Sourcing from trusted vendors guarantees consistent, high-yield results and reduces trial and error in your early batches.
Yeast and Additives for Fermentation
Choosing the Right Wine Yeast
Selecting the appropriate wine yeast strain is crucial for achieving the desired flavor, aroma, and alcohol content in your wine. Different strains are tailored for specific grape varieties or juice types—red, white, fruity, or high-alcohol wines—so match the yeast to your base ingredient.
For beginners, universal strains like Lalvin EC-1118 offer reliable fermentation and tolerance to varying temperatures. More advanced winemakers might prefer aroma-enhancing yeasts such as Lalvin 71B for fruit wines or RC-212 for complex reds. Always hydrate dry yeast properly before pitching, following manufacturer instructions to ensure viability.
Consider the fermentation temperature range of the yeast, as too high or low can produce off-flavors or stuck fermentation. Purchasing fresh, vacuum-sealed yeast from reputable suppliers ensures potency. Keeping a log of yeast performance helps refine future batches for consistent, high-quality results.
Using Yeast Nutrients and Energizers
Yeast nutrients and energizers are essential for healthy fermentation, especially in musts low in natural nitrogen or vitamins, like fruit wines or concentrated juices. Without proper nutrition, yeast can produce off-flavors such as hydrogen sulfide (rotten egg smell) or stall entirely.
Use a complete yeast nutrient blend containing diammonium phosphate (DAP), vitamins, and minerals, adding it in stages—typically at the start and during early fermentation—to maintain yeast health. Energizers, which include yeast hulls and vitamin complexes, help restart sluggish ferments or support high-sugar musts.
Follow dosage guidelines carefully—overuse can lead to excessive yeast growth or imbalanced wine. For best results, combine nutrients with proper aeration and temperature control. Regular use of nutrients leads to faster, cleaner ferments and more stable, flavorful wine. Always store supplements in a cool, dry place to preserve effectiveness.
Acid and Enzyme Adjustments
Balancing acidity and using enzymes are key steps in optimizing wine quality before and during fermentation. Most fruit juices lack sufficient acid, so using an acid test kit and adjusting with wine acid blend (tartaric, malic, citric) ensures proper pH (3.0–3.6), which affects taste, microbial stability, and color.
Too little acid results in flat, flabby wine; too much makes it overly sharp. Pectic enzyme is equally important, especially for fruit wines, breaking down pectin to improve juice yield and clarity. Add enzymes before fermentation, allowing them to work at optimal temperatures (around 70°F).
For red wines, enzymes can enhance color extraction. Always follow recommended dosages—overuse can cause bitterness or haze. Testing and adjusting acid levels early ensures a smooth fermentation and better-tasting final product. These adjustments are simple yet powerful tools for consistent, professional-quality results.
Cleaning and Sanitizing Supplies
Best Sanitizers for Wine Equipment
Choosing the right sanitizer is critical to ensuring your wine remains free from harmful microbes. Potassium metabisulfite and sodium metabisulfite are widely used because they effectively kill bacteria and wild yeast without leaving strong residues. Dissolve one teaspoon in a gallon of water for an effective sanitizing solution.
Star San, a no-rinse acid-based sanitizer, is another top choice among home winemakers due to its broad-spectrum efficacy and food-safe formula. It works quickly and remains effective even in the presence of organic matter. Always prepare fresh solutions and follow manufacturer instructions for dilution.
Avoid household bleach, as it can leave behind odors and react with wine compounds. Rinse equipment thoroughly if using a sanitizer that requires it, but with no-rinse options like Star San, simply drain and air dry.
Regularly sanitize all tools that contact your wine, including spoons, airlocks, and siphons, to maintain sterile conditions throughout the winemaking process.
Cleaning Fermenters and Bottles
Proper cleaning before sanitizing ensures that wine residues, yeast buildup, and mold don’t compromise your batch. Start by rinsing fermenters and bottles with warm water immediately after use to remove leftover must or wine.
Use a non-abrasive cleaner like PBW (Powdered Brewery Wash) to break down organic material—mix according to label directions and soak equipment for 20–30 minutes. For carboys and narrow-neck bottles, use long-handled brushes to reach interior surfaces without scratching. Avoid dish soap, which can leave behind film and impart off-flavors.
After cleaning, rinse thoroughly with clean water before applying your chosen sanitizer. Inspect glass and plastic fermenters for scratches or cloudiness, which can harbor bacteria. Replace damaged equipment to prevent contamination. Allow all items to air dry in a clean, dust-free area.
Clean and sanitize bottles just before bottling day to maintain sterility and ensure your wine ages properly without spoilage.
Tips for Preventing Contamination
Preventing contamination starts with consistent hygiene practices at every stage of winemaking. Always wash your hands before handling equipment, and work in a clean, organized space free of pets, drafts, and strong odors. Use dedicated winemaking tools that never come into contact with other kitchen tasks.
Cover fermenters with sanitized lids or airlocks immediately after use to block airborne microbes. Minimize opening the fermenter unnecessarily, as each exposure increases contamination risk. Maintain proper sulfite levels in your wine, as they inhibit unwanted bacteria and oxidation. Store equipment in closed cabinets after cleaning to prevent dust accumulation.
Keep a log of sanitation routines to ensure consistency across batches. Finally, sanitize anything that touches the wine post-fermentation, including hoses, funnels, and bottle fillers. Vigilance in sanitation is the most effective way to produce clear, flavorful, and stable homemade wine every time.
Testing and Measuring Tools
Hydrometers for Tracking Sugar Levels
A hydrometer is essential for measuring the specific gravity of your wine must, allowing you to track sugar levels throughout fermentation. By taking readings before and during fermentation, you can estimate potential alcohol content and determine when fermentation is complete.
To use it correctly, draw a sample of must into a testing jar, gently place the hydrometer inside, and spin it slightly to dislodge air bubbles. Read the measurement at the liquid’s surface level. Calibration at 60°F (15.5°C) is crucial for accuracy.
Choose a hydrometer with a range of 0.990 to 1.120 specific gravity for wine making. Keep it clean and store it safely to avoid breakage. Regular use of a hydrometer ensures consistent fermentation progress and helps prevent stuck ferments or overly sweet wines.
It’s one of the most affordable and reliable tools for home winemakers seeking precision and quality control.
pH Meters and Test Strips
Maintaining the correct pH level is vital for wine stability, taste, and microbial safety. Most wines perform best between a pH of 3.0 and 3.6. pH test strips offer a quick, inexpensive way to get approximate readings—simply dip the strip and compare the color change to a chart.
For greater accuracy, a digital pH meter is recommended, though it requires regular calibration with buffer solutions. Always rinse the electrode with distilled water between uses and store it properly. pH affects color, flavor, and sulfite effectiveness, so monitoring it helps prevent spoilage and ensures a balanced final product.
While test strips are suitable for beginners, serious winemakers benefit from the precision of a calibrated pH meter. Both tools are essential for quality control and help you make informed adjustments using acids or additives during the winemaking process.
Thermometers for Fermentation Control
Fermentation is highly sensitive to temperature, making a reliable thermometer a must-have tool. Yeast performs best within specific temperature ranges—typically 60–75°F (15–24°C) for most wine yeasts. Too hot, and you risk off-flavors or yeast death; too cold, and fermentation may stall.
Use a floating or digital thermometer to monitor must temperature daily. Floating thermometers are inexpensive and easy to use—just place them in the fermenter. Digital probe thermometers offer faster, more precise readings and are ideal for temperature-controlled environments. Avoid using household thermometers not designed for liquids or fermentation.
Consistent temperature tracking helps ensure a smooth, complete fermentation and preserves delicate aromas. Pair your thermometer with a fermentation jacket or heating belt if needed. Temperature control is one of the most impactful ways to improve wine quality, especially for beginners.
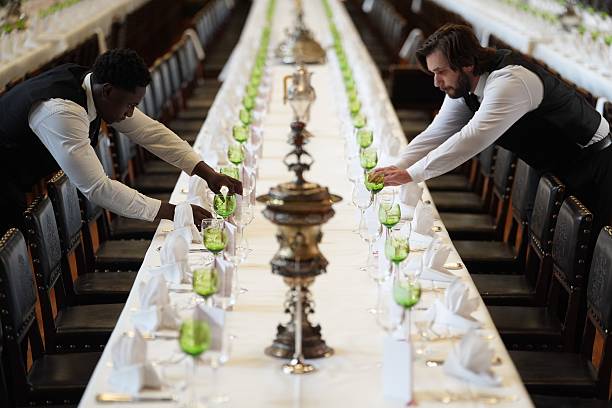
Bottling and Storage Supplies
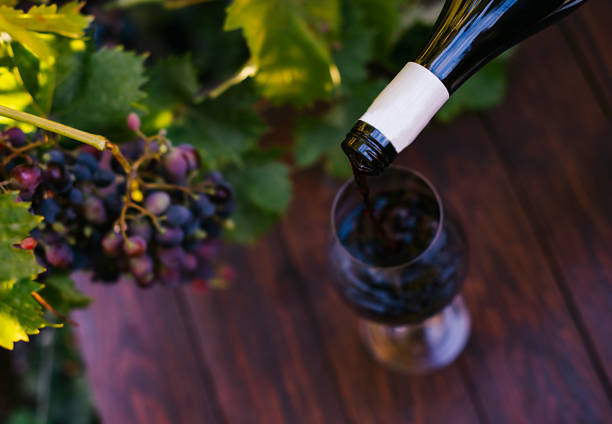
Types of Wine Bottles and Closures
Choosing the right wine bottles and closures is essential for preserving quality and enhancing presentation. Standard 750ml bottles are most common, with green or clear glass offering UV protection and aesthetic appeal. Consider punt depth for sediment collection in aged wines.
For closures, natural corks allow minimal oxygen exchange, ideal for aging, while synthetic corks suit short-term storage and are easier to insert. Screw caps provide excellent airtight seals and are growing in popularity for both casual and premium wines.
Ensure all bottles are thoroughly cleaned and sanitized before filling to prevent contamination. Match closure type to your wine’s aging plan—long-term aging benefits from natural cork, while early consumption pairs well with alternatives. Consistent bottle shape and size also streamline labeling and storage.
Investing in quality bottles and appropriate closures ensures your wine remains stable, flavorful, and professionally presented from bottling to opening.
Corkers and Alternatives
Selecting the right bottling tool ensures a secure seal and prevents oxidation. Hand corkers—such as twin- or single-lever models—are affordable and effective for small batches, allowing precise cork insertion with minimal effort. For higher volume, floor-mounted corkers offer speed and consistency.
Always lubricate corks slightly with water before insertion to avoid cracking. If avoiding cork, consider screw cap applicators or synthetic stopper tools, which are user-friendly and provide reliable seals. Test your chosen method on a few bottles first to ensure proper fit and seal integrity.
Proper alignment during insertion prevents leaks and damage. Whichever tool you use, sanitation is critical—clean all parts before and after use. Investing in a durable, well-reviewed corker or alternative system enhances efficiency and preserves your wine’s quality, making the bottling process smooth and reliable every time.
Labeling and Storage Tips
Clear labeling and proper storage conditions protect your wine’s identity and quality. Design labels with essential details: vintage, varietal, alcohol content, and bottling date—this helps track aging and taste development. Use water-resistant, adhesive-backed labels to prevent peeling in humid environments. For a professional touch, consider shrink capsules or wax seals.
Store bottles horizontally to keep corks moist and prevent drying or air exposure. Ideal storage means consistent temperature (55°F/13°C), moderate humidity (60–70%), and darkness—avoid vibrations and strong odors. Use sturdy racks made of wood or plastic to organize bottles safely. Rotate stock as needed and inspect seals periodically.
Whether aging for years or storing short-term, these practices preserve flavor, prevent spoilage, and ensure every bottle reflects the care put into crafting it.
Beginner-Friendly Wine Making Kits
What’s Included in a Starter Kit
Beginner-friendly wine making kits typically include all essential supplies for making wine at home, making the process simple and accessible. Most kits come with concentrated grape juice or wine base, yeast, yeast nutrient, and fining agents to clarify the wine.
You’ll also receive sterilizing solution to keep your equipment clean and prevent contamination. Basic kits include a fermentation bucket or carboy, an airlock, siphon tubing, and bottles. Some even provide corks and a corker. These components eliminate guesswork and ensure you have everything needed to start.
Following the included instructions is key—most kits yield 1 to 6 gallons of wine in 4–8 weeks. With pre-measured ingredients, beginners avoid common mistakes and enjoy consistent results. Investing in a quality starter kit gives you a solid foundation and the confidence to explore more advanced techniques later.
Top Brands and Where to Buy
Several trusted brands offer high-quality, beginner-friendly wine making kits that deliver great taste and ease of use. Wine Kits Canada, Winexpert, and Connoisseur Collection are top choices, known for their reliable ingredients and clear instructions. These kits often use premium grape concentrates from renowned wine regions, ensuring authentic flavor.
You can purchase them online through specialty retailers like MoreWine!, Austin Homebrew Supply, or Amazon, where customer reviews help guide your choice. Local homebrew stores also carry starter kits and can offer personalized advice. Look for kits labeled ‘easy’, ‘express’, or ‘premier’ depending on your desired timeline and quality.
Many include step-by-step guides and customer support. Buying from reputable sources ensures fresh ingredients and access to replacement parts or upgrades as your skills grow. Start with a proven brand to build confidence and enjoy consistent results.
How to Choose the Right Kit for You
Choosing the right wine making kit depends on your experience level, preferred wine style, and available time. Beginners should look for kits labeled ‘starter’, ‘introductory’, or ‘easy ferment’ with clear instructions and minimal steps. Decide whether you want red, white, rosé, or fruit-based wine, as kits specialize in different profiles.
Consider fermentation time—some kits produce drinkable wine in under a month, while others take 2–3 months for richer flavor. Check the batch size (typically 1–6 gallons) based on your storage and consumption needs. Ensure the kit includes bottling supplies or confirm you have them separately.
Read reviews to gauge taste quality and ease of use. Lastly, verify that the kit matches your equipment—some require a carboy, others use a bucket. Choosing wisely ensures a successful first batch and encourages continued exploration of home winemaking.
Frequently Asked Questions
What basic supplies do I need to make wine at home?
To make wine at home, you’ll need a fermentation vessel, an airlock, a siphon, wine bottles, corks, a corker, sanitizer, and wine yeast. Additional items like a hydrometer and test jars help monitor sugar levels and fermentation progress.
Can I make wine without a wine kit?
Yes, you can make wine without a kit using fresh grapes or fruit, sugar, wine yeast, and acid blends. You’ll need to manage the recipe and sanitation more carefully compared to using a pre-formulated kit.
What type of fermentation vessel is best for winemaking?
Food-grade plastic buckets or glass carboys are commonly used. Glass carboys are preferred for secondary fermentation because they’re non-porous and protect against oxidation, while plastic buckets work well for primary fermentation.
How important is sanitization in winemaking?
Sanitization is critical to prevent contamination by bacteria or wild yeast, which can spoil your wine. Always clean and sanitize all equipment that comes in contact with the wine.
Do I need special bottles to store homemade wine?
Yes, use dark glass wine bottles to protect the wine from light exposure. Standard 750ml bottles with a cork finish are ideal, and they should be thoroughly cleaned and sanitized before use.
What is the role of a hydrometer in winemaking?
A hydrometer measures the specific gravity of your wine, helping you track sugar content and estimate alcohol levels during fermentation. This ensures fermentation completes properly and helps achieve desired wine characteristics.
Conclusion
Making wine at home is a rewarding and enjoyable process with the right supplies. From fermenters and airlocks to sanitizers and bottles, each tool plays a vital role in crafting quality wine. With proper equipment and attention to detail, anyone can create delicious homemade wine.