How To Safely Clean Microwave
Tackling a messy microwave doesn’t have to be stressful or risky. With the right method, you can safely clean your microwave in minutes using simple household items like vinegar, water, and a sponge. Whether it’s splattered sauce or stubborn odors, we’ve got safe, effective solutions that work quickly. Say goodbye to yucky buildup and hello to a fresh, sparkling microwave—without the guesswork.
Why Regular Microwave Cleaning Is Essential for Safety and Performance
Health Risks of a Dirty Microwave
A microwave that isn’t cleaned regularly can become a breeding ground for bacteria and mold, especially when food splatters are left to sit. These contaminants thrive in warm, moist environments and can easily transfer to your food during heating, posing serious health risks like foodborne illnesses.
Leftover residues may also attract pests or emit unpleasant odors. To minimize these dangers, wipe down the interior after each use with a damp cloth and mild detergent.
For tougher stains, use a microwave-safe bowl with water and lemon or vinegar, heat it for a few minutes to loosen grime, then easily wipe it away. Regular disinfecting ensures your microwave remains a safe tool for food preparation.
How Built-Up Grime Affects Cooking Efficiency
Accumulated food splatters and grease inside the microwave can interfere with even heating, leading to cold spots and unevenly cooked meals. The microwave’s energy reflects off the interior walls, but when those surfaces are coated in residue, the waves scatter unpredictably.
This reduces cooking efficiency and may require longer heating times, wasting energy. To restore optimal performance, clean the interior, turntable, and ceiling regularly using non-abrasive cleaners. A simple steam-cleaning method—microwaving a bowl of water with lemon slices—helps loosen stubborn buildup without harsh chemicals.
Maintaining a clean cavity ensures food heats quickly and evenly, improving both taste and safety.
Preventing Fire Hazards from Food Residue
Dried food particles and grease splatters inside the microwave can ignite under high heat, especially if they contain oils or sugars that burn easily. This poses a real fire hazard, particularly during extended heating cycles.
Sparks or smoke may occur when residue overheats, potentially damaging the appliance or causing kitchen fires. To prevent this, never ignore splattered or burnt-on food. Clean spills immediately and perform weekly deep cleans. Avoid using metal or aluminum foil, which can also cause arcing.
For safe cleaning, unplug the microwave, use a soft sponge with warm soapy water, and steer clear of abrasive tools that could damage protective coatings. Proactive cleaning eliminates ignition risks and keeps your kitchen safe.
Extending Appliance Lifespan with Routine Maintenance
Regular cleaning is essential for maximizing your microwave’s lifespan. Built-up grime can corrode interior surfaces, damage the turntable mechanism, and strain internal components by forcing the unit to work harder. Routine maintenance prevents wear and tear, ensuring smooth, reliable operation over time.
Wipe down the door seal, clean the vents, and check for debris that could block airflow. Using gentle, non-corrosive cleaners protects the finish and electronics. Setting a weekly cleaning schedule—including steam-cleaning and turntable washing—keeps performance high and repairs rare.
A well-maintained microwave not only runs more efficiently but also avoids premature replacement, saving money and reducing waste in the long term.
Essential Safety Precautions Before Cleaning Your Microwave
Unplugging the Microwave for Maximum Safety
Before beginning any cleaning process, always unplug the microwave to eliminate the risk of electrical shock or accidental activation. This is the most critical safety step, as microwaves contain high-voltage components that can remain energized even when turned off.
Locate the power cord and disconnect it from the wall outlet to ensure the appliance is completely powered down. Never attempt to clean the interior or exterior while the unit is plugged in, even if it appears to be off.
Taking a few seconds to unplug the microwave can prevent serious accidents. For added safety, consider labeling the outlet or using a reminder tag if others frequently use the kitchen. This simple precaution ensures a safe cleaning environment every time.
Allowing the Interior to Cool Completely
After using your microwave, allow sufficient time for the interior to cool before starting the cleaning process. Residual heat can cause burns when touching hot surfaces or when steam is released during cleaning.
Never open the door and immediately wipe down the walls or turntable, as trapped heat can also cause cleaning solutions to vaporize quickly, creating scalding steam.
Wait at least 10–15 minutes after the microwave has been used, or test the interior with the back of your hand to ensure it’s safe. Cooling the appliance fully not only protects you but also improves cleaning effectiveness, as some residues are easier to remove once cooled.
Patience here prevents injury and enhances results.
Using Non-Toxic, Non-Abrasive Cleaning Tools
Choose gentle, non-toxic cleaning agents like a mixture of vinegar and water or baking soda paste to avoid damaging the microwave’s interior or exposing yourself to harsh fumes.
Avoid abrasive scrubbers, steel wool, or chlorine-based cleaners, as these can scratch surfaces and degrade the microwave’s protective coating, leading to rust or reduced efficiency. Instead, use a soft sponge, microfiber cloth, or paper towel for wiping. These materials effectively lift grime without causing harm.
Always test cleaning solutions on a small, inconspicuous area first. By selecting the right tools and cleaners, you ensure a thorough clean while preserving the appliance’s integrity and promoting a healthier kitchen environment.
Protecting Yourself with Gloves and Ventilation
Wear rubber or nitrile gloves to shield your hands from hot surfaces, cleaning agents, and accumulated bacteria inside the microwave. Even when using natural cleaners, gloves provide a barrier against germs and potential skin irritation.
Additionally, ensure the kitchen is well-ventilated by opening a window or turning on an exhaust fan, especially if using steam or stronger solutions. Proper airflow helps disperse any vapors and prevents inhalation of fumes. This is particularly important for individuals with respiratory sensitivities.
Combining gloves with good ventilation creates a safer cleaning experience, reducing both chemical and biological risks. These protective measures are simple yet effective ways to prioritize personal safety during routine appliance maintenance.
Best Natural and Homemade Cleaning Solutions for Microwaves
Vinegar and Water Steam Cleaning Method
The vinegar and water steam cleaning method is one of the safest and most effective ways to clean your microwave naturally. Combine equal parts white vinegar and water in a microwave-safe bowl—about 1 cup of each.
Place the bowl inside the microwave and heat on high for 3–5 minutes, or until the mixture boils and steam coats the interior. The hot steam loosens dried-on food and grime, while the vinegar helps dissolve grease and eliminate odors.
After heating, carefully remove the bowl (it will be hot), then wipe down the interior with a damp cloth or sponge. This method avoids harsh chemicals and leaves your microwave sparkling without residue. Always unplug the microwave or let it cool before cleaning crevices or the turntable.
Lemon Juice for Degreasing and Freshening
Lemon juice is a natural degreaser and deodorizer, making it ideal for freshening and cleaning your microwave safely. Squeeze the juice of one lemon into a bowl of 1 cup of water and place it in the microwave.
Heat on high for 3–4 minutes to allow the citrus-infused steam to soften stuck-on food. The citric acid breaks down grease and leaves behind a bright, clean scent. After steaming, let the microwave sit for a few minutes, then wipe the interior with a soft cloth.
This method is especially useful for removing lingering food smells and light stains. Lemon juice is non-toxic and safe for households with children or pets, providing a refreshing alternative to commercial cleaners without compromising effectiveness.
Baking Soda Paste for Tough Stains
For stubborn stains and baked-on spills, a baking soda paste offers a gentle yet powerful cleaning solution. Mix 2 tablespoons of baking soda with enough water to form a thick paste. Apply the paste directly to tough spots inside the microwave and let it sit for 5–10 minutes.
The mild abrasiveness of baking soda lifts grime without scratching surfaces. Use a damp sponge or soft cloth to gently scrub the area in circular motions, then wipe clean with a damp cloth. This method is especially effective after using a steam technique, as it helps remove residue that remains.
Baking soda is non-toxic and eco-friendly, making it a safe choice for frequent microwave maintenance and deep cleaning sessions.
Combining Ingredients for Maximum Effectiveness
You can combine natural ingredients like vinegar, lemon juice, and baking soda to maximize cleaning power while maintaining safety. Start with a vinegar-water or lemon-water steam session to loosen debris, then follow up with a baking soda paste on persistent areas.
This two-step process leverages the steam’s softening effect and baking soda’s scrubbing ability for a thorough clean. Avoid mixing vinegar and baking soda directly in the same solution, as the chemical reaction reduces their effectiveness. Instead, use them sequentially.
This approach ensures your microwave is not only free of grease and stains but also sanitized and odor-free. These natural solutions work synergistically, offering a comprehensive cleaning routine without exposing your kitchen to harsh chemicals.
Step-by-Step Guide to Deep Cleaning Your Microwave
Preparing Your Cleaning Supplies
Before cleaning your microwave, gather all necessary supplies to ensure a safe and efficient process. You’ll need a microwave-safe bowl, distilled white vinegar or lemon juice, water, a soft sponge or cloth, baking soda, and rubber gloves for hand protection.
Avoid using abrasive scrubbers or harsh chemicals like bleach or ammonia, as they can damage the interior surface and leave harmful residues. Ensure the microwave is unplugged or at least turned off at the power source to prevent accidental activation.
Having everything ready minimizes interruptions and keeps your focus on thorough cleaning. Using natural, non-toxic ingredients not only protects your appliance but also ensures food safety. This preparation step sets the foundation for a deep clean without risking damage or personal injury.
Creating Steam to Loosen Grime
To safely loosen built-up grease and food splatters, use steam generated from a vinegar or lemon solution. Mix one cup of water with half a cup of white vinegar or the juice of one lemon in a microwave-safe bowl.
Place the bowl inside the microwave and heat on high for 3–5 minutes, or until the solution boils and steam condenses on the interior walls. Keep the door closed for an additional 5 minutes after heating to allow the steam to soften stubborn grime.
This method avoids the need for harsh scrubbing and reduces exposure to chemicals. The steam effectively breaks down residue, making it easier to wipe away. Always use oven mitts when removing the hot bowl to prevent burns, ensuring a safe and effective cleaning experience.
Wiping Down Interior Surfaces Safely
After steaming, gently wipe down all interior surfaces using a soft sponge or microfiber cloth dampened with the vinegar solution or plain water. Focus on the ceiling, walls, door, and corners where grime accumulates.
For stubborn spots, make a paste of baking soda and water, apply it with a cloth, and let it sit for a minute before wiping—this gentle abrasion removes residue without scratching. Never spray liquids directly into the microwave; instead, apply them to the cloth to avoid damaging electrical components.
Ensure all surfaces are completely dry after cleaning to prevent moisture buildup and odors. This careful approach maintains the microwave’s integrity while achieving a deep, hygienic clean without risking damage or safety hazards.
Cleaning the Turntable and Removable Parts
Remove the turntable, roller ring, and any other detachable components for thorough cleaning. Wash these parts in warm, soapy water using a mild dish detergent and a non-abrasive sponge. Avoid submerging the roller ring’s motor housing if it’s not fully detachable—wipe it with a damp cloth instead.
For tough stains on the glass turntable, soak it for 10–15 minutes before scrubbing gently. Rinse all parts with clean water and dry them completely before reassembling to prevent steam or slipping during operation. Regular cleaning of these parts ensures smooth rotation and prevents odors.
This step is essential for maintaining both performance and hygiene, and doing it safely extends the lifespan of your microwave with minimal effort.
Tackling Tough Stains and Burnt-On Food Residue
Identifying Problem Areas in the Microwave Cavity
Start by removing the turntable and inspecting the interior walls, ceiling, and floor of the microwave for visible residue, discoloration, or hardened food buildup. Pay close attention to corners and edges where burnt-on splatters accumulate over time. Use a flashlight if needed to spot hidden grime.
Identifying these problem areas helps target cleaning efforts efficiently without unnecessary scrubbing. Avoid using sharp tools that could scratch the surface. Mark tough spots with a mental note or sticky label so you can focus steam or cleaning paste on them later.
Early detection prevents long-term damage and makes each cleaning session quicker. A thorough visual assessment ensures no stain is overlooked, leading to a safer, more hygienic appliance.
Using Baking Soda for Abrasive-Free Scrubbing
Create a gentle yet effective cleaning paste using two tablespoons of baking soda and one tablespoon of water. Baking soda’s mild abrasiveness lifts grime without damaging the microwave’s interior coating.
Apply the paste directly to stubborn stains using a soft sponge or cloth, then let it sit for 2–3 minutes to break down residue. Gently scrub in circular motions, focusing on burnt-on spots or sticky spills. Wipe clean with a damp microfiber cloth.
This method is safe for most microwave surfaces, including painted and stainless steel interiors. Baking soda also neutralizes lingering odors, leaving your microwave fresh. Always avoid harsh scrubbers or chemical cleaners that compromise the protective finish.
Reapplying Steam for Stubborn Spills
For persistent spills, reapply steam to soften hardened food particles. Fill a microwave-safe bowl with one cup of water and a few tablespoons of white vinegar or lemon juice, then heat on high for 3–5 minutes until steam condenses on the interior walls.
Let the door remain closed for an additional 5 minutes to allow steam to penetrate tough residue. Carefully remove the bowl and use a soft cloth to wipe away loosened grime—minimal scrubbing is needed. Repeat if necessary, especially for thick, carbonized spills.
This chemical-free method safely breaks down messes using heat and moisture, protecting your microwave’s finish while ensuring deep cleaning without risk of damage.
Avoiding Damage to the Interior Coating
Protect your microwave’s interior by never using metal scrubbers, abrasive powders, or harsh chemicals like bleach or ammonia-based cleaners. These can scratch or degrade the protective coating, leading to rust and reduced efficiency.
Instead, opt for soft cloths, sponge pads labeled non-abrasive, and natural cleaning agents like vinegar or baking soda. Avoid scraping with utensils or sharp objects, even when removing tough residue. Always unplug the microwave before deep cleaning to ensure safety.
Wipe down surfaces with a damp cloth after cleaning to remove any cleaning agent traces. Preserving the interior coating extends your appliance’s lifespan and maintains optimal performance, ensuring safe, efficient operation for years.
Maintaining a Clean Microwave with Daily and Weekly Habits
Wiping Spills Immediately After Use
Cleaning spills right after they happen is one of the most effective ways to maintain a clean microwave. As soon as your food is done, wait 30 seconds for the interior to cool slightly, then use a damp microfiber cloth or sponge to gently wipe away any splatters.
This prevents food residue from baking onto the walls or turntable, which makes future cleaning much harder. For stubborn spots, place a microwave-safe bowl with water and a splash of vinegar inside and heat it for 2–3 minutes to loosen dried-on grime.
Always unplug the microwave or ensure it’s off before cleaning, and avoid abrasive scrubbers that can damage the interior coating. Immediate wiping keeps your microwave hygienic and reduces the need for intensive cleaning later.
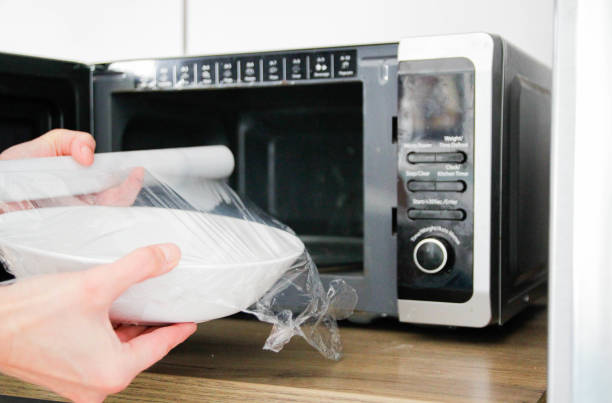
Using Microwave Covers to Prevent Splatters
A simple way to minimize mess is by using a microwave-safe splatter cover every time you heat food. These reusable lids, made from BPA-free plastic or silicone, fit over bowls and plates to trap steam and prevent food from spraying inside the microwave.
They not only reduce cleanup time but also help food heat more evenly. Always ensure the cover has venting holes or leave a small gap to allow steam to escape safely. After use, wash the cover with warm, soapy water as part of your dish routine.
Consistent use of covers dramatically reduces interior buildup, making daily wipe-downs quicker and more effective. This small habit promotes long-term cleanliness and extends the life of your appliance.
Scheduling Regular Deep Cleaning Sessions
Even with daily care, your microwave needs a thorough deep clean every one to two weeks to remove lingering grease, stains, and bacteria. Start by removing the turntable and washing it with warm, soapy water.
For the interior, mix equal parts water and white vinegar in a microwave-safe bowl and heat it on high for 3–5 minutes until steam condenses on the walls. This softens stuck-on food and disinfects naturally. Carefully remove the bowl, then wipe down all surfaces with a soft cloth.
Use a toothbrush for crevices around the door seal. Dry everything before reassembling. Regular deep cleaning ensures peak performance, prevents odors, and maintains a sanitary cooking environment without harsh chemicals.
Odor Prevention with Simple Daily Practices
Preventing unpleasant smells starts with consistent, simple habits after each use. After removing your food, leave the microwave door open for a minute to let moisture escape, reducing the chance of mildew and odor buildup.
Wipe the interior with a cloth dampened with water and a drop of dish soap or diluted lemon juice, which naturally deodorizes. If lingering smells persist, place a small bowl of baking soda inside overnight to absorb odors safely and effectively.
Avoid heating pungent foods like fish or onions without a cover, as their vapors can embed in the walls. By incorporating these small steps daily, you maintain a fresh-smelling microwave that’s always ready for use, without needing frequent intensive odor treatments.
Common Microwave Cleaning Mistakes to Avoid
Using Harsh Chemicals That Emit Toxic Fumes
Avoid using abrasive or chlorine-based cleaners inside your microwave, as they can release toxic fumes when heated and leave behind harmful residues on food-contact surfaces. These chemicals may also degrade the microwave’s interior coating over time, reducing its efficiency and safety.
Instead, opt for natural cleaning solutions like a mixture of white vinegar and water or lemon juice and water. Heat the solution for 2–3 minutes to create steam, which loosens grime without chemical risks. Always ensure the microwave is unplugged and cooled before cleaning.
Ventilate the area during and after cleaning to disperse any lingering odors. This safe, steam-based method effectively cuts through grease and eliminates odors without endangering your health.
Scratching the Interior with Steel Wool or Scrapers
Never use steel wool, metal scrapers, or abrasive pads to clean your microwave’s interior, as they can scratch the enamel or paint, exposing underlying metal to moisture and accelerating rust and damage. These scratches also harbor bacteria and make future cleaning more difficult.
Instead, use a soft sponge, microfiber cloth, or nylon brush to gently remove food residue after steaming. For stubborn spots, let the steam soften the grime for a few extra minutes before wiping.
If residue persists, apply a paste of baking soda and water, which acts as a gentle abrasive without damaging surfaces. Regular use of non-abrasive tools preserves your microwave’s interior and ensures long-term performance and hygiene.
Skipping the Vent and Door Seal Areas
Many people overlook the microwave’s vent and door seal during cleaning, but these areas collect grease, food particles, and mold that can affect performance and hygiene. The door seal (gasket) keeps radiation contained, and buildup can compromise its effectiveness.
Use a damp cloth with mild soapy water to wipe the seal gently—avoid harsh scrubbing. Check the top or side vents for dust and debris, which can obstruct airflow and cause overheating. Use a cotton swab or soft brush to clean these tight spaces.
Regular maintenance of these zones ensures safe operation, prevents odors, and extends the appliance’s life. Never let moisture or cleaning solution seep into electrical components—always unplug first.
Not Rinsing Cleaning Residue Properly
Failing to thoroughly rinse or wipe away cleaning residue can leave behind soapy or acidic traces that emit fumes or taint food during future use. After using vinegar, lemon, or baking soda solutions, wipe the interior with a clean, damp cloth to remove any leftover particles.
For best results, follow up with a second cloth dampened with plain water to ensure a residue-free finish. Allow the microwave to air dry with the door open for a few minutes. This step is crucial when using homemade cleaning mixtures, as they may leave behind natural oils or acids.
Proper rinsing ensures your microwave remains safe, odor-neutral, and ready for food preparation without contamination risks.
Frequently Asked Questions
What is the safest way to clean a microwave?
The safest way to clean a microwave is by using a mixture of water and mild dish soap or white vinegar. Heat the solution inside the microwave for a few minutes to create steam, which loosens grime, making it easy to wipe away with a soft cloth.
Can I use vinegar to clean my microwave?
Yes, you can clean your microwave with a solution of equal parts water and white vinegar. Heat it for 3-5 minutes, let it sit for a few more, then wipe the interior to remove grease and odors safely.
How do I remove stubborn food stains from my microwave?
To remove stubborn stains, heat a bowl of water with lemon juice or vinegar for 5 minutes. Let the steam soften the residue, then gently scrub with a non-abrasive sponge or cloth.
Is it safe to use commercial cleaners in the microwave?
It’s best to avoid harsh chemical cleaners as they can leave toxic residues on food-contact surfaces. Opt for natural solutions like vinegar, lemon, or mild soap and water for safe cleaning.
How often should I clean my microwave?
For hygiene and performance, clean your microwave at least once a week. If you notice spills or splatters, clean them immediately to prevent buildup and odors.
What should I avoid when cleaning a microwave?
Avoid using abrasive scrubbers, steel wool, or strong chemicals that can damage the interior coating or leave harmful residues. Also, never submerge the microwave or clean electrical components.
Can I clean the microwave turntable in the dishwasher?
Most microwave turntables are dishwasher-safe, but check the manufacturer’s manual first. If washing by hand, use warm soapy water and dry thoroughly before replacing.
Conclusion
Cleaning your microwave safely is simple and effective when using natural ingredients like vinegar or lemon juice. Always unplug the appliance and avoid harsh chemicals to protect both yourself and the microwave. Regular maintenance prevents buildup and odors, keeping your kitchen fresh. With just a few minutes of effort, you can maintain a clean, hygienic cooking environment. Stay consistent, stay safe, and enjoy a sparkling microwave every time.