How To Make Wine From Grapes At Home
Making wine from grapes at home is simpler than you think and incredibly rewarding. With just a few basic supplies and some patience, you can turn fresh grapes into delicious homemade wine. Whether you’re a beginner or just looking to refine your technique, you’ll have clear, easy-to-follow instructions to craft your own wine right in your kitchen. Let’s get started.
How to Choose the Right Grapes for Homemade Wine
Best Grape Varieties for Red and White Wine
Choosing the right grape variety is essential for quality homemade wine. For red wine, varieties like Cabernet Sauvignon, Merlot, and Syrah offer rich color, tannins, and deep flavors ideal for fermentation. These grapes have thick skins and high sugar levels, which contribute to alcohol content and aging potential.
For white wine, opt for Chardonnay, Sauvignon Blanc, or Riesling, known for their aromatic profiles and balanced acidity. These varieties ferment cleanly and retain bright, crisp characteristics. Avoid table grapes like Thompson Seedless, as they lack the sugar, acidity, and tannin balance needed for wine.
Always select wine-specific grapes to ensure your homemade wine develops proper body, complexity, and structure.
Where to Buy Wine Grapes
You can source wine grapes from specialty suppliers, vineyards, or homebrew stores, especially during harvest season (late summer to early fall). Many online vendors ship fresh, crushed grapes or frozen must directly to your door, making it convenient for home winemakers.
Look for suppliers that provide varietal-specific grapes with harvest dates and Brix levels to ensure ripeness and quality. Joining a local winemaking club or co-op can also give you access to bulk grape purchases. When buying, confirm the grapes are destemmed and crushed properly, or plan to do it yourself.
Reliable sources ensure your wine starts with fresh, uncontaminated fruit, which is critical for a successful fermentation and clean-tasting final product.
Fresh vs. Frozen Grapes: What Works Best
Both fresh and frozen grapes can produce excellent homemade wine, but each has advantages. Fresh grapes are ideal when harvested at peak ripeness, offering vibrant flavors and natural yeast for fermentation. However, they must be processed quickly to avoid spoilage.
Frozen grapes are flash-frozen post-harvest, preserving sugar, acid, and flavor compounds, and are available year-round. Freezing also breaks down cell walls, aiding juice extraction. While frozen grapes may lack native yeast, you can inoculate with wine yeast for consistent results.
For most home winemakers, frozen grapes offer convenience and reliability without sacrificing quality. Just ensure they’re unsweetened and additive-free. Both types work well when handled properly.
How Much Fruit You Need Per Batch
To make a standard 5-gallon batch of wine, you’ll need approximately 70 to 90 pounds of grapes, depending on the variety and juice yield. Red wines often require more fruit due to higher solids and lower juice extraction.
As a rule, expect 2.5 to 3 gallons of juice from 50 pounds of grapes, so scaling up is necessary. Crush the grapes gently to avoid releasing bitter tannins from seeds and stems. Use a press for maximum yield. If using frozen grapes, account for some liquid loss during thawing.
Always sanitize equipment and measure Brix levels to ensure adequate sugar for your target alcohol content. Planning your fruit quantity in advance prevents shortages mid-process and ensures consistent fermentation and balanced flavor in your final wine.
Essential Equipment for Home Winemaking
Fermentation Containers and Carboys
Choosing the right fermentation container is crucial for successful home winemaking. Food-grade plastic buckets or glass carboys are the most common options, each offering distinct advantages. Plastic buckets are lightweight and affordable, ideal for primary fermentation where vigorous bubbling occurs.
Glass carboys, on the other hand, are best for secondary fermentation due to their impermeable surface, which prevents oxygen exposure and contamination. Ensure your container has a capacity of at least 6 gallons for a standard 5-gallon batch to allow headspace for foam.
Always sanitize thoroughly before use with a no-rinse sanitizer to eliminate bacteria and wild yeast. A lid with a hole for an airlock is essential to maintain an anaerobic environment while allowing gases to escape safely.
Airlocks and Stoppers
An airlock and stopper system is essential to protect your fermenting wine from contamination while allowing carbon dioxide to escape. The stopper fits snugly into the carboy’s mouth, creating an airtight seal, while the airlock, typically filled with water or sanitizer, acts as a one-way valve.
This setup prevents oxygen and microbes from entering, which could spoil the wine or cause vinegar formation. Use a #6 or #7 rubber stopper that fits your carboy precisely to avoid leaks. Float-type or three-piece airlocks both work well; the latter is easier to clean.
Regularly check the airlock to ensure it’s functioning—bubbling indicates active fermentation. Replace water if it evaporates and sanitize before reattaching.
Hydrometer and Testing Tools
A hydrometer is a vital tool for measuring the sugar content, tracking fermentation progress, and estimating alcohol by volume (ABV). Take an initial reading before fermentation begins (original gravity), then subsequent readings to monitor sugar conversion. When gravity stabilizes over several days, fermentation is likely complete.
Always draw a sample using a sanitized wine thief and test in a graduated cylinder. Temperature affects accuracy, so use a temperature-corrected reading or adjust accordingly. Other useful tools include pH test strips or a pH meter to ensure proper acidity, and acid testing kits to balance flavor.
Accurate measurements help produce consistent, high-quality wine and prevent issues like stuck fermentation or excessive sweetness.
Bottles, Corks, and Cappers
Once fermentation is complete and the wine is clear, it’s time to bottle and seal your wine properly. Use clean, sanitized glass wine bottles—recycled ones work if free of residue and labels. Choose high-quality natural or synthetic corks that match your bottle neck size.
To insert corks, you’ll need a hand-held corker (double-lever or floor model), which ensures a tight, secure fit without damaging the cork. Proper sealing prevents oxidation and spoilage during aging. Store bottles horizontally to keep corks moist and maintain airtight seals.
Label your bottles with the wine type and date for tracking. Always sanitize bottles, corks, and tools before bottling to avoid contamination and ensure longevity.
Step-by-Step Process for Making Wine from Grapes
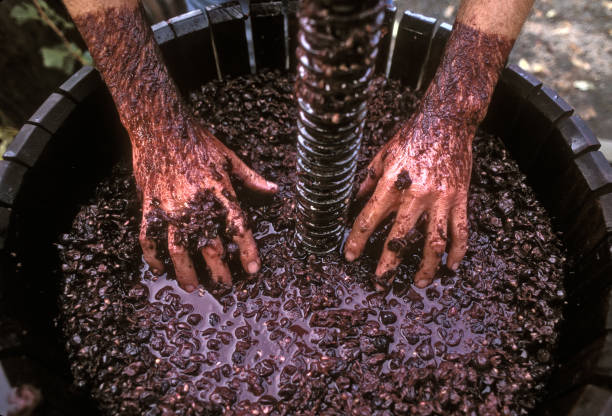
Crushing Grapes by Hand or Machine
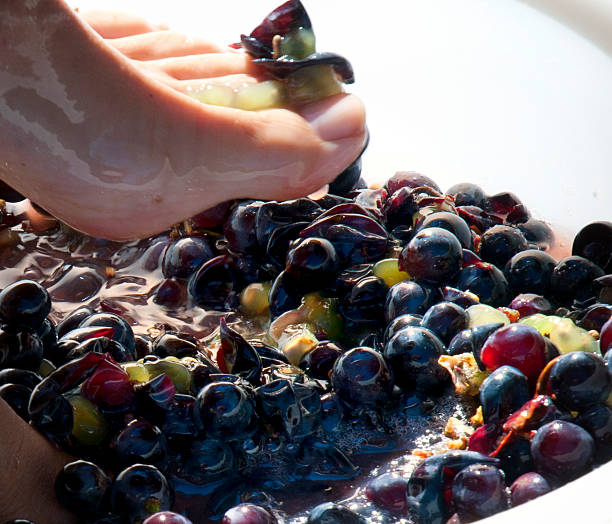
Begin by thoroughly washing and sorting your grapes to remove leaves, stems, and debris. For small batches, crush the grapes by hand in a sanitized container, gently squeezing them to release juice while avoiding breaking seeds, which can add bitterness.
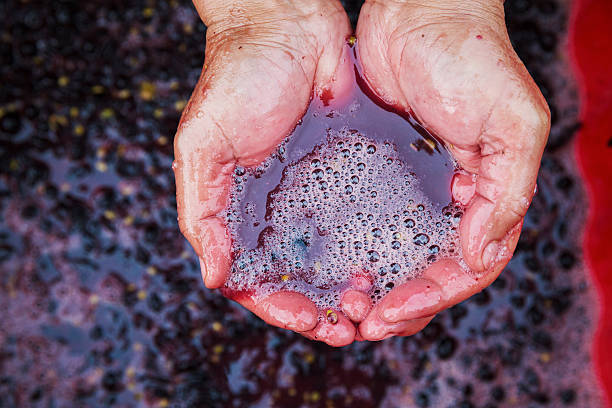
For larger quantities, consider using a manual or electric crusher-destemmer to efficiently separate grapes from stems and break skins. The goal is to create a mixture called must, composed of juice, skins, and seeds. Transfer the must into a sanitized fermentation vessel.
Do not crush too aggressively, as this can extract harsh tannins. Keep everything clean to prevent contamination, and cover the vessel with a breathable cloth to keep out insects while allowing gas exchange.
Adding Yeast and Starting Fermentation
Once the must is in the fermentation vessel, it’s time to introduce wine yeast to begin alcoholic fermentation. While wild yeast can naturally ferment the juice, using a cultured wine yeast strain ensures consistency and desired flavor. Rehydrate the yeast according to package instructions before adding it to the must.
Stir well to distribute evenly. Maintain a consistent temperature (ideally 68–75°F or 20–24°C) to support healthy fermentation. Fit an airlock on the container to allow carbon dioxide to escape while preventing oxygen and contaminants from entering.
Fermentation typically begins within 12–48 hours and is indicated by bubbling and a frothy surface. Monitor daily and stir the cap of skins that forms on top to extract color and flavor.
Pressing Juice After Primary Ferment
After 5–7 days, when primary fermentation slows (bubbling reduces significantly), it’s time to separate the juice from the solids. Carefully transfer the must into a sanitized wine press or use a fine mesh bag to gently press the liquid from the skins and seeds.
Avoid over-pressing, as this can extract harsh tannins and cloudiness. The extracted liquid, now called young wine, should be clear or slightly hazy. Do not squeeze too hard—use gradual pressure for best quality. Transfer the pressed wine into a sanitized carboy or demijohn, leaving behind as much sediment as possible.
This step marks the end of primary fermentation and prepares the wine for clarification and further development during aging.
Racking and Secondary Fermentation
Transfer the pressed wine into a sanitized glass carboy using a siphon, a process known as racking, to leave sediment behind. Fit an airlock to prevent oxidation and contamination.
At this stage, the wine undergoes secondary fermentation, often involving malolactic fermentation (conversion of sharp malic acid to softer lactic acid), which improves mouthfeel and stability. This process can take several weeks to months.
Store the carboy in a cool, dark place and rack the wine every 2–3 months to remove sediment buildup. After secondary fermentation completes and the wine clears, it’s ready for stabilization, fining (if needed), and eventual bottling after 6–12 months of aging.
Managing Fermentation and Alcohol Levels
Ideal Temperature for Fermenting Wine
Maintaining the ideal fermentation temperature is crucial for producing balanced, flavorful wine at home. For most red wines, the optimal range is between 68°F and 75°F (20°C–24°C), which allows yeast to work efficiently without producing off-flavors.
White wines and delicate varieties perform best at slightly cooler temperatures, around 55°F to 65°F (13°C–18°C). Use a fermentation chamber, temperature-controlled room, or wrap the fermenter with a heating belt or cooling wrap as needed.
Avoid temperature fluctuations, as they can stress the yeast, leading to stuck fermentation or unwanted aromas. Monitor the must temperature daily, especially during active fermentation, and adjust your environment to keep it stable. Consistent temperatures ensure a clean, complete fermentation and a better-tasting final product.
How to Monitor Sugar and Alcohol with a Hydrometer
A hydrometer is an essential tool for tracking the progress of your wine fermentation. Before pitching yeast, take an initial specific gravity (SG) reading to determine the starting sugar level—typically between 1.070 and 1.100 for wine. As yeast converts sugar into alcohol, the SG drops.
Take readings every few days, sanitizing the hydrometer and sample tube each time. When the SG stabilizes near 1.000 or below (usually 0.990–1.000) for three consecutive days, fermentation is likely complete.
Use the difference between the starting and final gravity to calculate alcohol by volume (ABV) using a simple formula: (Starting SG – Final SG) × 131. This helps ensure your wine reaches the desired strength and sweetness level.
When to Stop Fermentation
Knowing when to stop fermentation is key to achieving your desired wine style. For dry wines, allow fermentation to run its course until the hydrometer reads stable and near 0.990–1.000 for at least three days. To make sweet or off-dry wines, you’ll need to halt fermentation early.
This can be done by chilling the wine to slow yeast activity, then adding potassium sorbate and sulfites (like Campden tablets) to stabilize it. Never stop fermentation without stabilization, as residual yeast can restart later, causing carbonation or even bottle explosions.
Racking the wine off the lees before stabilization helps reduce yeast activity. Timing and proper additives ensure your wine remains stable, safe, and delicious.
Troubleshooting Common Fermentation Problems
Home winemakers often face common fermentation issues like sluggish starts, stuck fermentation, or off-odors. If fermentation doesn’t begin within 36 hours, check the yeast viability, temperature, and nutrient levels—rehydrate active yeast and ensure the must is warm enough.
A stuck fermentation (where activity stops prematurely) may result from low temperature, nutrient deficiency, or high alcohol levels. Gently stir the must, warm it gradually, or add yeast nutrients to restart. For unpleasant smells like rotten eggs, add a copper coin or copper sulfate during racking.
Always maintain strict sanitation to avoid bacterial contamination. Addressing issues early ensures a healthy fermentation and a high-quality wine.
Aging, Clarifying, and Stabilizing Your Wine
How Long to Age Homemade Wine
The aging time for homemade wine depends on the type of grape and desired flavor profile. Most red wines benefit from 6 to 18 months of aging in a cool, dark place to develop complexity and soften tannins.
White wines typically require 3 to 6 months, though some varieties like Chardonnay can improve with longer aging. Store bottles horizontally to keep corks moist and prevent oxidation. Taste periodically using a sanitized wine thief to monitor progress. Avoid rushing the process, as proper aging enhances aroma, flavor, and smoothness.
Young wines may taste harsh or disjointed, but mellow over time. Always maintain a consistent temperature (55–60°F) and high humidity to protect the wine’s quality during maturation.
Using Fining Agents for Clearer Wine
Fining agents help clarify homemade wine by binding to suspended particles and settling them to the bottom. Common fining agents include bentonite, gelatin, isinglass, and egg whites, each suited to different wine types. Bentonite is ideal for white wines, removing proteins and haze-causing elements.
For reds, gelatin or egg whites gently reduce astringency while improving clarity. Follow manufacturer instructions for dosage and mixing. Add the agent after fermentation, stir gently, and allow 1 to 2 weeks for particles to settle. Racking the wine off the sediment afterward ensures a bright, stable product.
Cold-stabilize before fining for best results. Proper fining enhances appearance and mouthfeel without altering flavor when used correctly.
Cold Stabilization to Prevent Crystals
Cold stabilization prevents tartrate crystals—harmless but unappealing ‘wine diamonds’—from forming in bottled wine. After fermentation and initial clearing, chill the wine to near-freezing temperatures (32–40°F) for 1 to 2 weeks. This encourages potassium bitartrate to crystallize and settle. Use a sanitized container and cover it to prevent contamination.
After chilling, rack the wine carefully to leave crystals behind. This step is especially important for white and rosé wines. While not mandatory, cold stabilization improves visual clarity and consumer confidence.
For home winemakers without a temperature-controlled fridge, short outdoor chilling in cold climates can work—monitor closely to avoid freezing the wine, which can damage flavor and texture.
When and How to Filter Wine
Filtering wine enhances clarity and stability just before bottling, but timing is crucial. Wait until the wine is fully fermented, stabilized, and fined to avoid clogging filters. Use a pad or membrane filter with appropriate micron ratings: 0.45 microns for sterile filtration, or 1 micron for polish filtering.
Assemble the filter system, sanitize all parts, and prime with wine to remove air. Filter slowly to maintain pressure and efficiency. Avoid excessive oxygen exposure by minimizing splashing. Filtering removes yeast and bacteria, reducing spoilage risk. However, some traditionalists skip filtration to preserve body and flavor.
If filtering, bottle immediately afterward to maintain sterility and freshness. Always clean equipment thoroughly post-use for future batches.
Bottling and Storing Homemade Wine
Sanitizing Bottles and Equipment
Before bottling your homemade wine, sanitizing all equipment is essential to prevent contamination and spoilage. Start by thoroughly washing bottles, corks, funnels, siphons, and any tools with hot water to remove residue.
Then, use a no-rinse sanitizer such as potassium metabisulfite or a commercial brewing sanitizer to eliminate bacteria and wild yeast. Soak bottles and equipment for at least 5–10 minutes, ensuring all surfaces are covered. Avoid using dish soap as it can leave residues that affect flavor.
After sanitizing, let everything air-dry upside down on a clean rack—do not towel dry, as this can reintroduce contaminants. Proper sanitation ensures your wine remains stable and safe during storage, preserving the quality of your hard work.
How to Properly Cork Wine Bottles
Corking your wine correctly ensures an airtight seal that protects the wine from oxidation and spoilage. Use a bottle filler wand attached to a siphon to fill each sanitized bottle, leaving about 1–1.5 inches of headspace.
Prepare corks by soaking them in warm water for 10–15 minutes to make them pliable. Use a hand-held corker or floor corker to insert the cork straight and evenly—angled corks can leak. Avoid over-compressing the cork, which may cause cracks.
Test a few bottles by inverting them to check for leaks. Properly corked bottles maintain pressure and prevent air exposure, preserving your wine’s aroma, flavor, and aging potential for years to come.
Best Storage Conditions for Aging
To age homemade wine successfully, store bottles in a cool, dark, and humidity-controlled environment. Ideal conditions include a constant temperature of 55°F (13°C), with minimal fluctuations—avoid areas like kitchens or garages.
Store bottles horizontally to keep corks moist and prevent them from drying out and shrinking, which could let air in. Keep wine away from strong light, especially sunlight and fluorescent bulbs, as UV rays degrade wine quality. Maintain humidity around 70% to prevent cork shrinkage and mold growth.
Avoid vibration and strong odors, which can disturb sediment and affect flavor. Proper storage allows wine to mature gracefully, developing complex flavors over time.
How Long Homemade Wine Lasts
Most homemade wines are best consumed within 1 to 3 years of bottling, though some full-bodied reds can age gracefully for 5 years or more. The shelf life depends on acidity, sugar content, alcohol level, and storage conditions.
Dry wines with high acidity and tannins tend to age longer, while fruit wines and whites are often best within 1–2 years. Always store bottles properly to maximize longevity. Over time, wine may lose its vibrancy or develop off-flavors if exposed to heat, light, or oxygen.
Check each bottle before serving—look for cloudiness, off-odors, or leakage. While homemade wine doesn’t spoil dangerously, its quality diminishes. Labeling bottles with bottling dates helps track aging and ensures optimal drinking windows.
Common Mistakes and Tips for Better Homemade Wine
Avoiding Contamination and Off-Flavors
One of the most critical steps in homemade winemaking is maintaining strict sanitation throughout the process. All equipment, including fermenters, airlocks, spoons, and bottles, must be thoroughly cleaned and sanitized before use to prevent bacterial contamination and wild yeast infections that lead to off-flavors.
Use a no-rinse sanitizer to eliminate microbes without introducing residue. Avoid using chlorinated water, as it can react with compounds in wine and create unpleasant medicinal aromas. Work in a clean, dust-free environment and seal your fermenter promptly with an airlock to protect the must.
Monitor for signs of spoilage, such as mold, vinegar smells, or unexpected cloudiness. Catching contamination early can save a batch or at least prevent future mistakes.
Balancing Sweetness and Acidity
Achieving the right balance between sweetness and acidity is essential for a pleasant-tasting homemade wine. Grapes naturally vary in sugar and acid levels, so testing must is crucial using a hydrometer for sugar (potential alcohol) and a pH or acid test kit for acidity.
If your must is too acidic, it will taste sharp; too little acid results in flat, dull wine. Adjust with food-grade acid blend or water dilution as needed before fermentation.
For sweetness, remember that fermentation converts sugar to alcohol—stop fermentation early or back-sweeten after stabilization with potassium sorbate if you prefer a sweeter wine. Tasting throughout the process helps guide adjustments and ensures a well-rounded final product.
Improving Color and Body
To enhance the color intensity and mouthfeel of your homemade wine, focus on extraction techniques during fermentation. For red wines, regularly stir the cap (the layer of skins and solids that rises to the top) to increase contact between juice and skins, which boosts color and tannin extraction.
Extending the maceration period (skin contact after fermentation) can deepen color and add complexity. Consider using fining agents like bentonite or egg whites to clarify and stabilize the wine, improving both appearance and texture.
For fuller body, some winemakers add grape tannin powder or age the wine on lees (dead yeast cells). These small steps significantly improve the perceived quality and richness of your finished wine.
Tips for Consistent Results Every Batch
Consistency in homemade winemaking comes from meticulous record-keeping and process control. Track every detail—grape source, sugar levels, acid balance, yeast strain, fermentation temperature, and timeline—for each batch. This allows you to replicate successes and correct errors in future runs.
Use the same reliable yeast strains and maintain stable fermentation temperatures (ideally 68–75°F for reds, 55–65°F for whites) to avoid stuck ferments or off-flavors. Invest in quality tools like a thermometer, hydrometer, and pH meter for precision.
Rack carefully to minimize oxidation and always store wine in a cool, dark place. Over time, refining your technique with data-driven adjustments leads to professional-quality results you can depend on.
Frequently Asked Questions
What is the basic process for making wine from grapes at home?
The basic process involves crushing fresh grapes to extract juice, fermenting the juice with yeast, allowing the wine to age, and then bottling it. Sanitation is critical throughout to prevent contamination and spoilage.
How many grapes do I need to make a gallon of wine?
You typically need about 6 to 7 pounds of grapes per gallon of wine. This accounts for juice yield and losses during pressing and fermentation.
Do I need special equipment to make wine at home?
Yes, essential equipment includes a fermenter, airlock, siphon, carboy, hydrometer, and sanitizing solution. A grape crusher and press are helpful but not mandatory for small batches.
What type of yeast should I use for homemade grape wine?
Use wine-specific yeast strains such as Lalvin D-47 or Red Star Côte des Blancs for better flavor control and alcohol tolerance. Avoid regular bread yeast, as it can produce off-flavors.
How long does homemade wine take to ferment?
Primary fermentation usually takes 5 to 10 days, followed by secondary fermentation and aging that can last several weeks to months. Most homemade wines benefit from at least 2 to 6 months of aging before drinking.
Can I make wine without adding sugar?
Yes, if your grapes are naturally high in sugar, you may not need to add extra. However, adding sugar (chaptalization) can help achieve desired alcohol levels, especially in cooler climates where grapes ripen less fully.
How do I know when my wine is ready to bottle?
Your wine is ready to bottle when fermentation has fully stopped, the wine has cleared, and specific gravity readings remain stable over several days using a hydrometer.
How should I store homemade wine after bottling?
Store bottles horizontally in a cool, dark place with stable temperatures around 55°F (13°C) to keep the cork moist and prevent oxidation. Allow the wine to age further for best flavor.
Conclusion
Making wine from grapes at home is a rewarding process that combines patience, cleanliness, and attention to detail. By selecting quality grapes, maintaining proper sanitation, and carefully managing fermentation, you can create delicious homemade wine. While it requires time and care, the results are well worth the effort. With practice, anyone can master this craft and enjoy the fruits of their labor.