How To Make Red Wine At Home
Making red wine at home is easier than you think and incredibly rewarding. With just a few basic ingredients—grapes, yeast, and a bit of patience—you can craft your own delicious red wine right in your kitchen. Whether you’re a beginner or just curious, you’ll have everything you need to make great homemade red wine in no time.
How to Make Red Wine at Home: A Step-by-Step Guide
What You Need to Start Making Red Wine
To begin making red wine at home, gather essential equipment such as a fermentation bucket, glass carboy, airlock, siphon hose, and bottles for storage. You’ll also need a hydrometer to measure sugar levels and potential alcohol content, and a crusher-destemmer if using fresh grapes.
Campden tablets (potassium metabisulfite) are crucial for preventing unwanted bacteria and wild yeast. A large mesh straining bag helps separate juice from skins after fermentation. Yeast starter or wine yeast culture ensures a strong, consistent fermentation. Having all tools ready before starting ensures a smooth process.
Labeling supplies and a thermometer are also helpful for tracking progress and maintaining ideal fermentation temperatures between 70–85°F (21–29°C).
Choosing the Right Red Wine Grapes
Selecting quality red wine grapes is critical for flavor, color, and balance in your homemade wine. Opt for wine-specific grape varieties like Cabernet Sauvignon, Merlot, Syrah, or Zinfandel, available from reputable vineyards or home winemaking suppliers. Grapes should be ripe, plump, and free of mold or damage.
If fresh grapes aren’t accessible, high-quality frozen grape must or juice is a reliable alternative. Consider the sugar content (Brix level) and acidity—ideally between 22–26 Brix and pH 3.3–3.6—for balanced fermentation. Choosing region-specific grapes can help replicate classic wine profiles.
Always taste the grapes beforehand to assess sweetness, tartness, and aroma, ensuring they meet your desired wine style before committing to the batch.
Setting Up Your Home Winemaking Space
A dedicated, clean space is essential for successful home winemaking. Choose a cool, dark area with stable temperatures—such as a basement or garage—where fermentation can occur without fluctuations. Ensure you have ample counter or table space for crushing, pressing, and transferring liquids.
Store equipment within easy reach but off the floor to avoid contamination. Install a sink with running water for cleaning, or keep large containers for rinsing. Keep fermenting vessels covered with sanitized lids or cloth to prevent airborne contaminants. Organize your tools and ingredients in labeled bins for efficiency.
A temperature-controlled environment or fermentation jacket can help maintain ideal conditions, especially during long maceration and aging phases. Proper airflow and minimal sunlight exposure preserve wine quality.
Sanitation: Why It Matters
Sanitation is the most crucial step in preventing spoilage and off-flavors in homemade red wine. All equipment—buckets, carboys, airlocks, spoons, and siphons—must be thoroughly cleaned and sanitized before and after each use. Use a no-rinse sanitizer like Star San or potassium metabisulfite solution to eliminate bacteria, wild yeast, and mold.
Even minor contamination can lead to vinegar-like aromas or cloudy wine. Never skip sanitizing the inside of bottles before filling. Wash hands before handling any components. Re-sanitize tools if they touch unsanitized surfaces. Remember: cleaning removes residue, but sanitizing kills microbes—both steps are necessary.
Consistent sanitation ensures your wine ferments cleanly and ages properly, preserving the rich, complex flavors you aim to create.
Selecting and Preparing Your Grapes
Best Red Wine Grape Varieties for Home Winemaking
Choosing the right grape variety is crucial for successful homemade red wine. Varieties like Cabernet Sauvignon, Merlot, Syrah, and Zinfandel are excellent choices due to their robust flavors, high tannin content, and availability. These grapes thrive in various climates and are often sold in winemaking supply kits for beginners.
Concord grapes can also be used for a fruitier, more approachable wine. Ensure grapes are fresh, ripe, and free of mold or rot—ideally harvested at peak sugar levels. If sourcing locally, consult regional vineyards for advice on suitable types.
Using quality grapes sets the foundation for a balanced, flavorful wine, so invest time in selecting the best available for your region and equipment.
How to Crush Grapes by Hand or Machine
Crushing grapes breaks the skins to release juice and begin fermentation. For small batches, crushing by hand in a sanitized food-grade container is effective—wear sanitized gloves and gently stomp or squeeze the grapes. For larger quantities, a manual or electric crusher-destemmer saves time and ensures consistency.
Avoid over-crushing, which can release bitter tannins from seeds. The goal is to liberate juice while minimizing seed damage. Always sanitize equipment before use to prevent contamination. Transfer the crushed grapes (called must) directly into your fermentation vessel.
This step prepares the must for yeast inoculation and is essential for extracting color, flavor, and aroma from the skins during fermentation.
De-stemming vs. Whole Cluster Fermentation
Deciding whether to de-stem or use whole clusters affects your wine’s tannin structure and aroma. Most home winemakers de-stem grapes to avoid harsh, green tannins from stems and achieve a smoother wine.
However, some styles, like certain Pinot Noirs, benefit from partial whole cluster fermentation, which adds complexity and a spicy note. If using whole clusters, ensure stems are fully ripe to prevent bitterness. Use a destemmer or hand-remove stems for precision.
For reds, a common approach is 10–30% whole clusters to enhance structure without overwhelming the palate. This choice should align with your desired wine profile and grape variety, so experiment cautiously in small batches.
Testing Sugar Levels with a Hydrometer
A hydrometer measures sugar content in your grape must, helping predict potential alcohol levels. To use, collect a sample of juice and place it in a test cylinder, then gently insert the hydrometer.
Read the specific gravity (SG) where the surface intersects the scale—typical red wine must starts between 1.080 and 1.100. This reading indicates enough sugar for 12–14% alcohol after fermentation. If sugar is too low, add sugar (chaptalization) according to recipe guidelines.
If too high, dilute with water or use lower-sugar grapes. Sanitize all tools to avoid contamination. Regular testing during fermentation also tracks progress and confirms when fermentation is complete, ensuring a balanced, properly alcoholic wine.
Fermenting Red Wine at Home

Adding Wine Yeast: When and How Much
After crushing your grapes and transferring the must (juice, skins, seeds) to a fermentation vessel, rehydrate wine yeast properly before adding it. Use a sanitized container to mix the yeast with warm water (around 100°F or 38°C) and let it sit for 15–20 minutes until frothy.
This step boosts yeast viability and ensures a strong start. For every 5–6 gallons of must, use one packet (5 grams) of wine yeast. Adding too much can lead to off-flavors, while too little risks a sluggish or stuck fermentation. Once rehydrated, gently stir the yeast into the must.
Avoid adding dry yeast directly to the must, as it can shock the cells. Start fermentation within a few hours of preparing the must for best results.
Managing Fermentation Temperature
Maintaining the ideal temperature range of 70–85°F (21–29°C) is crucial for red wine fermentation. Too cold, and the yeast becomes dormant; too hot, and you risk killing the yeast or producing cooked, unbalanced flavors.
Use a fermentation jacket, heating pad, or place the vessel in a temperature-controlled room to stabilize conditions. Monitor daily with a sanitized floating thermometer or adhesive strip. For deeper color and tannin extraction, start fermentation on the warmer side. As fermentation slows, slightly cooler temperatures help preserve fruit character.
Avoid sudden temperature swings, which can stress the yeast. Consistent warmth ensures a clean, complete fermentation and helps develop the wine’s full aromatic and structural potential.
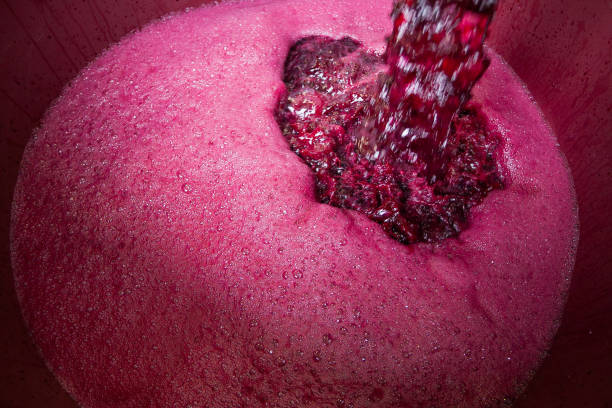
Punching Down the Cap: Tools and Techniques
During fermentation, grape solids rise to the surface, forming a ‘cap’ that must be submerged regularly to extract color, tannins, and flavor. Use a sanitized punch-down tool, such as a stainless steel plunger or wooden paddle, to break up and push the cap down into the juice.
Do this 2–4 times daily during active fermentation. Alternatively, use a ‘pump-over’ system or gently stir with a long spoon. Be thorough but gentle to avoid excessive tannin extraction or oxidation. Punching down also releases built-up CO2 and helps regulate temperature.
Consistent cap management ensures even fermentation and a balanced, richly structured red wine with deep color and complexity.
How Long Fermentation Should Last
Primary fermentation for red wine typically lasts 5 to 7 days, but can extend up to 14 days depending on temperature, yeast strain, and sugar levels. The process is complete when bubbling slows significantly and the cap falls, indicating most sugar has converted to alcohol.
Use a sanitized hydrometer to confirm: a reading near 0.990–0.996 specific gravity signals dryness. Avoid rushing—extended skin contact after fermentation can enhance body and complexity, but monitor for bitterness. Once fermentation finishes, press the wine off the skins immediately to prevent over-extraction.
Transfer to a carboy for secondary fermentation or aging. Timing is key: too short, and the wine lacks structure; too long, and it may become harsh or unbalanced.
Pressing and Transferring the Wine
When to Press: Signs Fermentation Is Complete
Knowing when to press your red wine is critical for quality. Fermentation typically lasts 5–7 days, but the best indicator is a stable specific gravity reading of 0.990 or below over two consecutive days using a hydrometer.
Additionally, bubbling in the airlock will slow to fewer than one bubble per minute, and the cap of grape skins will fall, signaling the end of active fermentation. Taste the wine—it should be dry, not sweet.
Do not press too early, as incomplete fermentation can lead to off-flavors or stuck fermentation. Once these signs are confirmed, prepare your equipment for pressing to extract the liquid wine from the skins and seeds while preserving clarity and flavor.
Using a Wine Press for Homemade Wine
A wine press efficiently separates liquid wine from grape solids after fermentation. For home winemakers, basket presses or bladder presses are ideal. Gently transfer the fermented must into the press using a sanitized tool to avoid contamination.
Apply gradual pressure to extract free-run wine first, which is higher in quality, followed by press wine. Avoid over-pressing, as excessive force can extract harsh tannins and bitterness from seeds and skins. Collect the pressed wine in a sanitized container, such as a food-grade bucket or carboy.
Sanitize all parts of the press before and after use to prevent microbial spoilage. This step ensures a clean, flavorful base ready for aging.
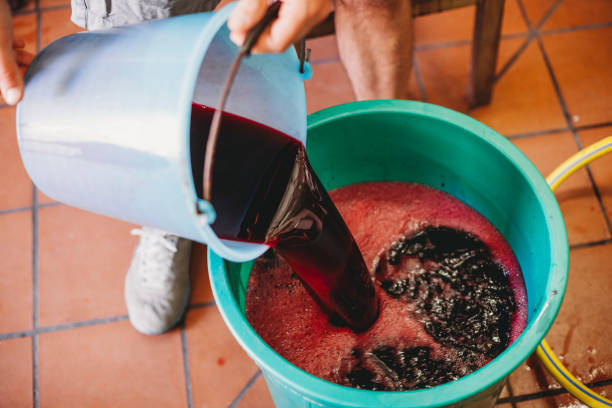
Racking Wine into Carboys or Barrels
After pressing, racking transfers wine into a carboy or barrel, leaving sediment behind. Use a sanitized siphon hose and avoid splashing to minimize oxidation. Place the receiving vessel below the source to allow gravity flow. The first racking removes coarse lees—dead yeast and grape particles—improving clarity.
Seal the vessel with an airlock filled with sanitizer or water to allow CO₂ to escape while blocking oxygen and microbes. Store the container in a cool, dark place at around 55–60°F (13–16°C). Repeat racking every 2–3 months to further clarify the wine and prepare it for bottling after aging.
Avoiding Oxidation During Transfer
Oxidation can ruin homemade wine, causing flat flavors and a brownish tint. To prevent it, always limit wine’s exposure to air during transfer. Use a siphon hose that reaches the bottom of the receiving vessel to reduce splashing.
Consider using inert gases like food-grade argon or nitrogen to blanket the wine before and after racking. Keep containers as full as possible to reduce headspace, or use glass marbles to displace volume safely. Ensure all equipment is sanitized and airtight.
Work quickly and efficiently, and reattach the airlock immediately after filling. These steps preserve freshness, color, and aroma throughout aging.
Aging and Clarifying Your Red Wine
How Long to Age Red Wine at Home
Aging red wine at home requires patience and proper storage conditions. Most homemade red wines benefit from aging between 6 months to 2 years, depending on the grape variety and desired flavor profile.
Lighter reds like Pinot Noir may be ready in 6–12 months, while fuller-bodied wines such as Cabernet Sauvignon improve over 18–24 months. Store bottles horizontally in a cool, dark place with a consistent temperature of 55–60°F (13–16°C) and minimal vibration. This prevents the cork from drying out and reduces oxidation.
Taste your wine periodically after the first 6 months to monitor its development. Proper aging softens tannins, integrates flavors, and enhances complexity, transforming a harsh young wine into a smooth, balanced beverage ready for enjoyment.
Using Oak Chips or Barrels for Flavor
Adding oak influence enhances the depth and character of homemade red wine. Oak chips are an affordable, accessible option for home winemakers compared to barrels. Use food-grade oak chips—available in toast levels (light, medium, heavy)—and soak them in sanitized water or wine before adding to the carboy.
A typical dosage is 1–4 ounces per 5 gallons, depending on intensity desired. Let the wine age with the chips for 2–6 months, tasting monthly to avoid over-oaking. For a more authentic profile, consider a small oak barrel, which allows micro-oxygenation and gradual flavor integration.
Barrels require careful maintenance to prevent spoilage. Both methods add notes of vanilla, spice, and toast, elevating the wine’s complexity and mimicking premium aged styles.
Natural Clarification Methods
Natural clarification relies on time and gravity to clear red wine without additives. After fermentation, allow the wine to age undisturbed for several months, enabling solids like dead yeast and grape particles to settle as lees.
Rack the wine carefully every 2–3 months, transferring it to a clean vessel while leaving sediment behind. Cold stabilization—chilling the wine near freezing for a few days—helps precipitate tartrate crystals, improving clarity. This method is gentle and preserves flavor but requires patience. Avoid agitation during racking to prevent resuspending particles.
Natural clarification works best when combined with good sanitation and proper sulfite levels to prevent spoilage. While slower than fining, it produces clean, stable wine with minimal intervention, ideal for organic or additive-free winemaking approaches.
Fining Agents: What Works Best
Fining agents accelerate clarification by binding to suspended particles and pulling them out of solution. Common fining agents for red wine include gelatin, egg whites (albumen), and bentonite. Gelatin effectively removes tannins and improves clarity but may strip color if overused—use 1/2 to 1 gram per gallon.
Egg whites are traditional for softening harsh tannins in reds; they gently clarify without stripping flavor. Bentonite, a clay-based agent, removes proteins and yeast, preventing haze and spoilage. Always dissolve and mix fining agents properly, then wait 1–2 weeks before racking. Test small batches first to determine the right dosage.
Fining improves stability and appearance, making your wine ready for bottling faster and with professional clarity.
Bottling Your Homemade Red Wine
Choosing the Right Bottles and Corks
Selecting high-quality wine bottles is essential for preserving your homemade red wine. Use dark green or amber glass bottles to protect the wine from UV light, which can cause spoilage. Ensure the bottles are specifically designed for wine, with a standard 750ml size for consistency.
When choosing corks, opt for natural or high-grade synthetic corks that create an airtight seal. Avoid reusing old corks, as they may not seal properly. Use a cork size that matches your bottle neck—typically 1.5 inches in length and 17–18mm in diameter.
Always store corks in a cool, moist environment before use to maintain flexibility. Matching the right cork to your bottling equipment ensures a smooth, leak-free seal and long-term wine stability.
How to Sanitize Bottles Properly
Proper sanitation is critical to prevent contamination during bottling. Begin by thoroughly rinsing each bottle with warm water to remove dust or debris. Then, fill bottles with a food-grade sanitizer solution, such as potassium metabisulfite or no-rinse sanitizer, using a bottling wand or funnel.
Swirl the solution for 30 seconds, ensuring full contact with all interior surfaces, then empty and let bottles air dry upside down on a clean rack. Never towel-dry sanitized bottles, as this can reintroduce bacteria.
Work in small batches to maintain cleanliness, and sanitize all tools, hoses, and the filler wand as well. A sterile environment preserves your wine’s flavor and prevents spoilage, ensuring your red wine ages safely and correctly over time.
Using a Wine Filler for Clean Bottling
A gravity-fed wine filler ensures consistent, spill-free bottling. Attach the filler to a sanitized hose connected to your carboy or bottling bucket. Insert the filler tip to the bottom of the bottle—it automatically stops filling at the perfect level when lifted. This method minimizes oxidation by reducing splashing and foam.
Work slowly and steadily, filling one bottle at a time, and keep the filler tip submerged until the bottle is nearly full. Use a three-bottle rotation: one filling, one corking, and one ready. This keeps the process efficient and reduces exposure to air.
A wine filler preserves clarity and quality, making it a must-have tool for clean, professional-looking homemade red wine.
Sealing and Storing Bottled Wine
After filling, immediately cork each bottle using a hand corker or floor model for a tight, secure fit. Ensure the cork is inserted evenly and sits flush with the bottle neck to prevent leaks or oxidation. Apply wax or capsule seals for added protection and presentation.
Store bottles horizontally in a cool, dark place with stable temperatures (55–60°F) and high humidity (70%) to keep corks moist and prevent drying. Avoid vibration and temperature swings, which can disrupt aging. Allow red wine to age for at least 6 months to develop complexity.
Proper sealing and storage are vital for long-term quality, ensuring your homemade wine matures gracefully and tastes its best when opened.
Troubleshooting Common Home Winemaking Problems
Why Your Wine Tastes Sour or Vinegary
If your homemade red wine tastes sour or vinegary, it’s likely due to acetic acid bacteria contamination, which converts alcohol into vinegar in the presence of oxygen. This often happens when fermentation vessels aren’t sealed properly or if the wine is exposed to air during aging.
Always use an airlock to allow CO2 to escape while preventing oxygen entry. Ensure all equipment is thoroughly sanitized before use. If the wine smells strongly of vinegar, it may be beyond saving, but mild cases can sometimes be blended with fresher batches to reduce acidity.
Avoid prolonged exposure to air during racking and bottling. Using sulfites like Campden tablets can help inhibit bacterial growth. Early detection and proper sanitation are key to preventing spoilage.
Fixing Cloudy or Hazy Wine
Cloudiness in homemade red wine usually results from suspended yeast, proteins, or pectin remaining after fermentation. To clear it, first ensure fermentation is complete using a hydrometer—stable readings over several days confirm this. Then, use fining agents like bentonite or gelatin to help particles clump and settle.
Cold stabilization—chilling the wine for a few days—can also encourage sedimentation. Racking the wine off the lees (sediment) carefully into a clean carboy helps maintain clarity. Avoid filtering too early, as this can reintroduce oxygen. Patience is essential; some wines take weeks to clear naturally.
Repeated racking and time often resolve haze without additives. Proper clarification ensures a polished, professional-looking final product.
Dealing with Off Smells and Flavors
Unpleasant odors like rotten eggs, sewage, or burnt rubber indicate hydrogen sulfide production, often caused by nutrient-deficient yeast or stressed fermentation. To fix this, aerate the wine early by gently stirring or racking, which helps dissipate volatile sulfur compounds. Adding yeast nutrients during primary fermentation prevents this issue from developing.
If the smell persists, a small dose of copper (like a sanitized copper coin or copper sulfate) can bind and remove sulfides—use sparingly. Other off-flavors may stem from poor sanitation or wild yeast; always sanitize equipment thoroughly and consider using a reliable wine yeast strain. Tasting frequently allows early intervention.
Addressing problems quickly improves the final taste and aroma profile significantly.
Preventing Mold and Contamination
Mold growth or microbial contamination can ruin a batch of red wine, often appearing as fuzzy spots or film on the surface. This occurs when sanitation is inadequate or the fermentation environment is compromised. Always clean and sanitize all tools, carboys, and stoppers with a no-rinse sanitizer before use.
Keep fermentation vessels topped up to minimize headspace and use an airlock filled with sanitizer to block airborne contaminants. If mold appears, the wine is typically unsafe and should be discarded—mold can produce harmful mycotoxins. Avoid using fruit that shows signs of mold before crushing.
Maintain a clean workspace and store equipment in sealed containers. Prevention through strict hygiene is far more effective than attempting to fix contamination after it occurs.
Frequently Asked Questions
What ingredients do I need to make red wine at home?
You’ll need red wine grapes (about 3-4 pounds per bottle), wine yeast, acid blend, tannin, and potassium metabisulfite. Optional additions include water and sugar, depending on the grape sugar content and desired alcohol level.
How do I start the fermentation process for homemade red wine?
Crush the grapes and transfer the juice, skins, and seeds to a sanitized fermenter. Add sulfite to kill wild yeast, then pitch wine yeast after 24 hours. Stir daily and keep the temperature between 70-75°F for primary fermentation.
How long does it take to make red wine at home?
The entire process takes about 4 to 6 weeks for active fermentation, followed by 3 to 6 months of aging. Some wines benefit from longer aging up to a year for improved flavor and smoothness.
Do I need special equipment to make red wine at home?
Yes, essential equipment includes a fermenting bucket, glass carboy, airlock, siphon hose, hydrometer, and bottles. Sanitization tools and a crusher/destemmer are also recommended for best results.
Can I use store-bought grape juice to make red wine?
Yes, you can use 100% pure red grape juice without preservatives. Add yeast, nutrients, and adjust sugar levels if needed. Ferment for 2-3 weeks, then age as you would with fresh grapes.
How do I know when my homemade red wine is ready to bottle?
Check with a hydrometer; a stable reading of around 0.990-0.998 for three consecutive days indicates fermentation is complete. The wine should also be clear and free of sediment before bottling.
How should I store homemade red wine after bottling?
Store bottles horizontally in a cool, dark place at around 55°F. This keeps the cork moist and prevents oxidation. Let the wine age for at least a few months to develop better flavor.
Conclusion
Making red wine at home is a rewarding process that combines patience, cleanliness, and attention to detail. By selecting quality grapes, maintaining proper fermentation temperatures, and allowing sufficient aging time, you can craft a delicious, personalized wine. While the process takes several weeks to months, the results are well worth the effort.