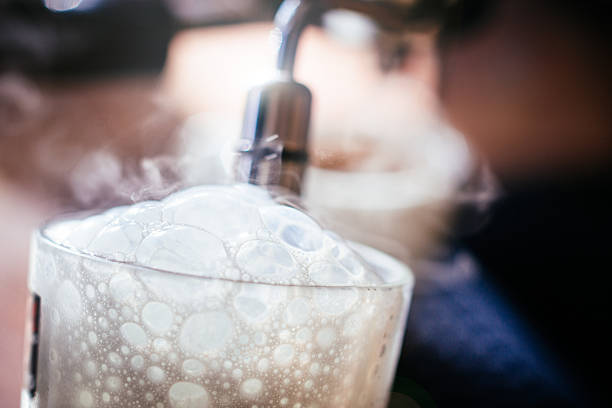
Beer Coming Out Of Keg Foamy
If your beer is coming out of the keg foamy, you’re not alone—and there’s good news, it’s fixable. Foam usually means something’s off with temperature, pressure, or pouring technique. In this guide, we’ll quickly pinpoint the most common causes and show you exactly how to troubleshoot each one.
Why Is Beer Coming Out of the Keg Too Foamy?
How Temperature Affects Foam Formation
Temperature plays a critical role in foam formation when dispensing beer from a keg. Beer stored too cold can retain excessive CO2, leading to over-carbonation and foamy pours when pressure is released. Conversely, warm beer releases CO2 more rapidly, creating large, unstable bubbles that result in excessive foam.
The ideal serving temperature for most draft beers is between 36°F and 38°F (2°C–3°C). Maintaining a consistent temperature throughout the keg, lines, and tap is essential—fluctuations can agitate the beer and promote foaming.
Use a reliable refrigerator thermometer to monitor your kegerator, and allow newly installed kegs time to stabilize at the correct temperature before dispensing. Avoid placing the keg near heat sources or in direct sunlight.
Ensuring temperature stability from keg to glass significantly reduces foam issues and preserves beer quality and flavor integrity.
The Role of CO2 Pressure in Foam
Improper CO2 pressure is a leading cause of foamy beer from kegs. Each beer style requires a specific PSI setting to maintain proper carbonation without over-pressurizing. Too much pressure forces excess CO2 into the beer, which escapes violently when poured, creating foam.
Too little pressure can cause uneven flow and turbulence, also contributing to foam. Use a calibrated regulator and set the pressure according to your beer type and serving temperature—typically 10–14 PSI for most ales and lagers.
Ensure your CO2 tank has sufficient gas and that connections are airtight to prevent pressure fluctuations. Balancing line length and diameter with your system’s pressure prevents surges and maintains smooth flow.
Regularly inspect your system for leaks or regulator inconsistencies, as even minor issues can disrupt pressure balance and lead to foamy pours.
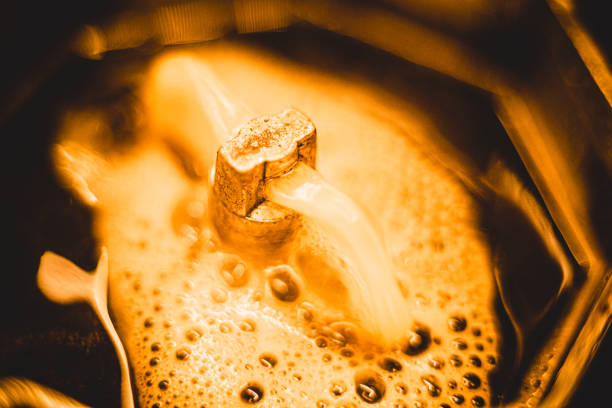
Common Keg Setup Mistakes That Cause Foam
Several setup errors can turn a smooth pour into a foamy mess. One frequent mistake is incorrectly tapping the keg, which can damage internal seals or introduce air, disrupting flow. Always follow the manufacturer’s tapping instructions carefully.
Another issue is dirty or poorly maintained beer lines—residue buildup increases friction and turbulence, promoting foam. Clean lines every two to four weeks depending on usage. Kinks or sharp bends in the beer line restrict flow and create pressure drops that release CO2 prematurely.
Ensure tubing is the correct length and diameter for your system’s pressure. Finally, pouring too quickly or at the wrong angle increases agitation. Train staff to pour steadily at a 45-degree angle, then straighten the glass. Addressing these common setup and maintenance oversights dramatically improves pour quality and reduces foam.
How to Fix a Foamy Beer Keg

Adjusting Regulator Pressure Correctly
Foamy beer from a keg is often caused by incorrect regulator pressure, which forces CO₂ into the beer too aggressively. To fix this, first identify the beer type and its ideal serving pressure—most ales require 10–12 PSI, while lagers may need 12–14 PSI.
Use a reliable pressure gauge to check the current setting on your regulator. If the pressure is too high, slowly turn the adjustment knob counterclockwise to reduce it. After adjusting, pour a test glass and observe the flow: smooth, steady beer with minimal foam indicates proper pressure.
Avoid sudden pressure spikes by making incremental changes and allowing the system to stabilize. Also, ensure the temperature of the keg is consistent—warmer beer holds less CO₂ and foams more easily. Maintaining the correct balance between temperature and pressure is essential.
Recalibrate the regulator regularly, especially after long storage or transport, to prevent over-carbonation and preserve beer quality.
Checking and Replacing Faulty Beer Lines
Foam issues can stem from damaged, kinked, or undersized beer lines, which disrupt proper beer flow and cause turbulence. Inspect the entire length of the beer line for cracks, bends, or blockages that may introduce air or restrict liquid.
Lines that are too short often lead to excessive foam because they don’t provide enough resistance to counter high CO₂ pressure. The ideal beer line length and diameter depend on serving pressure and fridge temperature—typically, 3/16-inch internal diameter lines that are 8–10 feet long work well for most systems.
Replace old or degraded lines every 6–12 months to prevent buildup and contamination. Use food-safe, beer-specific tubing to ensure compatibility. When installing new lines, purge air by running a small amount of beer through the system.
Properly sized and maintained lines ensure smooth, controlled dispensing and significantly reduce foam, delivering a cleaner pour every time.
Bleeding Excess Pressure from the Keg
Excess pressure buildup inside a keg can force beer out too quickly, resulting in a foamy, messy pour. To safely release this pressure, locate the pressure relief valve (PRV) on the keg’s lid or CO₂ disconnect.
Slowly open the PRV to let gas escape with a controlled hiss—never fully release it at once, as this can agitate the beer. Wait 30 seconds after closing the valve, then test pour a small amount. If foam persists, repeat the process until the beer flows smoothly.
This method is especially helpful after transporting or shaking the keg, which can destabilize the beer’s carbonation. Always ensure the keg is upright during this process to prevent beer from escaping through the gas line. Regularly checking and bleeding excess pressure prevents over-foaming and maintains ideal dispensing conditions.
Combine this with proper storage and consistent temperatures to keep your beer pour perfect.
Proper Keg Refrigeration and Storage
Ideal Temperature Range for Serving Beer
Maintaining the ideal temperature range of 36°F to 38°F (2°C to 3°C) is crucial for serving draft beer without excessive foam. When beer is stored and dispensed within this narrow range, CO₂ remains properly dissolved, minimizing turbulence and preventing over-foaming during pours.
Temperatures above this range cause gas to come out of solution too quickly, while colder temps can mask flavors and increase viscosity. Use a dedicated keg refrigerator with a reliable digital thermostat to maintain consistency. Avoid placing the keg near heat sources or in direct sunlight.
Allow 12–24 hours for temperature stabilization after installing a new keg. Regularly calibrate your fridge’s thermometer to ensure accuracy. Consistent cold storage not only reduces foam but also preserves freshness, flavor, and carbonation levels, ensuring every pour is smooth and enjoyable from the first glass to the last.
How Warm Kegs Cause Excessive Foam
When a keg is too warm, CO₂ becomes unstable and rapidly escapes from the beer, leading to foamy, messy pours. As temperature rises, gas solubility decreases—meaning warm beer holds less carbonation in solution, causing bubbles to form aggressively when pressure is released through the tap.
Even slight temperature fluctuations can trigger nucleation sites inside the beer lines or glass, accelerating foam production. A keg stored above 40°F (4°C) is especially prone to this issue. Additionally, warm beer flows faster and agitates more during dispensing, further increasing foam.
This problem is often mistaken for incorrect line length or pressure issues, but temperature is frequently the root cause. Ensuring your keg stays cold from delivery to last pour prevents this avoidable issue and maintains optimal dispensing performance throughout the keg’s lifecycle.
Tips for Cooling a Warm Keg Quickly
If your keg has been exposed to warm temperatures, rapid cooling techniques can restore it to serving temperature efficiently. Begin by wrapping the keg in wet towels and placing it in an ice bath—this leverages evaporative cooling to accelerate heat loss.
Pack ice around the entire keg, focusing on the bottom and sides, and add a small amount of salt to the ice to lower the freezing point and draw heat faster. Keep the keg upright to avoid disturbing sediment.
For faster results, use a forced-air keg cooler or blast chiller if available. Avoid submerging stainless kegs in standing water for prolonged periods to prevent contamination risks. Monitor the temperature with a digital thermometer inserted into the beer line.
Allow at least 4–6 hours for significant cooling, and always recheck pressure settings once the ideal temperature is reached.
Best Ways to Pour Beer from a Keg Without Foam
Using the Right Pouring Angle
To minimize foam when pouring beer from a keg, use a 45-degree angle when starting the pour. Begin by tilting the glass so the beer hits the side rather than flowing straight down the center. This reduces turbulence and CO₂ release, which are primary causes of excessive foam.
Once the glass is about half full, gradually straighten it to an upright position to finish the pour. Maintain a steady, controlled flow from the tap—rushing the process increases foam buildup. Also, ensure the beer line and faucet are properly chilled, as warm lines cause beer to foam more easily.
Using the correct pouring angle not only improves the appearance and texture of the beer but also preserves its carbonation balance. With practice, this technique becomes second nature and significantly reduces wasted beer. Consistency in pouring method across multiple servings ensures every guest enjoys a well-poured, foam-controlled draft.
Cleaning and Maintaining the Tap Valve
Foamy beer can often be traced back to a dirty or poorly maintained tap valve. Residue from previous pours, bacteria, or dried beer can accumulate in the tap and beer lines, creating nucleation sites that trigger excessive foam formation.
To prevent this, clean the tap valve and beer lines every two weeks using a food-grade line cleaning solution. Disassemble the faucet and soak all parts, then flush the lines thoroughly. A clean system ensures smooth beer flow without unwanted agitation.
Also, inspect washers and seals regularly for wear—leaks or improper seals disrupt pressure balance, contributing to foam. After cleaning, rinse all components completely to avoid chemical aftertaste. Proper maintenance not only reduces foam but also preserves beer flavor and quality.
Establishing a routine cleaning schedule is essential for any keg setup, whether at home or in a commercial setting, ensuring every pour is clean, clear, and enjoyable.
Avoiding Agitation During Dispensing
Agitation is a major cause of foamy beer from a keg, so it’s essential to keep the keg still and upright before and during dispensing. Moving or jostling the keg introduces turbulence in the beer, which releases dissolved CO₂ rapidly and results in excessive foam.
Always allow the keg to settle for at least one hour after transportation before tapping. Additionally, ensure the keg is stored at a consistent, cold temperature (36–38°F), as temperature fluctuations also promote foaming. Avoid rapid dispensing—pour slowly and steadily to maintain control.
If using a CO₂ system, verify that the pressure is correctly calibrated to your beer type and line length, as over-pressurization forces beer out too quickly, increasing foam. By minimizing physical disturbance and maintaining stable conditions, you ensure smoother pours with minimal head.
A calm, deliberate approach to dispensing makes a significant difference in beer quality.
Troubleshooting Draft Beer System Issues
How Long Lines Contribute to Foam
Incorrect beer line length is a common cause of foamy beer from a keg. Lines that are too short don’t provide enough resistance to counteract the CO₂ pressure, causing beer to pour too quickly and become agitated. This turbulence forces dissolved CO₂ out of solution, creating excessive foam.
On the other hand, lines that are too long can cause excessive resistance, leading to slow pours and potential over-pressurization at the faucet. The ideal line length balances flow rate and pressure, typically calculated based on the distance from the keg to the tap and the serving pressure.
For most systems using 12-gram CO₂ cartridges or standard regulators, a line length of 8 to 10 feet with 3/16-inch inner diameter tubing works well. Measuring your draft system’s total rise and run helps determine proper line length.
Adjusting line length ensures smooth, controlled pours and minimizes foam formation by maintaining proper carbonation equilibrium during dispensing.
Identifying Leaks in the Beer Dispense System
Leaks in the beer dispense system can disrupt pressure balance and introduce air, leading to foamy pours. Air infiltration causes CO₂ to escape rapidly when beer is dispensed, resulting in excessive foam and poor pour quality.
To identify leaks, start by inspecting all connections—from the CO₂ tank to the keg coupler and beer lines—for loose fittings or worn O-rings. Apply a soapy water solution to joints and connections while the system is pressurized; bubbles indicate a leak.
Also, check for cracks in beer lines and faulty seals on the keg itself. Even small leaks can significantly impact performance. Tightening connections and replacing damaged parts promptly restores system integrity. Regular maintenance and leak checks prevent foam issues and ensure consistent beer quality.
A well-sealed system maintains proper pressure, allowing beer to pour smoothly with minimal foam.
Balancing Beer Line Length and Pressure
Achieving the right balance between beer line length and CO₂ pressure is critical for minimizing foam. The goal is to match the resistance of the beer line with the applied gas pressure so that beer flows at the correct rate—typically 2 ounces per second—without agitation.
If pressure is too high or lines too short, beer rushes out, agitating CO₂ and creating foam. Conversely, excessive line resistance or low pressure leads to flat, slow pours. Use a pressure gauge and flow rate test to diagnose imbalances.
For most systems, 10–12 PSI of CO₂ is ideal, paired with appropriately sized and lengthed lines. Adjustments may include adding longer lines, changing tubing diameter, or fine-tuning regulator pressure. Proper balancing ensures beer travels smoothly from keg to glass, preserving carbonation and delivering a perfect, foam-controlled pour every time.
What Is the Ideal PSI for a Beer Keg?
Recommended PSI by Beer Type
The ideal PSI for a beer keg depends largely on the type of beer you’re serving. Ales, such as pale ales and IPAs, typically require 10–12 PSI to maintain proper carbonation without excessive foam.
Lagers and pilsners, which are more highly carbonated, often need 12–14 PSI for optimal flow and taste. Stouts and nitro beers are different—they usually use a 70% nitrogen and 30% CO2 blend at 30–35 PSI to achieve their creamy texture.
If your beer is coming out foamy, the pressure may be too high for the beer style, forcing CO2 out of solution too quickly. Always consult the brewery’s recommended serving pressure and adjust accordingly.
Using the correct PSI helps maintain carbonation balance and reduces foam, ensuring a smooth pour every time.
How Altitude Affects Keg Pressure Settings
Altitude significantly impacts keg pressure requirements due to changes in atmospheric pressure. At higher elevations, lower air pressure means beer releases CO2 more easily, increasing the risk of foamy pours.
For every 1,000 feet above sea level, you may need to increase regulator pressure by 0.5 to 1 PSI to maintain proper carbonation levels. For example, a beer that pours well at 12 PSI at sea level might need 13–14 PSI in Denver (5,280 ft).
Failing to adjust for altitude can cause over-carbonation symptoms, even with correct initial settings. To prevent foam, monitor pour quality and use a temperature-stable serving environment, as temperature and altitude interact to affect CO2 solubility. Regularly testing and fine-tuning PSI based on elevation ensures consistent, foam-free pours regardless of location.
Using a Dual Gauge Regulator for Precision
A dual gauge regulator is essential for precise keg pressure control and preventing foamy beer. One gauge displays tank pressure (PSI coming from the CO2 tank), while the other shows output pressure delivered to the keg, allowing real-time monitoring and adjustments.
This precision helps maintain consistent carbonation levels and avoids over-pressurization, a common cause of foam. When adjusting PSI, make small changes and allow time for the system to stabilize—typically 15–30 minutes. If beer is foamy, lower the output pressure slightly and recheck the pour.
Dual gauges also help detect CO2 leaks or tank depletion early. For best results, pair the regulator with a properly sized beer line to balance resistance and pressure. This system ensures smooth, controlled dispensing and minimizes waste from excessive foam.
Maintenance Tips to Prevent Foamy Keg Beer
How Often to Clean Beer Lines
To prevent foamy keg beer, clean beer lines every two weeks during regular use. Over time, yeast, bacteria, and scale buildup can disrupt beer flow and create excess foam. Use a food-grade cleaning solution designed for draft systems and follow manufacturer instructions for proper dilution and circulation.
Flush lines thoroughly with clean water afterward to remove any cleaning residue. For high-volume settings, consider weekly cleanings to maintain optimal performance. Neglecting line maintenance not only causes foam but can also alter beer flavor and aroma. Invest in a three-step cleaning process: rinse, clean, and sanitize.
Use line cleaning pumps to ensure solution circulates fully through all lines. Regular cleaning preserves beer quality and reduces foaming caused by contamination. Schedule cleanings during low-traffic periods to minimize downtime. Keeping a log helps track cleaning cycles and identify issues early.
Ultimately, consistent line hygiene is one of the most effective ways to ensure smooth, foam-free pours from your keg system.
Inspecting O-Rings and Seals Regularly
Foamy beer from a keg is often caused by damaged or worn O-rings and seals in the coupler or keg connection. These components create airtight seals that maintain proper pressure; if compromised, CO2 can leak or mix unevenly, forcing beer out too quickly and creating foam.
Inspect all O-rings weekly for cracks, dryness, or warping, and replace them immediately if any damage is found. Lubricate with food-safe silicone grease to ensure a snug fit and prevent premature wear. A loose connection or hissing sound when tapping a keg is a clear sign of seal failure.
Use the correct coupler type for your keg system to avoid misalignment. Keeping spare O-rings on hand allows for quick replacements. Regular inspection not only reduces foam but also prevents beer waste and contamination. Properly sealed connections maintain consistent pressure, allowing beer to pour smoothly.
Make seal checks part of your routine maintenance to ensure every pour is clean, controlled, and foam-free.
Storing Kegs Properly Before Use
Proper keg storage is essential to prevent foamy beer and starts with keeping kegs upright and refrigerated at all times before use. Storing kegs on their side can disturb sediment and cause over-carbonation issues, leading to excessive foam during dispensing.
Maintain a consistent temperature between 36°F and 38°F (2°C–3°C); temperature fluctuations cause CO2 to expand and contract, destabilizing the beer. Avoid moving kegs frequently or exposing them to warm environments, such as loading docks or sunlit areas.
Always allow a newly installed keg to chill thoroughly for 24 hours before tapping, ensuring the beer reaches dispensing temperature and pressure equilibrium. Use a keg jacket or insulated cover if transporting. Additionally, minimize agitation by rolling kegs gently rather than shaking or dropping them.
Proper storage preserves carbonation balance and beer clarity, directly reducing foam. By treating each keg with care before it’s tapped, you set the foundation for smooth, high-quality pours every time.
Frequently Asked Questions
Why is my beer coming out of the keg foamy?
Foamy beer from a keg is often caused by incorrect serving pressure, improper line temperature, or turbulent beer flow. If the CO2 pressure is too high or the beer lines are too warm, excess carbonation can escape, creating foam.
How can I fix a foamy keg of beer?
Adjust the regulator to the correct PSI for your beer type and serving temperature. Ensure your beer lines are properly cooled and not too short, which helps maintain proper carbonation balance and reduces foam.
What should the ideal keg pressure be to prevent foam?
Typically, 10-12 PSI is ideal for most beers at 38°F (3°C). The exact pressure depends on the beer style and temperature, so use a beer line calculator to match pressure and line length correctly.
Can warm beer lines cause foamy dispense?
Yes, warm beer lines allow CO2 to come out of solution, creating foam. Keep lines refrigerated and as short as possible to maintain consistent temperature from keg to tap.
How does beer line length affect foam?
Lines that are too short don’t provide enough resistance, leading to over-pressurized pour and foam. Properly sized lines balance the pressure and ensure smooth, foam-free dispensing.
Should I tap the keg differently to reduce foam?
The tapping method rarely causes foam; it’s usually due to pressure or temperature issues. Ensure the keg is properly seated and the coupler is functioning correctly to avoid introducing air or turbulence.
Conclusion
Foamy beer from a keg is often caused by improper temperature, pressure, or line length. Ensuring the keg is cold, the CO2 pressure is correctly set, and the beer lines are the right length can prevent excessive foam. Stay attentive to your system’s setup and pour with confidence.

