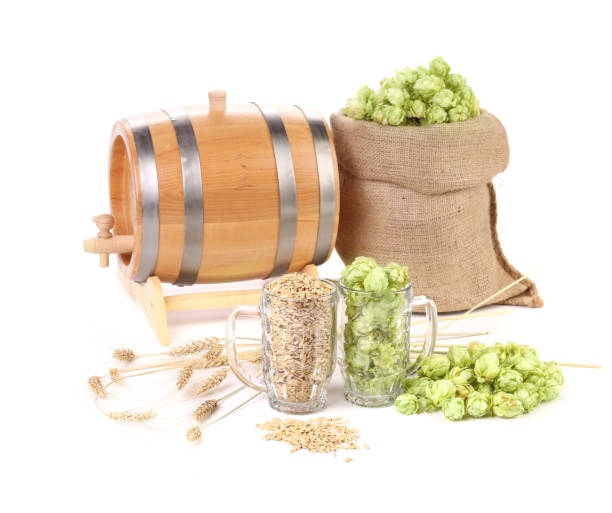
Beer Brewing Extract Kits
Ready to brew your first batch of beer at home without the hassle? Beer brewing extract kits are the perfect starting point—simple, affordable, and packed with everything you need to make great-tasting beer in just a few weeks. Whether you’re a complete beginner or looking to try new styles, these kits take the guesswork out of brewing. In this guide, we’ll break down how extract kits work, what’s inside, and how to choose the best one for your next brew day.
What Are Beer Brewing Extract Kits?
How Extract Kits Work for Beginners
Beer brewing extract kits are perfect for beginners because they simplify the brewing process by using pre-converted malt extract instead of requiring you to mash grains yourself.
These kits typically include liquid or dry malt extract, hops, yeast, and step-by-step instructions, making it easy to brew your first batch with minimal equipment. All you need is a pot, fermenter, and basic sanitation supplies.
The process starts by boiling the malt extract with hops to create wort, which is then cooled and transferred to a fermenter where yeast is added. Fermentation takes about 1–2 weeks, after which the beer is bottled or kegged.
Extract kits reduce brewing time and complexity while still delivering great-tasting, customizable beer. They’re an excellent way to learn core brewing techniques before advancing to more complex methods.
Types of Malt Extract in Kits
Beer brewing extract kits use two main types of malt extract: liquid malt extract (LME) and dry malt extract (DME), each offering unique advantages.
LME is a thick syrup made by concentrating wort and retains more of the original malt flavor, making it ideal for darker, richer beers like stouts and porters. DME, a powdered form, has had nearly all moisture removed, which makes it lighter, easier to store, and less prone to spoilage.
It dissolves quickly and is often preferred for lighter styles like pilsners or pale ales. Both types provide the fermentable sugars needed for alcohol production and are available in various malt profiles—such as pale, amber, and Munich—to influence color and flavor.
Choosing the right extract type and blend allows brewers to customize beer characteristics while maintaining consistency. Most kits specify which type to use for best results.
Differences Between Extract, Partial Mash, and All-Grain Brewing
Understanding the differences between extract, partial mash, and all-grain brewing helps brewers choose the right path. Extract brewing uses 100% malt extract, skipping the grain mashing process entirely—ideal for beginners due to its simplicity and lower equipment needs.
Partial mash combines malt extract with a small grain mash, allowing for more flavor complexity while still being accessible to novice brewers with limited gear. All-grain brewing involves mashing all grains yourself to extract sugars, offering maximum control over flavor, efficiency, and recipe design—best suited for experienced brewers.
Each method increases in complexity, time, and equipment requirements. Extract kits are the fastest entry point, while all-grain offers the deepest customization. Partial mash serves as a valuable middle ground, helping brewers transition skills gradually while experimenting with specialty grains and advanced techniques.
Benefits of Using Beer Brewing Extract Kits
Why Extract Brewing Is Great for New Homebrewers
Extract brewing is an excellent starting point for beginners diving into homebrewing because it simplifies the most complex part of the process—mashing grains. Beer brewing extract kits come with concentrated wort, which is the sugar-rich liquid extracted from malted barley, eliminating the need for mashing equipment and advanced techniques.
This allows new brewers to focus on mastering fermentation, sanitation, and recipe understanding without being overwhelmed. Most kits include clear instructions, pre-measured ingredients, and even yeast, making the first brew day approachable and less intimidating.
Minimal space and low startup costs make extract kits ideal for apartment brewers or those with limited supplies. Plus, the shorter learning curve means you can enjoy your first homemade beer in under a month.
With consistent results and easy cleanup, extract brewing builds confidence quickly, setting the foundation for future experimentation.
Time and Equipment Savings Compared to All-Grain
One of the biggest advantages of beer brewing extract kits is the significant reduction in time and equipment compared to all-grain brewing. Extract kits use pre-converted wort, so you skip the hours-long mashing and sparging process, cutting brew day from 6+ hours to just 2–3.
This makes brewing more accessible for busy individuals who still want quality results. You won’t need a mash tun, hot liquor tank, or complex plumbing—just a large pot, fermenter, and basic tools. This minimal setup reduces clutter and cost, perfect for small spaces.
Since the extract is processed in controlled facilities, you get consistent sugar profiles without monitoring mash temperatures. The faster, simpler process also means more time for cleaning, monitoring fermentation, and enjoying your beer.
For those testing recipes or brewing occasionally, extract kits offer a practical, time-efficient solution without sacrificing flavor or quality.
Consistency and Reliable Results with Pre-Formulated Kits
Beer brewing extract kits deliver consistent, predictable outcomes, making them ideal for both beginners and experienced brewers testing new recipes. The extracts are produced in controlled environments, ensuring uniform sugar composition and flavor profiles batch after batch.
This reliability means your pale ale will taste like a pale ale every time, minimizing surprises. Many kits are developed by master brewers and include balanced ingredient combinations—hops, grains, and yeast—designed to work perfectly together. This eliminates guesswork and helps you understand how each component affects the final beer.
Even if you later transition to all-grain brewing, starting with extract kits builds a reliable reference point for flavor and technique. Plus, reputable brands regularly update formulations based on feedback, ensuring high-quality, up-to-date recipes.
Whether you’re brewing for fun or perfecting a signature brew, extract kits offer a trustworthy path to delicious, repeatable beer.
How to Choose the Best Beer Brewing Extract Kit
Key Features to Look for in a Quality Kit
When selecting a beer brewing extract kit, prioritize kits that include fresh, high-quality malt extracts and clearly labeled ingredient lists. Look for kits that provide complete equipment bundles if you’re a beginner, including fermenters, airlocks, siphons, and bottling wands.
Comprehensive, easy-to-follow instructions are essential—especially for first-time brewers—to ensure proper sanitation, fermentation, and bottling procedures. Check whether the kit uses whole hops or hop pellets, as this affects flavor and aroma.
Kits with yeast strains matched to the beer style yield better results, so verify the package includes the correct strain. Also, consider kits with add-on options, like dry yeast or extra flavorings, for customization.
Lastly, ensure the kit is rated for your skill level and includes estimated brewing time and alcohol content to set realistic expectations for your homebrewing success.
Top Brands and Trusted Manufacturers
Several reputable brands dominate the beer brewing extract kit market, offering consistent quality and innovation. Mr. Beer is ideal for beginners, providing compact, user-friendly kits with patented keg systems that simplify the brewing process.
Northern Brewer stands out for its detailed recipes and premium ingredients, catering to both novices and intermediate brewers. Austin Homebrew Supply offers diverse, style-specific kits with robust flavor profiles and reliable yeast pairings.
WilliamsWarn delivers advanced countertop systems with integrated fermentation and dispensing capabilities, perfect for those seeking convenience and consistency. BrewDemon is another strong contender, known for high-gravity extracts and bold, authentic-tasting beers. When choosing a brand, read customer reviews, check for active support communities, and verify ingredient sourcing.
Trusted manufacturers often provide online tutorials, troubleshooting guides, and recipe calculators, enhancing your brewing experience. Selecting a well-reviewed brand ensures access to reliable products and ongoing support for long-term brewing enjoyment.
Matching Kit Styles to Your Beer Preferences
To get the most satisfaction from your brewing experience, align the kit style with your personal taste preferences. If you enjoy crisp, light beers, choose a lager or pilsner extract kit, which typically uses bottom-fermenting yeast and requires cooler fermentation temperatures.
For rich, roasted flavors, opt for a stout or porter kit featuring dark malts and chocolate or coffee notes. Fans of bold, hoppy profiles should explore IPA or pale ale kits, which emphasize aromatic hop varieties and higher bitterness levels.
Wheat beer kits are excellent for refreshing, slightly fruity brews perfect for warm weather. Consider seasonal kits—like pumpkin ales or winter warmers—for festive, themed batches. Many kits also offer customization potential, allowing you to add specialty grains or dry hops.
By selecting a kit that mirrors your favorite commercial beers, you increase the likelihood of crafting a brew you’ll truly enjoy, making each batch both rewarding and delicious.
Step-by-Step Guide to Brewing with Extract Kits
Preparing Your Equipment and Workspace
Before brewing with extract kits, ensure all equipment is clean and sanitized to prevent contamination. Gather your brew kettle, fermenter with airlock, siphon, hydrometer, thermometer, stirring spoon, and bottles. Clean each item with a no-rinse sanitizer, especially the fermenter and any tools touching cooled wort.
Set up your workspace in a draft-free, temperature-stable area away from direct sunlight. Review the kit instructions to identify required ingredients and boil volume. Measure and prepare steeping grains (if included) by placing them in a muslin bag and soaking in hot water (150–170°F) for 20–30 minutes.
Remove grains gently to avoid squeezing tannins. This steeping step enhances flavor and color without requiring full mashing. Keep water heating in the kettle while preparing hops and yeast. Proper preparation ensures a smooth, efficient brewing process and sets the foundation for a clean, great-tasting beer.
Boiling the Wort and Adding Hops
After steeping grains, bring water to a gentle boil and slowly stir in the malt extract to prevent scorching. Once dissolved, return to a rolling boil. Begin timing your 60-minute boil, during which hops are added at specific intervals for bitterness, flavor, and aroma.
Bittering hops go in at the start, boiled for 60 minutes to isomerize alpha acids. Flavor hops are added at 15–20 minutes left, contributing complexity without excessive bitterness. Aroma hops go in during the last 5 minutes or at flameout for essential oils and fragrance.
Stir frequently to avoid boil-overs and hot spots. Use a kettle with at least 25% extra capacity to manage foam. At the end of the boil, turn off heat and prepare for cooling. This phase is critical for developing balanced beer character and sterilizing the wort before fermentation.
Cooling, Fermenting, and Bottling Your Beer
Immediately after boiling, cool the wort rapidly to 65–75°F using an ice bath or wort chiller to prevent contamination and DMS formation. Transfer cooled wort to the sanitized fermenter, topping up to the target volume with clean water. Take a hydrometer reading to measure original gravity and estimate alcohol content.
Sprinkle or pitch the included yeast, seal the fermenter, and install the airlock. Store in a dark, temperature-consistent location (68–72°F for ales). Fermentation begins in 12–48 hours and lasts about 1–2 weeks. After bubbling slows, check final gravity to confirm completion.
Transfer beer to a bottling bucket, add priming sugar for carbonation, and fill sanitized bottles. Cap securely and condition at room temperature for 2–3 weeks before chilling and enjoying your homemade beer.
Common Mistakes When Using Extract Kits and How to Avoid Them
Preventing Burnt Extract During Boil
One of the most common mistakes when using beer brewing extract kits is scorching the malt extract during the boil. This happens when the extract settles on the bottom of the pot and overheats, creating a burnt, bitter flavor that ruins the beer.
To prevent this, always mix the extract thoroughly with hot (not boiling) water before bringing the wort to a boil. Stir continuously while adding the extract to ensure even distribution. Use a large enough pot to allow for vigorous stirring and avoid hot spots.
A heat diffuser or lower heat setting can also help maintain a gentle, even temperature. Additionally, never add extract directly to a dry, hot pot—always have liquid in the kettle first. Constant agitation during the initial heating phase is essential.
By taking these precautions, you’ll maintain the intended malt character and produce a clean, balanced beer every time.
Avoiding Infections with Proper Sanitation
Infections from bacteria or wild yeast are a major cause of ruined batches when using beer brewing extract kits. These contaminants thrive in sugary wort and can produce sour, medicinal, or otherwise unpleasant flavors. The key to preventing infections is rigorous sanitation of all equipment that contacts the wort post-boil.
This includes fermenters, airlocks, siphons, bottles, and utensils. Use a no-rinse sanitizer like Star San or iodophor, and apply it to all surfaces that will touch the cooled wort. Never assume equipment is clean just because it looks clean—microscopic residues can harbor microbes.
Also, avoid unnecessary exposure of wort to air during transfer and fermentation. Minimize open handling and ensure your fermentation environment is clean. Re-sanitize tools if they come into contact with non-sterile surfaces. By making sanitation a non-negotiable step, you dramatically increase your chances of brewing a clean, flavorful beer.
Fixing Off-Flavors from Poor Temperature Control
Off-flavors such as fruity esters, solvent-like notes, or excessive spiciness often stem from inadequate fermentation temperature control when using extract kits. Yeast is highly sensitive to temperature, and deviations from its ideal range can stress the cells, leading to undesirable byproducts.
To maintain proper fermentation temps, choose a yeast strain suited to your ambient environment and monitor the temperature closely with a reliable thermometer or fermentation chamber. Avoid placing the fermenter in areas with temperature swings, like near windows or heaters.
Use a swamp cooler, water bath, or temperature-controlled fridge to stabilize the environment. For ales, aim for 64–72°F (18–22°C), and for lagers, use colder fermentation with proper lagering techniques. Pitching the right amount of healthy yeast also helps maintain control.
By stabilizing temperatures, you’ll produce cleaner, more consistent beers that reflect the intended flavor profile.
Tips for Improving Beer from Extract Kits
Adding Specialty Grains for More Flavor
Enhance the depth and complexity of your extract brews by steeping specialty grains before boiling. This simple step mimics all-grain brewing and adds rich flavors like caramel, chocolate, or toast without extra equipment.
Use a muslin bag to steep crushed grains in 150–170°F water for 20–30 minutes—avoid boiling, which can extract harsh tannins. Popular choices include crystal malts for sweetness, roasted barley for stouts, and Munich malt for a bready backbone.
Match the grains to your beer style: use chocolate malt in porters or Vienna malt in amber ales. Rinse the grains with hot water afterward to extract maximum sugars. This technique elevates basic kits by introducing nuanced profiles that canned extract alone can’t achieve.
With minimal effort, you’ll notice a dramatic improvement in color, aroma, and mouthfeel, making your beer taste more authentic and professionally crafted.
Upgrading to Better Yeast Strains
One of the easiest ways to improve extract beer is by replacing the included dry yeast with a high-quality liquid or fresh dry strain tailored to your beer style. The yeast significantly impacts flavor, aroma, and attenuation—choosing the right strain can transform a flat brew into a vibrant, balanced beer.
For example, use English ale yeast for a fruity, malty bitter or a clean American strain for crisp IPAs. Always make a yeast starter when using liquid yeast to ensure healthy fermentation and reduce lag time. Rehydrate dry yeast properly in sanitized water at 95–105°F before pitching.
Maintain proper fermentation temperatures—too hot creates off-flavors; too cold stalls fermentation. With better yeast control, you’ll achieve cleaner finishes, better clarity, and more authentic style characteristics, making your extract beer rival all-grain batches in quality and consistency.
Dry Hopping and Other Simple Enhancements
Take your hoppy beers to the next level with dry hopping, the practice of adding hops during or after fermentation to boost aroma without extra bitterness. Use 0.5 to 2 ounces of fresh hops per 5 gallons, added to the fermenter for 3–7 days.
This technique is ideal for IPAs and pale ales, delivering vibrant citrus, pine, or floral notes. Combine dry hopping with other easy upgrades like using Irish moss during the boil for clearer beer or adding oak chips for subtle vanilla and complexity in stouts.
For extract beers prone to caramel notes, dilute with some steeped grains or adjuncts like rice or corn to lighten the body. Even simple changes like bottling with corn sugar instead of table sugar ensure consistent carbonation.
These tweaks require no extra gear but dramatically improve aroma, clarity, and authenticity, proving that great extract beer comes from smart, focused enhancements.
Best Beer Styles to Brew with Extract Kits
American Pale Ale and IPA with Extract
Brewing American Pale Ales (APA) and IPAs with extract kits is an excellent choice for both beginners and experienced homebrewers seeking bold, hop-forward flavors. These styles rely heavily on aromatic and bittering hops, which shine beautifully when using quality liquid or dry malt extract (LME or DME).
Extract kits simplify the brewing process by eliminating the need for all-grain mashing, allowing you to focus on hop timing and yeast selection. For the best results, choose a kit with fresh, high-alpha acid hops like Cascade, Centennial, or Citra to achieve the signature citrus and pine notes.
Add hops at multiple stages—bittering at the start, flavor in the middle, and aroma at the end or during dry hopping—for complexity. Use a clean-fermenting ale yeast such as US-05 to let the hops stand out. Ferment at 66–70°F and allow 2–3 weeks for primary fermentation.
These beers typically clear quickly and are ready to drink in under a month, making them ideal for fast, rewarding brews.
Stouts and Porters Made Easy
Extract brewing is perfect for crafting rich, flavorful stouts and porters without the complexity of an all-grain setup. These dark beer styles benefit from the concentrated flavors found in specialty malt extracts, which often include roasted barley, chocolate, or caramel malts for depth.
Many extract kits come pre-blended with these ingredients, ensuring consistent color and taste. To enhance body and mouthfeel, consider adding adjuncts like flaked oats or caramel malt during the boil. Use a low-flocculating ale yeast like Irish Ale or London Porter for a smooth, full-bodied finish.
Ferment between 64–68°F to avoid excessive esters. These beers often improve with age, so allow 2–4 weeks of conditioning for flavors to meld. You can also experiment with flavor additions like coffee, vanilla, or cocoa nibs during secondary fermentation.
With minimal effort and equipment, extract-brewed stouts and porters deliver complex, café-quality results ideal for cool evenings or gifting.
Wheat Beers and Light Ales Perfect for Beginners
Wheat beers and light ales are among the most beginner-friendly styles to brew with extract kits, offering quick turnaround and refreshing results. These beers use malt extract blends high in wheat, which promote excellent head retention and a smooth, slightly creamy mouthfeel.
Extract kits for styles like Hefeweizen, American Wheat, or Blonde Ale often include specialty grains and liquid yeast tailored to produce clean or estery profiles. For a classic Hefeweizen, choose a German wheat yeast that produces banana and clove notes, and ferment at 68–72°F.
Light ales benefit from neutral yeasts and cooler fermentation (64–68°F) for crispness. These beers typically require only 1–2 weeks of fermentation and carbonation, making them ready to drink in under three weeks. Use a simple steeping bag with crystal or Munich malts for added complexity, but avoid overcomplicating the process.
With low bitterness and approachable flavors, wheat beers and light ales are perfect first brews that build confidence and showcase the ease of extract brewing.
Frequently Asked Questions
What is a beer brewing extract kit?
A beer brewing extract kit contains concentrated wort, hops, yeast, and sometimes grains, providing beginners with all the essential ingredients to brew beer at home. These kits simplify the brewing process by eliminating the need to extract sugars from malted barley.
How do I use a beer extract brewing kit?
To use an extract kit, you dissolve the malt extract in water, boil it with hops, cool the wort, and ferment it with yeast. Follow the included instructions for best results, typically involving 1-2 weeks of fermentation before bottling.
Are beer extract kits suitable for beginners?
Yes, extract kits are ideal for beginners because they simplify the brewing process and require less equipment and time than all-grain brewing. They offer consistent results and a great way to learn the basics of homebrewing.
What equipment do I need for an extract brewing kit?
You’ll need a brew kettle, fermenter with airlock, siphon, bottles or keg, sanitizer, and basic brewing utensils. Most kits don’t include this equipment, so it must be purchased separately.
How long does it take to brew beer with an extract kit?
Brewing with an extract kit usually takes 4 to 6 weeks from start to finish. This includes 1-2 weeks of fermentation and 2-4 weeks of bottle conditioning.
Can I improve the beer from an extract kit?
Yes, you can enhance flavor and complexity by adding specialty grains during the boil or doing a partial mash. Using high-quality yeast and proper fermentation temperatures also improves the final beer.
Where can I buy beer brewing extract kits?
Extract kits are available at homebrew supply stores, online retailers, and some craft beer shops. Popular brands include Mr. Beer, Northern Brewer, and Brooklyn Brew Shop.
Conclusion
Beer brewing extract kits offer a simple, affordable entry into homebrewing, perfect for beginners and seasoned enthusiasts alike. They provide consistent results, require minimal equipment, and allow for creative customization. With clear instructions and accessible ingredients, these kits make crafting quality beer at home both enjoyable and rewarding. Start your brewing journey today and discover the joy of creating your own beer.