How to Fix Rusted Cast Iron Cookware: A Step-by-Step Restoration Guide
You can easily fix rusted cast iron cookware by scrubbing away the oxidation and applying a fresh layer of polymerized oil. This simple restoration process removes stubborn rust and restores the non-stick surface of your pans. With the right tools and a little patience, you can rescue your favorite kitchen staples from the scrap heap.
Restoring cast iron is a highly rewarding project, but it requires realistic expectations regarding the time and effort involved. While surface rust is generally easy to remove, heavily pitted or deep corrosion may require more intensive scrubbing. Understanding the material helps you avoid common mistakes that could potentially damage the metal during the cleaning process.
Discover how to restore your rusted cast iron cookware to its former glory. This guide provides a safe, effective process to remove rust and re-season your pans for a lifetime of cooking, ensuring your heirloom pieces remain functional and safe to use. Follow our step-by-step instructions to achieve a durable, professional-grade finish that lasts for years.

Safety First and Preparation
Before you begin restoring your rusted cast iron, you must prioritize your physical safety. Rust removal often involves abrasive scrubbing and the use of chemical agents, both of which pose potential health risks if handled improperly. Taking a few minutes to prepare your workspace will ensure the process remains efficient and injury-free.
Start by choosing the right environment. Always work in a well-ventilated area, such as a garage with the door open, a patio, or outdoors. If you are using chemical strippers or vinegar solutions, these can release fumes that are harmful to inhale in confined spaces. Proper airflow is essential for your respiratory health.
Equip yourself with the following protective gear before touching any tools:
- Safety Glasses: Whether you are using a wire brush, steel wool, or a power drill attachment, rust flakes and metal debris will fly. Protect your eyes from these sharp, microscopic particles at all times.
- Durable Gloves: Wear thick nitrile or heavy-duty rubber gloves. These prevent skin irritation caused by rust particles, harsh cleaning solutions, or lye-based products, which can cause chemical burns.
- Protective Clothing: Wear long sleeves and an apron to keep rust dust and cleaning agents off your skin and clothes.
Clear your workspace of unnecessary items to keep the area organized. If you are working on a tabletop, place down a layer of newspaper or a drop cloth to catch falling rust and debris. This makes the cleanup process significantly easier and prevents staining your work surface.
Finally, keep a source of clean water nearby. If any cleaning solution or rust dust makes contact with your skin or eyes, you need to be able to flush the area immediately. If you are using a power tool for scrubbing, ensure the cord is kept away from any liquid cleaning agents to prevent electrical hazards. By establishing these safety protocols early, you can focus entirely on the restoration process without worrying about avoidable accidents.
Removing Surface Rust
The first step in restoring rusted cast iron is to eliminate the loose, flaking oxidation. Begin by scrubbing the affected areas with a stiff-bristled brush, fine-grade steel wool, or a heavy-duty scouring pad. This mechanical action clears away the top layer of rust, revealing the condition of the metal underneath.
If you encounter stubborn patches that resist scrubbing, utilize a simple, non-toxic abrasive paste. Mix coarse kosher salt with a small amount of water to create a thick, gritty slurry. Apply this directly to the rusted spots and scrub firmly using a cloth or a brush. The salt provides the necessary friction to lift deep-seated rust without damaging the integrity of the iron.
When working on your cookware, follow these safety and preservation guidelines:
- Avoid power tools: Never use angle grinders, wire wheels on drills, or other power tools. These can easily remove too much metal, creating uneven surfaces or thinning the pan to the point of structural failure.
- Work in a well-ventilated area: If you are scrubbing a large amount of rust, perform the task outside or in a ventilated space to avoid inhaling fine iron oxide dust.
- Check for pitting: If the rust has caused deep pits or holes that penetrate the metal, the piece may be beyond safe repair. Surface rust is manageable, but deep corrosion that compromises the thickness of the pan is a safety hazard.
Once you have removed the visible rust, rinse the pan thoroughly with warm water to wash away any remaining salt or debris. Dry the piece immediately and completely with a clean towel; leaving it damp will cause flash rust to form within minutes. Because the metal is now completely stripped, you must move directly to the seasoning process to prevent the rust from returning. Do not let the bare iron sit exposed to the air for long, as it will begin to oxidize almost immediately.

Deep Cleaning and Drying
Once you have successfully scrubbed away the visible rust, the next step is a thorough cleaning to remove any remaining iron dust or debris. Wash the cookware using mild dish soap and warm water. Avoid using harsh chemical cleaners or abrasive scouring pads at this stage, as the goal is simply to clear the surface before re-seasoning.
After washing, the most critical step in preventing future corrosion is immediate and complete drying. Never allow a cast iron pan to air dry, as the metal will begin to oxidize and rust again within minutes of exposure to moisture.
Follow these steps to ensure every trace of water is eliminated:
- Wipe the pan thoroughly with a clean, lint-free cloth or paper towel to remove surface water.
- Place the cookware on a stovetop burner set to low heat.
- Leave the pan on the burner for approximately three to five minutes.
- Watch for the pan to turn a matte, dry gray, which indicates that all moisture has evaporated from the microscopic pores of the iron.
If you notice any lingering dampness or steam, keep the pan on the heat for an additional minute. Do not rush this process; even a small amount of trapped moisture can undermine your restoration efforts and lead to new rust spots forming under your fresh layer of seasoning.
Once the pan is completely dry and cool enough to handle, it is ready for the seasoning process. Applying oil while the pan is still slightly warm—but not hot—can help the oil penetrate the surface more effectively. If you are not planning to season the pan immediately, keep it in a dry, low-humidity environment. Because cast iron is highly reactive to water, maintaining this habit of heat-drying after every wash is the single most effective way to keep your cookware in excellent condition for years to come.
Re-seasoning for a Non-Stick Finish
Once you have scrubbed away the rust and dried your cast iron thoroughly, the final step is to restore its non-stick surface. This process, known as seasoning, involves baking oil into the metal to create a smooth, protective barrier that prevents further oxidation and ensures food releases easily.
Begin by selecting a high-smoke-point oil. Grapeseed, flaxseed, or refined vegetable oils are excellent choices because they break down cleanly at high temperatures. Avoid using butter or extra-virgin olive oil, as these will smoke excessively and turn sticky rather than hard.
Follow these steps to ensure a professional-grade finish:
- Apply a very small amount of oil to the entire surface of the pan, including the bottom and the handle.
- Use a clean paper towel to buff the oil into the iron. Continue wiping until the pan looks matte; if it appears shiny or wet, there is too much oil, which will result in a sticky, uneven surface.
- Place a sheet of aluminum foil on the bottom rack of your oven to catch any potential drips.
- Position the pan upside down on the top rack. Baking it inverted prevents oil from pooling in the center.
- Set your oven to 450 degrees Fahrenheit and bake for one hour. This heat triggers polymerization, a chemical reaction that transforms the liquid oil into a durable, slick plastic-like coating.
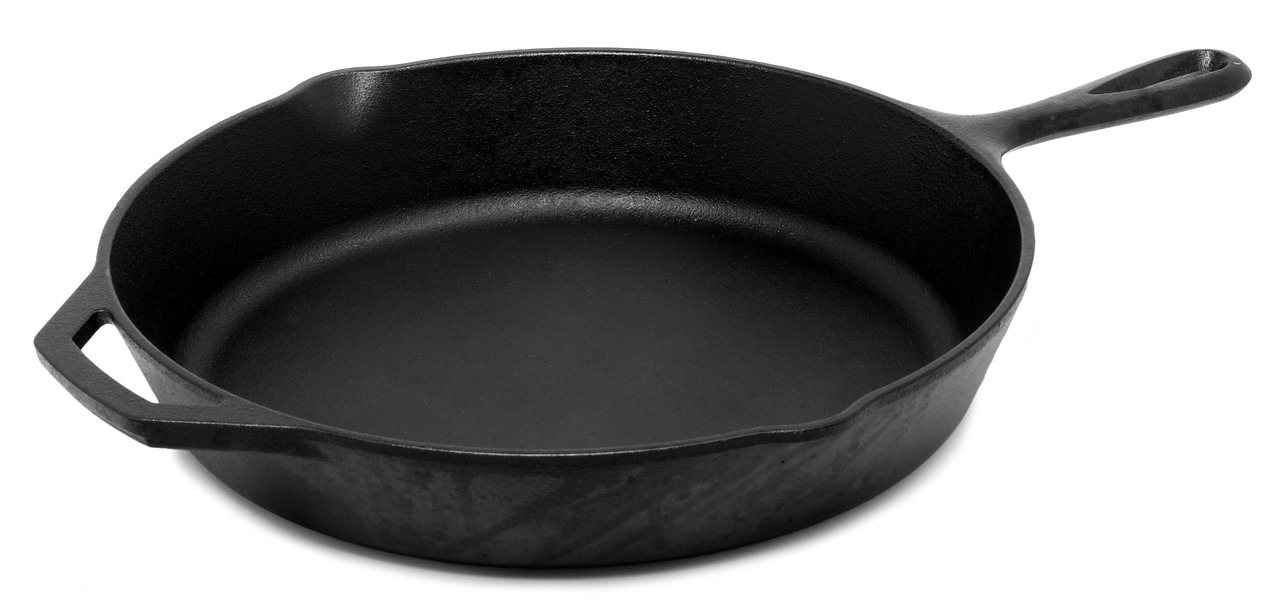
After the hour is up, turn off the oven and let the pan cool completely inside. This gradual cooling process allows the seasoning to set firmly. For the best results, repeat this oiling and baking process two or three times. You will know the seasoning is successful when the pan takes on a deep, dark, and smooth appearance. With a properly seasoned surface, your cast iron will be resistant to rust and ready for years of daily cooking. Remember to always dry your pan immediately after washing to protect the finish you have worked so hard to build.
Maintenance and Troubleshooting
The secret to keeping your cast iron cookware in peak condition is establishing a consistent maintenance routine. Rust is the primary enemy of cast iron, but it is entirely preventable with proper handling and storage habits.
To keep your pans rust-free, follow these essential care steps:
- Hand-wash only: Never put cast iron in the dishwasher. Use a mild soap and a stiff brush or chainmail scrubber to remove food residue.
- Dry immediately: Moisture is the catalyst for rust. After washing, dry the pan thoroughly with a lint-free towel. For extra security, place the pan on a low-heat burner for one to two minutes to evaporate any remaining microscopic water droplets.
- Apply a protective layer: While the pan is still warm, rub a very thin layer of high-smoke-point oil (such as grapeseed or flaxseed oil) over the entire surface. This creates a hydrophobic barrier that seals the iron from the air.
- Store in a dry place: Always store your seasoned cookware in a cool, dry environment. If you stack your pans, place a paper towel between them to prevent scratching the seasoning and to absorb any ambient moisture.
If you discover minor surface rust, do not panic. You can easily address these spots by scrubbing the area with a paste of coarse salt and water, or using a fine-grade steel wool pad. Once the rust is removed, rinse, dry, and re-season the pan immediately to restore its protective finish.
However, it is important to know when a pan has reached the end of its life. While surface rust is manageable, deep pitting—where the metal itself has been eaten away—can compromise the structural integrity of the cookware. Similarly, if you notice visible cracks or deep fissures that penetrate the metal, the pan is no longer safe to use. In these instances, the metal has become too unstable for high-heat cooking, and the piece should be retired to ensure your safety in the kitchen.