How to Clean a Rusted Pan: A Step-by-Step Restoration Guide
Learning how to clean rusted pan surfaces is surprisingly straightforward with common household staples like vinegar and baking soda. You can safely restore your favorite cookware to a pristine, usable state by following a few simple steps. This guide helps you tackle stubborn oxidation without needing harsh chemicals or expensive specialized cleaning products.
While most surface rust is easily removable, it is important to set realistic expectations for your restoration project. Not every piece of equipment can be saved, especially if the metal has deep pitting or structural damage. Understanding when a pan is beyond repair ensures you maintain a safe and healthy kitchen environment.
In the following sections, we provide practical guidance on effective cleaning methods for different types of materials, including cast iron and stainless steel. We will walk you through the entire process, from initial scrubbing to proper seasoning techniques. By the end of this article, you will know exactly how to reclaim your cookware.

Assessing the Damage and Safety Precautions
Before you commit time and effort to restoring a rusted pan, you must first determine the extent of the damage. Not all rust is created equal, and some pans may be beyond repair.
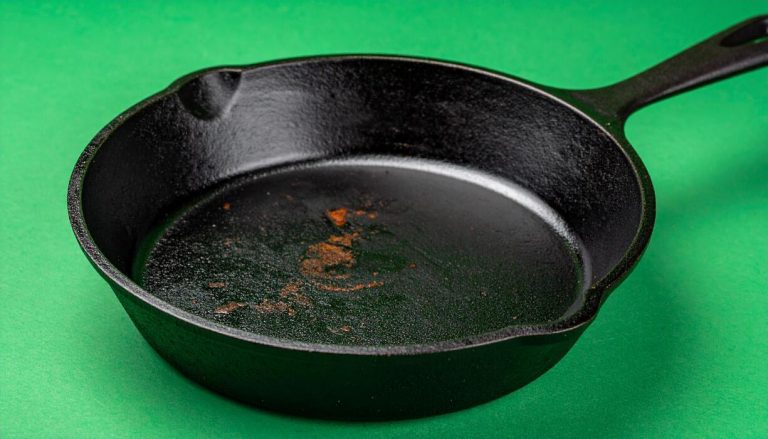
Inspect the surface closely. If the rust appears as a light, powdery orange or brown dusting, it is likely surface-level oxidation. This is common and usually easy to remove with mild abrasives. However, if you see deep, dark pits or craters in the metal, the structural integrity of the pan has been compromised. If the metal feels flaky or thin in these pitted areas, the pan is unsafe for cooking and should be discarded.
Safety must be your priority during the assessment and cleaning process. Rusted edges can be razor-sharp, and loose metal fragments can easily puncture skin. To protect yourself, follow these essential safety protocols:
- Wear heavy-duty gloves: Use thick rubber or work gloves to shield your hands from sharp edges, abrasive cleaning tools, and chemical cleaners.
- Protect your eyes: If you plan to use steel wool, wire brushes, or power tools, wear safety glasses. These tools often send tiny, sharp metal shards flying, which can cause serious eye injury.
- Work in a ventilated area: If you are using chemical rust removers, ensure you are in a well-ventilated space to avoid inhaling harsh fumes.
- Contain the debris: Spread newspaper or a drop cloth underneath your workspace. This makes it much easier to collect and safely dispose of the rust dust and metal filings once you finish.
By taking these precautions, you ensure that your restoration project remains a safe and productive experience. If at any point the cleaning process reveals deep holes that penetrate through the bottom of the pan, stop immediately. A compromised base will not heat evenly and could potentially fail while on your stovetop, creating a significant kitchen hazard. When in doubt, prioritize your safety and replace the item rather than risking a dangerous cooking failure.
The Vinegar Soak Method for Light Rust
For minor oxidation, a simple vinegar soak is often the most effective way to restore your pan without harsh chemicals. White vinegar contains acetic acid, which works to break down the chemical bonds of surface rust, lifting it away from the metal.
To begin, create a solution using equal parts white vinegar and water. Ensure you have enough liquid to completely submerge the affected area of the pan. Let the pan soak in this mixture for one to two hours. Avoid leaving it for longer than necessary, as prolonged exposure to acidic solutions can eventually damage the underlying metal surface.
Once the soak is complete, follow these steps to finish the cleaning process:
- Remove the pan from the solution and use a non-abrasive sponge or a soft-bristled brush to gently scrub away the loosened rust residue.
- Rinse the pan thoroughly under warm running water to remove all traces of the vinegar solution.
- Dry the pan immediately and completely using a clean, lint-free cloth or paper towel.
Drying is the most critical step in this process. If any moisture remains on the surface, the metal will be highly susceptible to “flash rust,” which is a rapid re-oxidation that occurs when bare metal is exposed to air and water. If you are cleaning a cast iron pan, this step is particularly vital; once dry, apply a very thin layer of neutral cooking oil to the surface to seal the pores of the metal and protect it from future moisture damage.
If the rust remains after one soak, you may repeat the process, but keep a close eye on the metal to ensure no pitting occurs. If the rust is deep or the pan shows signs of significant structural degradation, this method may not be sufficient, and you might need to consider professional restoration or replacement. Always store your cleaned pans in a dry, well-ventilated area to maintain their condition long-term.

Using Baking Soda for Stubborn Spots
When rust has deeply penetrated the surface of your pan, a gentle abrasive is often the most effective solution. Baking soda is a pantry staple that works exceptionally well because it is mildly alkaline and abrasive enough to lift oxidation without damaging the underlying metal. This method is safe for most iron and stainless steel cookware, provided you are thorough with the drying process afterward.
To begin, create a thick, spreadable paste by mixing baking soda with a small amount of water. Aim for a consistency similar to toothpaste—it should be dense enough to cling to the sides of the pan without running off. Apply a generous layer of this paste directly onto the rusted patches, ensuring the affected areas are completely covered.
Patience is the key to this process. Allow the paste to sit on the rust for several hours, or preferably overnight. During this time, the baking soda works to break down the bond between the rust and the metal surface.
Once the paste has had time to work, follow these steps to finish the cleaning:
- Use a stiff-bristled nylon brush or a non-metallic scouring pad to scrub the area in a circular motion.
- If the rust remains stubborn, add a tiny bit more water to reactivate the paste and continue scrubbing.
- Rinse the pan thoroughly with warm water to remove all traces of the baking soda residue.
- Immediately dry the pan completely using a clean, lint-free cloth or paper towel.
Because moisture is the primary catalyst for rust, never allow the pan to air dry. For cast iron, it is highly recommended to apply a very light coating of cooking oil to the surface immediately after drying. This step acts as a protective barrier, preventing oxygen and moisture from reaching the metal and stopping new rust from forming. If you notice any remaining discoloration, you can repeat the baking soda application as many times as necessary until the surface is restored to its original condition.
Mechanical Removal and Power Tool Safety
When dealing with severe, deep-seated rust, manual scrubbing may not be enough. Using a power drill equipped with a wire brush attachment is an effective way to strip away oxidation quickly. However, this method requires caution to protect both your health and the integrity of your cookware.
Before you begin, prioritize your personal safety. Metal dust and fine rust particles are hazardous if inhaled. Always operate your drill in a well-ventilated outdoor space and adhere to these safety protocols:
- Wear a high-quality N95 dust mask to prevent inhalation of airborne metallic debris.
- Use safety goggles to shield your eyes from flying rust flakes.
- Wear hearing protection, as power tools can reach decibel levels that cause long-term damage.
- Secure the pan firmly to a workbench using clamps so it does not slip during operation.
When using the wire brush, let the tool do the work. Apply only light, consistent pressure. If you press too hard, you risk several issues:
- Warping: Excessive friction creates intense heat, which can cause thin-gauge metal to buckle or warp permanently.
- Structural Damage: Aggressive grinding can gouge the surface, creating deep pits that are difficult to season or maintain later.
- Thinning: You may inadvertently remove too much healthy metal, compromising the pan’s thickness and heat distribution properties.
Maintain a steady, sweeping motion across the surface. Move the drill continuously rather than holding it in one spot for too long. This prevents localized overheating and ensures an even finish. If the rust is stubborn, stop periodically to inspect the metal. It is better to perform several light passes than one heavy-handed attempt. Once you have reached bare metal, immediately clean the surface with a damp cloth to remove any residual dust before proceeding to the seasoning process. Taking these precautions ensures your restoration is safe, effective, and preserves the longevity of your pan.

Follow-up Care and When to Replace
Once your pan is clean and free of rust, the restoration process is not yet complete. Exposed iron is highly susceptible to oxidation, so you must immediately re-season the surface to create a protective barrier. Apply a very thin layer of high-smoke-point oil, such as grapeseed or flaxseed oil, to the entire surface. Buff it off until the pan looks dry, then bake it in an oven at 450°F (230°C) for one hour to polymerize the oil into a durable, non-stick finish.
To keep your cookware in top condition, follow these maintenance habits:
- Dry immediately: Never let a cast iron pan air dry. After washing, place it on a low burner for a few minutes to evaporate all moisture before storing.
- Light oiling: Wipe a tiny drop of oil over the surface after every use to maintain the seasoning layer.
- Avoid soaking: Prolonged exposure to water is the primary cause of rust.
While cast iron is incredibly resilient, it is not indestructible. During the cleaning process, inspect the metal closely. If you discover deep pits, structural cracks, or areas where the metal is flaking away, the pan has reached the end of its lifespan. These imperfections can harbor bacteria and compromise the integrity of your cooking surface, making the pan unsafe for food preparation. In such cases, it is best to retire the piece.
Think of your cast iron like a garden; it requires consistent, gentle care to thrive. Just as you wouldn’t leave a plant to dry out or drown, you must manage the moisture levels of your cookware. If you find yourself frequently battling rust, check your storage environment. Damp cupboards or humid kitchens can undo your hard work. Storing your pans with a paper towel between them can help absorb ambient moisture, ensuring your restored pan remains ready for the stove rather than returning to a state of decay.
Frequently Asked Questions
How can I tell if my rusted pan is safe to restore or if it should be thrown away?
To determine if a pan is salvageable, you must carefully inspect the metal surface. If the rust appears as a light, powdery dusting of orange or brown, it is likely surface-level oxidation that can be safely removed. However, if your inspection reveals deep pits, craters, or flaky metal, the structural integrity of the cookware has been compromised. If you find holes that penetrate through the bottom of the pan or if the metal feels dangerously thin, you should stop the restoration process immediately. A pan with a compromised base will not heat evenly and poses a significant safety hazard on your stovetop. In such cases, it is always best to prioritize your kitchen safety and replace the damaged item rather than risking a dangerous cooking failure during use.
Why is it important to dry my pan immediately after cleaning it?
Drying your pan immediately and thoroughly after cleaning is the most critical step in the restoration process. If any moisture remains on the surface, the bare metal becomes highly susceptible to flash rust. This is a rapid form of re-oxidation that occurs when exposed metal reacts with air and water, effectively undoing your hard work. To prevent this, use a clean, lint-free cloth or paper towel to ensure every trace of water is removed. If you are working with cast iron, this step is especially vital because the material is porous. Once the pan is completely dry, you should apply a very thin layer of neutral cooking oil to the surface. This protective coating seals the metal pores and acts as a barrier against future moisture damage, keeping your cookware in excellent condition.
Can I use vinegar to clean all types of rusted cookware?
While white vinegar is an excellent, non-toxic solution for breaking down surface rust due to its acetic acid content, you must use it with caution. It is generally effective for minor oxidation, but you should never leave your cookware soaking in an acidic solution for an extended period. Prolonged exposure can eventually damage the underlying metal surface of your pan. Always monitor the progress of the soak, which typically takes between one and two hours. If you are cleaning cast iron or other reactive metals, be extra vigilant. After removing the pan from the vinegar solution, rinse it thoroughly with warm water to neutralize the acid, dry it completely, and apply a light coat of oil to protect the metal from immediate re-oxidation or flash rusting.
What safety equipment should I wear when removing rust from pans?
Safety must be your top priority when restoring rusted cookware, as the process involves sharp edges and potentially flying debris. You should always wear heavy-duty rubber or work gloves to shield your hands from sharp, rusted edges and abrasive cleaning materials. If you intend to use tools like steel wool, wire brushes, or power equipment, it is essential to wear safety glasses. These tools can send tiny, sharp metal shards flying, which pose a serious risk of eye injury. Furthermore, if you are working with chemical rust removers, ensure you are in a well-ventilated area to avoid inhaling any harsh fumes. Finally, protect your workspace by using a drop cloth or newspaper to contain rust dust and metal filings, making cleanup safer and more efficient.
Why is baking soda recommended for stubborn rust spots?
Baking soda is a highly effective pantry staple for stubborn rust because it acts as a mild, safe abrasive. Unlike harsh chemicals, it is alkaline and gentle enough to lift oxidation without causing damage to the underlying metal of your iron or stainless steel cookware. To use it effectively, mix the baking soda with a small amount of water until it forms a thick, toothpaste-like paste. This consistency allows the mixture to cling to the sides of the pan without running off. By applying a generous layer and letting it sit for several hours or overnight, the baking soda has enough time to break down the stubborn chemical bonds between the rust and the metal. This patient approach is often the best way to restore heavily oxidized surfaces without resorting to aggressive or expensive cleaning products.
What should I do if the rust returns after I have cleaned the pan?
If rust reappears shortly after you have cleaned your pan, it is usually a sign that the metal was not dried thoroughly enough or was not properly protected after the cleaning process. If you notice light, recurring rust, you can repeat the cleaning methods using vinegar or baking soda. However, it is essential to focus on the post-cleaning maintenance. For cast iron, you must ensure the pan is seasoned correctly with a thin layer of neutral cooking oil after every wash to seal the pores. Additionally, always store your cookware in a dry, well-ventilated area to prevent moisture buildup. If the rust continues to return despite these efforts, it may indicate that the metal has deep-seated oxidation or that the pan's surface has become too pitted to maintain a protective seasoning layer.