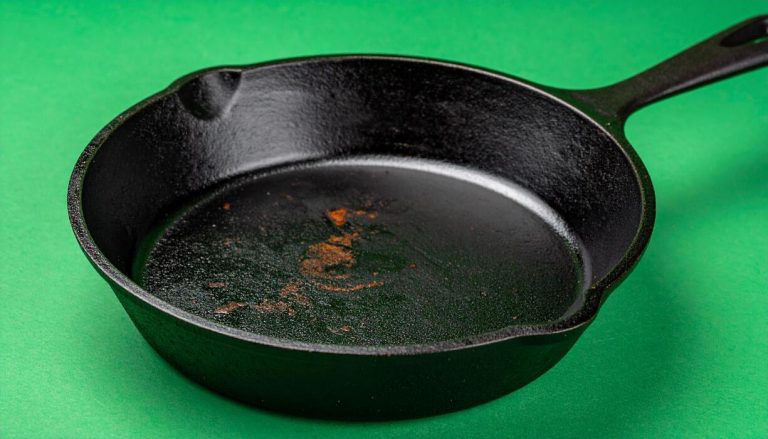
How to Clean Rust from an Iron Skillet and Restore Your Cookware
You can effectively remove rust from your cast iron skillet using common household items like vinegar, baking soda, and coarse salt. This guide walks you through the restoration process to get your pan back to a smooth, non-stick cooking surface, ensuring your reliable kitchen tool remains safe and functional for years to come.
Restoring a rusted skillet is a straightforward task, but it requires patience and a bit of elbow grease. While deep pitting may be permanent if the metal has corroded too far, most surface rust is easily treatable. Understanding the cause of oxidation helps you prevent future damage and protects your cookware investment.
In the following sections, we will explore the best methods for scrubbing away stubborn orange spots without damaging the integrity of the iron. You will learn how to properly strip the surface, prepare the metal for seasoning, and apply the final protective layer to ensure your skillet performs perfectly for every meal.

Assessing the Damage and Safety Precautions
Before you commit to a full restoration, take a moment to inspect your iron skillet carefully. The depth of the rust determines your approach. Minor surface oxidation usually appears as a light, dusty orange coating that wipes away easily. However, deep, pitted rust that has eaten into the metal requires more aggressive mechanical intervention.
If you notice deep flakes or holes, assess the structural integrity of the pan. While iron is incredibly durable, excessive pitting can compromise the surface, making it difficult to maintain a non-stick seasoning even after the rust is removed. If the skillet is warped or cracked, it may be time to retire it.
Safety must be your priority when removing rust. The process involves abrasive materials that can pose risks to your skin and respiratory system. Before you begin, gather the following protective gear:
- Heavy-duty work gloves: These protect your hands from sharp metal edges and the abrasive action of steel wool or wire brushes.
- Safety goggles: Rust particles and tiny metal shards become airborne during scrubbing. Protect your eyes from these irritants.
- Dust mask: If you are using a power tool or vigorous hand scrubbing, wear a mask to avoid inhaling fine rust dust and metallic debris.
Environment is just as important as personal protection. Always work in a well-ventilated space, such as a garage with the door open, a patio, or a workshop with proper airflow. Avoid working in small, enclosed rooms where dust can settle on surfaces or be inhaled. Lay down a drop cloth or old newspapers to catch the debris, making cleanup significantly easier once the job is finished.
By taking these precautions, you ensure that the restoration process is safe and efficient. Once you have confirmed the rust is manageable and you are properly equipped, you are ready to move on to the cleaning phase. Taking this time to prepare prevents unnecessary injury and ensures you have a clean workspace for the work ahead.
The Gentle Scrubbing Method
For light surface rust, begin by tackling the affected areas with a stiff-bristled nylon brush or a non-metallic scouring pad. Avoid using steel wool during this initial phase, as it can be overly aggressive and may scratch the seasoning layer of your skillet unnecessarily. Apply firm, steady pressure in a circular motion to lift the oxidized particles from the surface.
If the rust persists after your initial scrubbing, you can create a gentle, natural abrasive paste. This method is highly effective for localized spots without compromising the integrity of the iron.
- Combine two tablespoons of coarse sea salt with just enough water to form a thick, damp paste.
- Apply the mixture directly to the rusted areas.
- Use a clean cloth or a halved raw potato to scrub the paste into the rust.
The potato method is a kitchen-hack favorite for a reason: the natural oxalic acid in the potato reacts with the iron oxide, helping to dissolve the rust, while the starch acts as a mild abrasive. If you choose to use a cloth, ensure it is sturdy enough to withstand the friction of the coarse salt crystals. Continue scrubbing until the orange-brown discoloration disappears and you see the dark, smooth surface of the iron beneath.
Once you have successfully removed the rust, rinse the skillet thoroughly with warm water. It is critical to dry the pan immediately and completely—ideally over low heat on your stovetop—to prevent flash rust from forming on the freshly exposed iron. Once the pan is bone-dry, apply a very thin layer of neutral cooking oil to seal the surface and protect it until your next use. This simple, mechanical approach is the safest way to restore your skillet’s performance without resorting to harsh chemicals or power tools.

Using Vinegar for Stubborn Rust
If scrubbing with steel wool or a stiff brush fails to remove stubborn rust, a vinegar soak is your most effective next step. Because vinegar is acidic, it chemically reacts with and dissolves iron oxide, making it easier to lift away without excessive manual labor.
To prepare your soaking solution, mix equal parts white vinegar and water in a basin or sink large enough to submerge the entire skillet. Submerge the pan completely and set a timer. Do not leave the skillet in this solution for more than 30 to 60 minutes.
Monitoring the process is critical. While vinegar is excellent at removing rust, prolonged exposure will eventually begin to eat into the healthy iron of the pan, causing pitting or structural damage. Check the skillet every 15 minutes to see if the rust has begun to loosen.
Once the rust has softened, follow these steps to finish the cleaning process:
- Remove the skillet from the solution immediately.
- Scrub away the loosened rust using a scouring pad or stiff brush.
- Rinse the pan thoroughly under running water to neutralize the remaining acid.
- Dry the skillet immediately with a clean cloth or paper towel.
After rinsing, your cast iron will be highly susceptible to “flash rust,” which occurs when bare metal reacts with oxygen and moisture in the air. To prevent this, place the pan on a stovetop burner over low heat for a few minutes to ensure every trace of moisture has evaporated. Once the pan is bone-dry and slightly warm to the touch, apply a very thin layer of neutral cooking oil to the surface. This protective barrier seals the metal and prepares the skillet for the re-seasoning process. Never skip the drying and oiling steps, as they are the most important defense against future corrosion.
Re-seasoning Your Skillet
Once you have successfully removed the rust, your skillet is effectively a blank slate. Because the metal is now completely exposed, it is highly susceptible to flash rust if left damp. You must immediately restore a protective barrier to prevent oxidation and begin rebuilding the non-stick surface.
Start by placing your clean, dry skillet on the stovetop over low heat for two to three minutes. This ensures that every trace of moisture, even in the microscopic pores of the iron, is completely evaporated. Once the pan is bone-dry and cool enough to handle, you are ready to season.
Follow these steps to create a durable, non-stick finish:
- Apply the oil: Add a teaspoon of high-smoke-point oil, such as grapeseed, flaxseed, or canola oil, to the pan. Use a clean lint-free cloth or paper towel to rub the oil over the entire surface, including the handle and the bottom.
- Wipe it clean: This is the most critical step. Use a fresh paper towel to buff the pan as if you are trying to wipe all the oil away. You want only a microscopic layer remaining; if the pan looks wet or sticky, you have used too much oil.
- Bake the skillet: Place the skillet upside down on the middle rack of your oven. Put a piece of aluminum foil or a baking sheet on the rack below to catch any potential drips.
- Heat and cool: Bake the skillet at 450 degrees Fahrenheit for one hour. After the hour is up, turn off the oven and let the skillet cool completely inside before removing it.
A single round of seasoning provides a foundation, but your skillet will perform better with time. The more you cook with fats and oils, the more robust and slick the non-stick layer will become. If the surface appears dull or food begins to stick, simply repeat this process to maintain a reliable, rust-free cooking surface for years to come.

Maintenance Tips and When to Replace
Maintaining your iron skillet is a simple process that prevents rust from returning. The golden rule of cast iron care is to avoid the dishwasher at all costs. Moisture is the enemy of iron, and the harsh detergents and prolonged soaking cycles found in dishwashers will strip your seasoning and invite oxidation.
To keep your pan in peak condition, follow this routine after every use:
- Hand-wash immediately: Use warm water and a mild soap if necessary. Avoid soaking the pan, as this can lead to rust.
- Dry thoroughly: Towel-dry the skillet, then place it on a burner over low heat for two minutes. This ensures that every trace of moisture evaporates from the microscopic pores of the metal.
- Apply oil: While the pan is still warm, apply a very thin layer of neutral cooking oil—such as grapeseed or vegetable oil—to the entire surface using a paper towel. Buff away any excess until the surface is smooth and not tacky.
Proper maintenance creates a durable, non-stick patina that protects the metal from air and water. However, there are instances where a skillet cannot be saved. If you notice deep, pitted rust that has eaten into the metal, the structural integrity of the pan may be compromised. These pits can trap food particles and bacteria, making the surface impossible to clean effectively.
Additionally, if you have attempted the restoration process multiple times and the rust consistently reappears, or if the pan has developed a crack, it is time to retire the piece. Continuing to cook on a severely degraded skillet can affect the flavor of your food and may pose safety concerns. Investing in a new, high-quality skillet is often safer and more cost-effective than struggling with a piece of cookware that has passed its functional lifespan. When in doubt, prioritize your kitchen safety and replace the damaged iron.