Hooking Up A Kegerator
Ready to enjoy brewery-quality beer from the comfort of your home? Whether you are setting up a brand-new unit or refreshing an old setup, this guide provides the quick solutions you need. We will walk you through connecting the gas, lines, and coupler so you can start pouring the perfect pint in minutes.
Essential Tools and Parts for Kegerator Setup
CO2 Tank and Dual-Gauge Regulator
The foundation of any kegerator setup begins with a certified CO2 tank and a high-quality dual-gauge regulator. The CO2 tank provides the necessary pressure to push the beer from the keg to the faucet while maintaining carbonation levels.
A dual-gauge regulator is essential because it allows you to monitor two critical metrics simultaneously: the remaining pressure in the tank and the output pressure (PSI) going into the keg. Most standard beers require a setting between 10 and 12 PSI, though this varies by style.
When hooking up your system, ensure the regulator is tightly secured to the tank valve using a CO2 washer to prevent leaks. Always keep the tank in an upright position during operation to ensure the safety of the equipment and the consistency of the pour.
Beer and Gas Line Tubing
Selecting the correct food-grade tubing is vital for a clean-tasting pour and proper pressure balance. You will need two distinct types of lines: a gas line (typically red or clear reinforced PVC) and a beer line (usually clear vinyl or barrier tubing).
For the beer line, the length and internal diameter are crucial for controlling foam; a standard setup often uses 5 to 6 feet of 3/16-inch ID tubing to create the necessary resistance. The gas line usually features a larger 5/16-inch ID to allow for maximum airflow from the regulator.
Before installation, check that all lines are free of kinks or debris. Using high-quality, thick-walled tubing prevents oxygen permeation and ensures that your beverage remains fresh and carbonated from the first pint to the very last drop of the keg.
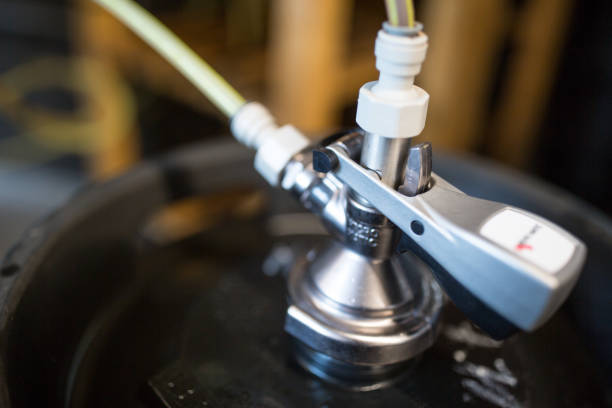
Couplers, Faucets, and Shanks
These components act as the bridge between your beverage and your glass. The keg coupler (most commonly a D-System Sankey for domestic beers) attaches directly to the keg valve, allowing gas in and beer out.
This is connected via a metal shank that passes through the refrigerator wall or draft tower, leading to the draft faucet. When assembling, ensure the faucet is a forward-sealing design if possible, as this reduces sticking and bacteria buildup.
It is critical to match your coupler type to the specific brand of beer you are serving, as European imports often require different styles like S or G systems.
Always inspect the internal O-rings and gaskets on these parts before hooking them up; a worn seal is the leading cause of messy leaks and wasted beer during the initial setup process.
Wrenches and Clamps
To ensure a leak-proof environment, you must have the right mechanical tools on hand. A specialized faucet wrench is indispensable for tightening the faucet to the shank without scratching the chrome finish.
Additionally, a heavy-duty crescent wrench or a dedicated CO2 tank wrench is required to secure the regulator to the gas cylinder. For the tubing connections, stainless steel Oetiker clamps or worm gear clamps are essential to prevent lines from blowing off under pressure.
Oetiker clamps provide a permanent, 360-degree seal that is superior for high-pressure gas lines, while worm gear clamps offer adjustability for quick repairs.
Never rely on hand-tightening alone; using these tools to create airtight seals at every junction ensures your CO2 lasts longer and your kegerator cabinet remains dry and free of sticky residue or gas loss.
Read more: Best Which Induction Stove Is Better 2026: Reviews & Top Pic – Cook Stove Picks
How to Prepare Your Kegerator Cabinet
Placement and Ventilation Requirements
Before you begin hooking up a kegerator, selecting the ideal location is critical for long-term performance and beer quality. Ensure the unit is placed on a level surface to prevent foaming issues caused by an unbalanced keg.
If you are using a freestanding model, it must have at least two to three inches of clearance on all sides and the back to allow the compressor to dissipate heat effectively. Built-in units require front-venting systems to avoid overheating within cabinetry.
Keep the cabinet away from direct sunlight or high-heat appliances like ovens, as excessive external heat forces the cooling system to work harder, potentially shortening its lifespan. Additionally, verify that there is a grounded power outlet nearby to avoid the use of extension cords, which can cause voltage drops.
Proper spacing ensures the internal thermostat maintains a consistent temperature, which is the most important factor in preventing a glass full of foam during your first pour.
Cleaning the Interior and Lines
A successful setup requires a sterile environment to ensure your beverage tastes exactly as the brewer intended. Begin by wiping down the interior of the cabinet with a mild soap and water solution to remove any factory dust or packing residue.
The most vital step is performing a thorough line cleaning before the first keg is tapped. Even new beer lines can contain manufacturing lubricants or debris that impart a plastic-like taste to your beer.
Use a specialized alkaline beer line cleaner and a pressurized cleaning pump to flush the vinyl tubing and the faucet thoroughly. Rinse the system with cold water until no chemical residue remains, which you can verify using pH strips if available.
Don’t forget to sanitize the coupler and the faucet head, as these are primary contact points for bacteria. Starting with a surgically clean system prevents the growth of wild yeast and ensures that every pint poured is crisp, clear, and free of off-flavors from day one.
Installing the Draft Tower
The draft tower is the centerpiece of your assembly and requires careful handling to ensure a leak-free connection. Start by feeding the beer line tubing through the pre-drilled hole on top of the cabinet, ensuring the rubber gasket is seated flat against the surface to create an airtight seal.
Secure the tower to the cabinet using the provided mounting bolts, tightening them in a cross-pattern to apply even pressure across the base.
If your unit includes a tower cooling fan, position the air ducting so it reaches up into the tower; this prevents the beer in the line from warming up between pours, which is the leading cause of first-pour foam.
Once the tower is mounted, attach the faucet head using a faucet wrench, ensuring the connection is snug but not over-tightened to avoid damaging the internal washers.
Proper alignment of the tower ensures that the lines remain kink-free inside the cabinet, allowing for a smooth, laminar flow of liquid from the keg to your glass.
Step-by-Step Guide to Connecting Gas Lines
Attaching the Regulator to the CO2 Tank
Begin by ensuring your CO2 tank is standing upright and secured to prevent tipping. Before attaching the regulator, quickly open and close the tank valve to blow out any dust or debris from the orifice.
Align the regulator inlet nut with the tank valve threads, ensuring the integrated washer or O-ring is seated perfectly inside the connection to prevent gas loss. Use a heavy-duty crescent wrench to tighten the nut firmly; it should be snug but avoid over-tightening which can crush the seal.
Once the regulator is physically mounted, ensure the shut-off valve is in the closed position before you attempt to open the main tank. This prevents a sudden surge of high-pressure gas from hitting the internal diaphragm or downstream lines.
Double-check that the pressure adjustment screw is backed out completely so that no pressure is applied to the low-pressure gauge initially. This methodical approach protects your equipment and ensures a steady, controlled flow of gas for your kegerator setup.
Connecting the Gas Line to the Coupler
To establish the flow of gas to your beer, take the flexible gas tubing—typically red or clear—and slide a stainless steel worm clamp or stepless Oetiker clamp over the end.
Push the tubing firmly onto the barbed gas inlet port of the keg coupler until it is flush against the base. Use a screwdriver or pliers to tighten the clamp securely over the barb, ensuring the connection is airtight and cannot be pulled off under pressure.
The other end of this line must be attached to the regulator output barb using the same clamping method. It is vital to ensure there are no sharp kinks or tight bends in the tubing that could restrict gas flow or cause the line to fatigue over time.
If the tubing is difficult to slide onto the barb, soaking the end in warm water for a minute will soften the plastic, making the installation much easier. Proper securement here is the primary defense against losing a full tank of CO2 overnight.
Checking for Air Leaks
Once all physical connections are tightened, it is time to perform a critical safety and efficiency check. Slowly open the main valve on the CO2 tank and turn the regulator adjustment knob until the gauge reads approximately 10-12 PSI.
Prepare a solution of soapy water or a specialized leak detector spray in a small bottle. Generously apply the solution to every junction, including the tank-to-regulator nut, the pressure adjustment screw, and both ends of the gas hose at the clamps.
Watch closely for the formation of growing bubbles, which indicate escaping gas. If you spot a leak, shut off the gas immediately and tighten the offending connection before retesting. Do not forget to spray the air-line tailpiece on the coupler itself.
Even a microscopic leak can deplete your gas supply in days, leading to flat beer and unnecessary refill costs. A silent system is not always a sealed system, so relying on visual bubble cues is the most reliable way to guarantee your kegerator is ready for long-term operation.
How to Install the Keg Coupler and Beer Lines
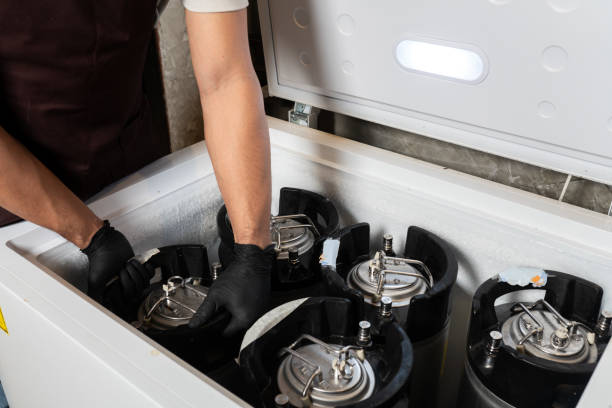
Matching the Coupler to Your Keg Type
Before you begin the physical assembly, you must ensure that your hardware matches the specific beverage container you intend to serve. Most domestic North American beers utilize a Standard D-System Sankey coupler, which is the industry norm for major brands.
However, if you are planning to serve European imports or specialized craft selections, you might require a G-System, S-System, or U-System coupler to achieve a secure fit. Attempting to force an incompatible coupler onto a keg valve can damage the delicate seals and lead to significant leaks or foaming issues.
Always verify the keg valve type by checking the manufacturer’s specifications or inspecting the lug pattern on the top of the barrel. Once you have confirmed the correct match, inspect the internal O-rings for any signs of wear, cracks, or dryness.
Applying a small amount of food-grade lubricant to these seals can help maintain an airtight connection and prolong the life of your equipment during frequent keg swaps.
Connecting the Beer Line to the Faucet
To establish a clean flow of liquid, you must securely attach the vinyl tubing between the coupler and the draft tower.
Start by sliding a stainless steel hose clamp over the end of the beer line before pushing the tubing firmly onto the barbed tailpiece located on the top of the coupler.
For a more pliable fit, soaking the end of the hose in hot water for a few seconds can make the installation much smoother. Tighten the clamp using a screwdriver or nut driver to prevent any pressurized beer from spraying out.
Next, connect the opposite end of the line to the faucet shank at the back of the tower. Ensure that the neoprene washer is properly seated inside the hex nut to create a leak-proof barrier.
Use a spanner wrench to tighten the connection snugly, but avoid over-tightening, which can crush the washer and cause turbulence in the line. Proper alignment here is vital for maintaining consistent pressure and preventing unwanted oxygen from entering the system.
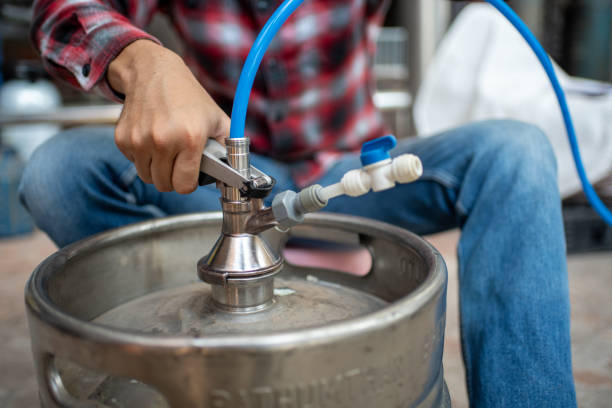
Tapping the Keg Correcty
With all lines securely fastened, you are ready to engage the flow of beer by tapping the keg. Begin by ensuring the coupler handle is in the upright, disengaged position before placing it onto the keg’s neck.
Align the lugs on the coupler with the corresponding slots on the keg valve, then perform a quarter-turn clockwise until the unit stops moving. This locks the coupler into place but does not yet open the flow.
To finalize the process, pull the handle outward and press it firmly downward until it clicks into the locked position.
You should see beer immediately enter the line; if you hear a persistent hissing sound, it indicates a gas leak, and you should immediately disengage the handle to check your seals. Once the connection is silent and secure, open your CO2 regulator valve to pressurize the system.
It is often helpful to pull the pressure relief valve on the side of the coupler briefly to purge any trapped air, ensuring that only fresh beer reaches your faucet.
Setting the Right PSI and Temperature
Ideal Temperature for Draft Beer
Achieving the perfect pour begins with precise thermal management inside your kegerator cabinet. For most standard domestic lagers and craft ales, you should aim for a liquid temperature of 38 degrees Fahrenheit.
Maintaining this specific set point is critical because beer that is too warm will release CO2 prematurely, resulting in excessive foam, while beer that is too cold will mask the intended flavor profile and aromas.
To ensure accuracy, do not rely solely on the internal thermostat dial; instead, place a calibrated thermometer in a glass of water inside the unit for twenty-four hours to get a true reading of the liquid temperature.
Consistency is the ultimate goal here, as even a minor fluctuation of two or three degrees can drastically alter how the gas stays in solution.
Once you have stabilized the environment at 38 degrees, you provide the necessary foundation for the carbonation levels to remain steady from the first pint to the very last drop in the keg.
Adjusting CO2 Pressure for Different Beer Styles
Once your temperature is stabilized, you must set the regulator to the correct Pounds Per Square Inch (PSI) to match the specific carbonation requirements of your beverage.
For a standard American ale or lager served at 38 degrees, a baseline of 10 to 12 PSI is typically the industry standard for a balanced pour.
However, different beer styles require unique adjustments to maintain their character; for instance, highly carbonated wheat beers or Belgian ales may require a higher setting of 15 to 20 PSI, whereas nitrogen-infused stouts utilize a specialized blend and much higher pressures near 30 PSI.
Always adjust your regulator in small increments and allow the system several hours to equalize before testing the results. It is important to remember that the regulator’s job is to maintain the equilibrium created by the brewery.
If the pressure is set too low, the beer will eventually go flat, but if it is set too high, you risk over-carbonating the product and creating a glass full of foam.
Balancing the System to Prevent Foam
The final step in hooking up your kegerator is ensuring the system is balanced, which refers to the relationship between the applied CO2 pressure and the resistance provided by your beer lines.
If you have set your regulator to 12 PSI but find the beer exiting the faucet with too much velocity, you likely need longer beer tubing to create more resistance.
Most home setups utilize roughly five to six feet of 3/16-inch ID tubing to provide the necessary friction to slow the flow.
If the beer is moving too fast, it hits the bottom of the glass with force, causing the CO2 to break out of the liquid and create unmanageable foam issues. Conversely, if the line is too long, the pour will be agonizingly slow.
Check your connections for any air bubbles in the line, which often indicate a loose fitting or a temperature imbalance. By matching your line length to your PSI and temperature, you ensure a gentle, steady stream that produces a perfect one-inch head of foam every single time.
Common Kegerator Setup Problems and Fixes
How to Fix Excessive Foam
Excessive foam is the most frequent issue when hooking up a kegerator, often caused by incorrect temperature or pressure settings. First, ensure your refrigerator is set between 36 and 38 degrees Fahrenheit, as liquid that is too warm cannot hold CO2, leading to breakout.
Use a calibrated thermometer to check the liquid temperature rather than the air. Next, check your CO2 regulator settings; most standard ales and lagers require 10 to 12 PSI. If the pressure is too low, CO2 will escape the beer in the lines, creating pockets of foam.
Additionally, inspect the beer line length, ensuring you have at least five to six feet of 3/16-inch ID tubing to provide necessary resistance. Always open the faucet quickly and fully to prevent turbulence at the tap.
Finally, check for any kinks or obstructions in the lines and ensure the keg has settled for at least 24 hours after transport before attempting to pour your first glass.
What to Do if Beer Isn’t Flowing
If you have completed your setup but nothing comes out when you pull the tap, start by checking the CO2 cylinder levels. Ensure the tank is not empty and that the primary shut-off valve is turned to the ‘on’ position.
If the gas is flowing, inspect the coupler attachment on the keg. It must be pressed down and locked firmly into place to engage the check valve. A common mistake is forgetting to open the secondary shut-off valve located on the regulator itself.
If the gas system is functional, check for a frozen beer line, which happens if the kegerator is set too cold or if the lines are touching the cooling plate.
Another possibility is a clogged faucet or coupler caused by dried residue; soak these components in warm water or brewery wash. Lastly, verify that the CO2 check valve inside the coupler isn’t stuck closed, which prevents the gas from pressurizing the keg and pushing the liquid through the lines.
Fixing Sputtering Faucets
A sputtering faucet usually indicates that air or gas is trapped in the lines, often due to a poor seal during the initial hookup. Start by inspecting the rubber washers and O-rings at every connection point, specifically where the beer line meets the coupler and the shank.
If these seals are cracked or missing, air will be drawn into the system, causing an uneven flow. Ensure the coupler is seated correctly on the keg; a loose connection here is a primary culprit for ‘burping’ taps.
Another cause is gas breakout, which occurs if the CO2 pressure is set too low for the temperature of the beer, allowing bubbles to form inside the lines. Check that your beer lines are clean and free of any debris or mineral buildup that could cause turbulence.
If the keg is nearly empty, sputtering is a natural sign that the liquid level has dropped below the spear. Replacing the keg and bleeding the pressure relief valve will typically resolve the issue for your next pour.
Maintenance Tips for a Clean Kegerator
How Often to Clean Beer Lines
To maintain the integrity of your draft system, you must establish a strict cleaning schedule for your beer lines. When hooking up a kegerator, many users overlook the fact that organic buildup begins the moment liquid enters the tubing.
You should perform a thorough flush with a caustic cleaning solution every two weeks or at the very least, every time you switch out an empty keg for a fresh one. This process removes yeast, mold, and beer stone that can negatively impact the flavor profile and cause excessive foaming.
Use a pressurized cleaning bottle to force the solution through the faucet and lines, followed by a thorough freshwater rinse to ensure no chemicals remain. Neglecting this step leads to bacteria growth that ruins the crisp taste of your brew.
By keeping the lines pristine, you ensure that the first pour from your newly hooked-up keg is as fresh and delicious as the brewer intended, preventing off-flavors from ruining your home bar experience.
Replacing Washers and O-Rings
A critical component of a successful kegerator setup is ensuring an airtight and liquid-tight seal throughout the entire assembly. Over time, the rubber components like washers and O-rings will become brittle, compressed, or cracked, leading to frustrating gas leaks or sticky beer messes.
During your routine maintenance, inspect the O-rings on the keg couplers and the rubber washers inside the wing nuts of your beer and gas lines. It is highly recommended to replace these seals annually or whenever you notice signs of wear or flattening.
Applying a small amount of food-grade keg lubricant can help extend the life of these parts and create a more secure connection. When you are hooking up a new keg, check that the tailpiece gasket is seated correctly to prevent leaks at the shank.
Keeping a small kit of spare gaskets on hand allows for quick repairs and prevents downtime, ensuring your CO2 levels remain stable and your beer stays carbonated and flowing perfectly without any unexpected equipment failures.
Storing Your CO2 Tank Safely
Proper management of your CO2 cylinder is vital for both the performance of your kegerator and your personal safety.
When hooking up a kegerator, always ensure the CO2 tank is stored upright at all times to prevent liquid CO2 from entering the regulator, which can cause permanent damage or inaccurate pressure readings. Secure the tank with a bracket or strap to prevent it from tipping over during keg swaps.
It is essential to keep the cylinder in a cool, well-ventilated area away from direct heat sources, as high temperatures can cause the internal pressure to rise to dangerous levels, potentially triggering the safety relief valve.
Periodically check the tank and regulator connections for leaks using a simple soap and water solution; bubbles will indicate where gas is escaping.
By maintaining a stable environment for your gas supply and ensuring the tank is handled with care, you guarantee a consistent carbonation level for your beer while maintaining a safe operating environment for your home draft system for years to come.
Frequently Asked Questions
What are the essential components needed to hook up a kegerator?
To properly set up a kegerator, you need a CO2 tank, a pressure regulator, gas and liquid lines, a coupler that matches your keg type, and a draft tower with a faucet. Ensure you also have a spanner wrench for tightening connections to prevent leaks.
How do I connect the CO2 regulator to the tank?
Attach the regulator to the CO2 tank valve by tightening the large nut with a wrench until it is snug. Ensure the integrated washer is in place or use a plastic CO2 washer to create an airtight seal before opening the tank valve.
How do I attach the coupler to the keg?
Align the lugs on the bottom of the coupler with the slots on the keg neck, then press down and turn it clockwise about 90 degrees. Once locked into place, pull the handle out and push it down to engage the probe and allow gas to flow.
What is the correct way to connect the gas and beer lines?
Slide the gas line from the regulator onto the side port of the coupler and secure it with a hose clamp. Attach the beer line from the tower to the top port of the coupler, ensuring the rubber washer is inserted before tightening the hex nut.
What pressure should I set the regulator to after hooking everything up?
For most domestic beers, you should set the CO2 regulator between 10 and 12 PSI. This pressure level maintains the carbonation of the beer while providing a steady, foam-free pour through the draft lines.
How do I check for leaks after hooking up my kegerator?
After opening the CO2 tank, spray a mixture of soapy water onto all connection points, including the regulator nut and hose clamps. If bubbles begin to form, there is a gas leak that needs to be tightened or resealed.
Conclusion
By prioritizing clean lines, proper CO2 pressure, and consistent temperature control, you can enjoy brewery-quality beer from the comfort of your home. Don’t be afraid to fine-tune your settings to achieve that ideal head of foam. Now that your system is ready, it is time to invite friends over, raise a glass, and enjoy your hard work.