Carbonating Beer In A Keg
Want to carbonate your beer in a keg but not sure where to start? You’re not alone—many homebrewers and craft beer lovers are turning to kegging for faster, fresher results. The good news? Carbonating beer in a keg is simple, efficient, and gives you full control over the fizz. Whether you’re using forced carbonation with CO2 or going the natural route, this guide will walk you through the best methods, ideal pressures, and timelines so you can enjoy perfectly carbonated beer in no time.
How to Carbonate Beer in a Keg
Setting Up Your Keg for Carbonation
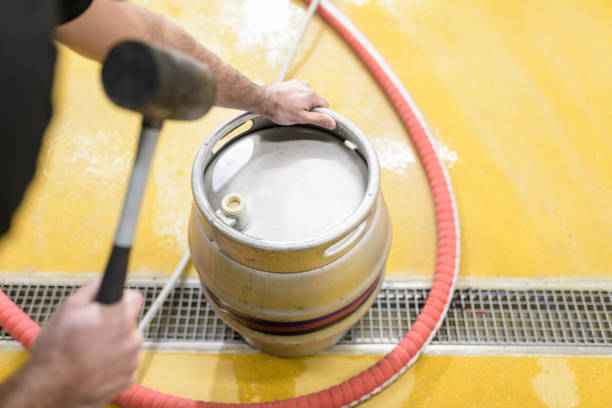
Before carbonating your beer, ensure your keg is clean and sanitized to prevent off-flavors and contamination. Begin by disassembling the lid and inspecting all components, especially the O-rings, for wear or debris. Reassemble the lid and securely attach it to the keg body.
Connect the liquid and gas posts using appropriate food-grade hoses. Fill the keg with your finished beer using a pump or gravity transfer, leaving minimal headspace to reduce oxidation. Once filled, purge the keg with CO2 by briefly opening the pressure relief valve while introducing a small amount of gas.
This displaces oxygen and creates an anaerobic environment ideal for carbonation and beer stability.
Connecting the CO2 Regulator and Gas Line
Properly connecting your CO2 system is essential for consistent carbonation. Start by attaching the CO2 regulator to a filled CO2 tank, ensuring the connection is tight and leak-free. Use a wrench to secure the nut, but avoid over-tightening.
Connect the gas line from the regulator to the in-post (gas inlet) on the keg using a quick-disconnect fitting. Before turning on the gas, set the regulator’s adjustment knob to zero to prevent sudden pressure spikes. Open the tank valve slowly to avoid damaging the regulator.
Check all connections with a soapy water solution to confirm there are no leaks, as even small leaks can disrupt carbonation and waste gas.
Choosing the Right PSI for Carbonation
Selecting the correct PSI is critical for achieving your beer’s ideal carbonation level. Most ales require 10–14 PSI, while lagers often need 14–18 PSI, depending on temperature and style. Use a carbonation chart as a guide to match your serving temperature with the desired volumes of CO2.
For example, at 38°F (3°C), 12 PSI yields about 2.4 volumes of CO2, suitable for many pale ales. Higher pressure or colder temperatures increase CO2 absorption. Avoid setting the PSI too high, as over-carbonation can lead to harsh mouthfeel or excessive foam.
Adjust gradually and allow time for the beer to absorb the gas evenly.
Sealing and Pressurizing the Keg
Once all components are connected, securely seal the keg and begin pressurization. Slowly open the CO2 valve and adjust the regulator to your target PSI. To speed up carbonation, use the ‘shake and vent’ method: shake the keg gently for 30–60 seconds, then release pressure through the relief valve.
Repeat this process 5–10 times until bubbles form steadily when venting. Alternatively, for a slower, more controlled approach, leave the keg at set pressure for 5–7 days at serving temperature. This allows CO2 to dissolve gradually, minimizing foam and ensuring even carbonation throughout the beer.
Types of Kegs Used for Carbonating Beer
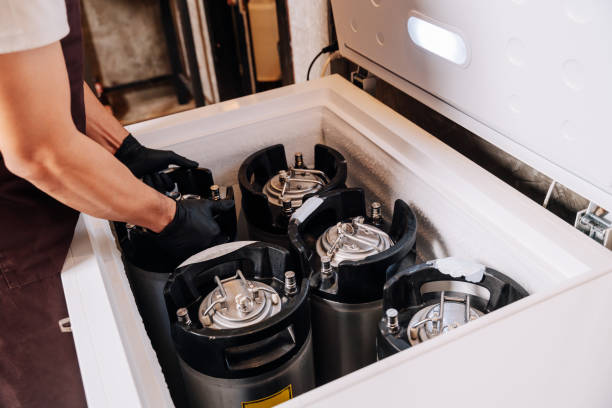
Cornelius Kegs (Cornies)
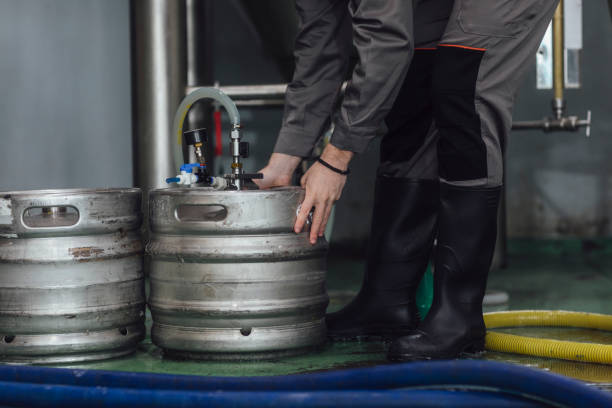
Cornelius kegs, commonly known as ‘cornies,’ are popular among homebrewers due to their manageable size and ease of use. Originally designed for soda, these 5-gallon stainless steel kegs feature threaded clamp lids and pin or ball lock fittings, making them simple to connect to CO₂ and beer lines.
When carbonating beer in a corny keg, forced carbonation is typically used by applying regulated CO₂ pressure (around 30 psi) for 24–48 hours with occasional shaking to speed up dissolution. Their wide availability and affordability make them ideal for beginners.
Plus, they’re easy to clean and sanitize, critical for consistent carbonation and flavor. For natural carbonation, priming sugar can be added before sealing, though forced carbonation is faster and more precise.
Sanke Kegs
Sanke kegs are commercial-grade, one-way kegs commonly used in bars and breweries for draft beer distribution. These cylindrical stainless steel kegs range from 1/6 barrel to full-size half-barrel (15.5 gallons) and require a specialized coupler to access the internal spear valve.
When carbonating beer in a Sanke keg, high-pressure CO₂ systems are standard, with pressures adjusted based on beer style and temperature. Their hermetic seal and robust construction maintain consistent carbonation levels over time.
While not typical for home use due to size and coupler requirements, Sanke kegs offer excellent durability and temperature stability, which supports uniform carbonation. They’re best suited for long-term storage and high-volume dispensing, where maintaining precise carbonation is essential for quality control.
Comparison of Keg Materials and Sizes
Kegs used for carbonating beer are primarily made of stainless steel, prized for its durability, corrosion resistance, and ease of cleaning. Plastic and aluminum kegs exist but are less common due to permeability and dent risks. Stainless steel maintains consistent pressure and temperature, both critical for uniform carbonation.
In terms of size, 5-gallon Cornelius kegs are ideal for homebrewers, offering manageable handling and faster temperature stabilization. Larger Sanke kegs (15.5 gallons) suit commercial operations but take longer to cool and carbonate evenly. Smaller kegs carbonate faster due to higher surface-area-to-volume ratios.
Choosing the right material and size affects carbonation efficiency, storage, and dispensing—key factors in achieving the desired beer texture and mouthfeel.
How Keg Type Affects Carbonation Speed
The type of keg significantly influences carbonation speed and consistency due to differences in material, volume, and design. Smaller kegs like 5-gallon Cornelius models cool faster, allowing CO₂ to dissolve into beer more quickly—typically within 24–48 hours under pressure. Their accessible lid design also enables agitation, which accelerates carbonation.
In contrast, larger Sanke kegs take longer to chill, slowing gas absorption, and their sealed spears limit agitation. Stainless steel’s excellent thermal conductivity helps maintain stable carbonation conditions. Kegs with wider internal diameters promote better CO₂ contact with beer.
Ultimately, temperature control, headspace, and agitation access—all shaped by keg type—determine how fast and evenly beer reaches ideal carbonation levels.
Forced Carbonation vs Natural Carbonation
How Forced Carbonation Works
Forced carbonation involves dissolving CO₂ directly into beer using pressure and cold temperatures in a keg. This method requires a CO₂ tank, regulator, and a keg with a carbonation lid or disconnect.
To begin, chill the keg to around 34–38°F (1–3°C), then apply CO₂ at 10–15 PSI for 24–48 hours, shaking the keg periodically to speed up absorption. Cold beer absorbs gas more efficiently, so maintaining a consistent temperature is crucial.
Once the desired carbonation level is reached, reduce pressure to serving levels (around 5–8 PSI). This method is fast, predictable, and ideal for draft systems, allowing brewers to serve fresh, consistently carbonated beer without waiting weeks. It’s especially useful for styles requiring precise carbonation levels.
Steps for Natural Carbonation in a Keg
Natural carbonation in a keg, also known as bottle conditioning in a keg, involves adding a measured amount of priming sugar to fermentable beer before sealing. Start by calculating the exact amount of sugar (typically corn sugar or dextrose) based on beer volume and desired carbonation level.
Mix the sugar solution thoroughly into the beer to ensure even distribution. Seal the keg with no pressure applied, and store it at fermentation temperatures (68–72°F) for 1–2 weeks to allow yeast to produce CO₂. After carbonation is complete, chill the keg and release any excess pressure before serving.
This method preserves yeast character and can enhance flavor complexity, but requires careful sanitation and timing to avoid over- or under-carbonation.
Time Comparison: Forced vs Natural
Forced carbonation can carbonate beer in as little as 24–48 hours, making it the fastest option for brewers needing quick turnaround. With consistent cooling and agitation, results are reliable and ready for immediate serving.
In contrast, natural carbonation in a keg typically takes 7–14 days, depending on yeast health, temperature, and sugar type. The extended timeline allows for subtle flavor development but delays availability. Forced carbonation is ideal for commercial setups or events, where time is limited.
Natural carbonation suits homebrewers prioritizing traditional methods or yeast-driven complexity. Choosing between them often comes down to schedule needs versus process preference, with forced offering speed and control, while natural provides a slower, fermentation-based approach.
Flavor Differences Between Methods
The carbonation method can subtly influence beer flavor and mouthfeel. Forced carbonation produces a clean, sharp effervescence with consistent bubbles, ideal for crisp lagers and modern ales. Since no additional fermentation occurs, the flavor profile remains stable and true to post-fermentation taste.
In contrast, natural carbonation can enhance complexity, as residual yeast continues to condition the beer, reducing off-flavors like diacetyl or sulfur. This often results in a smoother, more rounded mouthfeel and brighter carbonation over time. Some traditional styles, like Belgian ales, benefit from this method’s depth.
However, natural carbonation risks yeast sediment and variability. Ultimately, forced offers precision; natural offers nuance, letting brewers match technique to desired sensory outcome.
Optimal CO2 Pressure and Temperature Settings
Ideal Temperature for Carbonating Beer
The ideal temperature for carbonating beer in a keg is between 36°F and 40°F (2°C to 4°C). At this range, CO2 dissolves efficiently into the beer without over-pressurizing the system. Colder temperatures increase CO2 solubility, allowing you to achieve proper carbonation levels with lower pressure settings.
Always chill your keg fully before connecting CO2 and begin force carbonating. Use a temperature-stable environment like a kegerator or fermentation fridge to maintain consistency. Avoid carbonating at room temperature, as it requires much higher PSI to achieve the same carbonation level, increasing the risk of over-carbonation.
For best results, hold both temperature and pressure steady for 2–3 days, gently agitating the keg occasionally to speed up absorption.
PSI Chart for Different Beer Styles
Different beer styles require specific carbonation levels measured in volumes of CO2, which translate to different PSI settings based on temperature. For example, lagers and pilsners typically need 2.5–2.7 volumes of CO2, requiring about 12–14 PSI at 38°F.
Ales like pale ales or stouts usually require 2.1–2.4 volumes, needing 8–10 PSI at the same temperature. Wheat beers may go up to 3.0–3.3 volumes, requiring 14–16 PSI when chilled. Always reference a carbonation pressure chart that correlates temperature, desired CO2 volumes, and PSI.
Setting the correct pressure ensures proper mouthfeel and head retention without over-pressurizing. Adjust your regulator precisely and allow 24–48 hours for equilibrium after setting.
How Temperature Affects CO2 Absorption
Temperature plays a critical role in CO2 absorption during keg carbonation—the colder the beer, the more efficiently it absorbs carbon dioxide. CO2 solubility decreases as temperature increases, meaning warmer beer requires higher PSI to achieve the same carbonation level, raising the risk of foaming and over-pressurization.
For consistent results, always carbonate within a stable, cold environment. Rapid temperature fluctuations can cause CO2 to come out of solution, leading to inconsistent carbonation or gushing when poured. To maximize absorption, chill the keg to serving temperature first, then apply the correct PSI for your beer style.
Agitating the keg gently (e.g., rocking) while pressurized can speed equilibration, but only after the beer is cold to avoid uneven saturation.
Avoiding Over-Carbonation and Bottle Bombs
To prevent over-carbonation and potential keg or bottle explosions, always match your CO2 pressure to the beer’s temperature and style. Applying too much PSI or carbonating at warm temperatures traps excess CO2, leading to excessive foam, harsh mouthfeel, or dangerous pressure buildup.
When transferring from keg to bottles, ensure the beer is fully carbonated and depressurized first to avoid over-priming. Use a carbonation chart to verify correct PSI settings, and never leave a keg on high pressure indefinitely. If using a ‘quick carb’ method with elevated PSI, reduce to serving pressure promptly.
Regularly check for leaks and use quality hardware rated for CO2 pressures to maintain safety and consistency in every pour.
Step-by-Step Forced Carbonation Methods
The Set-and-Forget Method
The Set-and-Forget Method is ideal for brewers seeking consistent, hassle-free carbonation over several days. Begin by chilling your keg to serving temperature, typically around 38°F (3°C), to maximize CO₂ solubility. Set your regulator to the recommended pressure for your beer style, usually between 10–14 PSI for most ales.
Attach the gas line to the keg’s gas in port and let it sit undisturbed for 5–7 days. During this time, CO₂ gradually dissolves into the beer, achieving even saturation. Avoid agitation to prevent over-carbonation or foaming.
This passive approach ensures smooth, stable carbonation with minimal effort, making it perfect for batch processing or when time isn’t a constraint. Monitor pressure periodically to ensure consistency.
The Shake Method for Fast Carbonation
The Shake Method dramatically accelerates carbonation, delivering ready-to-serve beer in under an hour. Start with a chilled keg at serving temperature and set your CO₂ regulator to 30 PSI. Apply gas to the keg, then disconnect and shake vigorously for 30–60 seconds to increase gas-liquid contact.
Reapply pressure and repeat shaking every few minutes. After 10–15 cycles, reduce pressure to serving levels (10–12 PSI) to avoid over-carbonation. This method relies on agitation to speed CO₂ absorption, making it perfect for last-minute needs.
However, monitor closely—excessive shaking at high pressure can lead to too much carbonation or foam. Always release pressure slowly before opening the keg to prevent accidents.
The Cold and Force Method
The Cold and Force Method combines low temperature and high pressure for rapid, uniform carbonation in 24–48 hours. Cool your keg to 34–38°F (1–3°C) and set the CO₂ regulator to 25–30 PSI, depending on desired carbonation levels.
Connect the gas line and allow constant pressure to infuse CO₂ into the beer. The cold temperature increases CO₂ solubility, while sustained high pressure forces quicker absorption. After 24 hours, reduce pressure to serving levels and let the keg stabilize for a few hours.
This method offers a balance between speed and control, avoiding the inconsistency of shaking. It’s ideal for brewers needing reliably carbonated beer fast without compromising quality. Monitor with a carbonation chart for precision.
Tips for Consistent Carbonation Results
Achieving consistent carbonation starts with precise temperature and pressure control. Always chill beer before carbonating, as CO₂ dissolves more efficiently in cold liquid. Use a carbonation chart to match PSI settings with your beer’s temperature and style for accuracy.
Ensure all keg connections are tight and leak-free to maintain stable pressure. Purge oxygen from the keg before charging with CO₂ to prevent oxidation. Allow time for stabilization after carbonating—sudden pressure changes can cause foaming. Clean and inspect dip tubes and seals regularly to avoid blockages.
For best results, record your settings and outcomes per batch to refine your process. Consistency comes from repetition and attention to detail, ensuring every pour meets quality expectations.
Common Carbonation Problems and Solutions
Beer Not Carbonating: Causes and Fixes
If your beer isn’t carbonating in the keg, check the CO2 pressure and temperature first—carbonation requires cold beer (ideally 38°F/3°C) and proper pressure (typically 10–12 PSI for most ales). Ensure the gas line is connected securely and the regulator is delivering consistent pressure.
A faulty disconnect or a closed valve can halt carbonation. Agitate the keg gently by rocking it back and forth to speed up CO2 absorption. If using natural carbonation, confirm enough priming sugar was added and the yeast is still viable.
Verify the keg lid seals properly and the spear isn’t blocked. Patience is key—full carbonation can take 5–7 days under ideal conditions.
Fixing Over-Carbonated Beer
Over-carbonated beer can result from too high CO2 pressure or excessively cold beer served too quickly. To fix this, disconnect the gas line and vent the keg carefully by pulling the pressure relief valve in short bursts to reduce internal pressure.
Let the keg warm slightly (to around 45°F/7°C) to allow excess CO2 to come out of solution more safely. Pour a few test pints to assess foam levels and adjust accordingly. Reduce regulator pressure to the appropriate serving level (usually 8–12 PSI).
If needed, pour beer through a restrictor plate or use a longer beer line to dissipate excess carbonation during dispensing. Avoid shaking the keg during transport.
Dealing with Leaks in the Keg System
Leaks in a keg system can prevent carbonation and waste CO2. Inspect all connections—including gas and liquid disconnects, regulator fittings, and the keg lid seal—for signs of leakage. Use a soapy water solution to pinpoint escaping gas; bubbles will form at leak sites. Replace worn O-rings or faulty disconnects immediately.
Ensure the keg is properly seated and the lid is tightened evenly. Check the pressure relief valve—if it’s leaking, it may need cleaning or replacement. Tighten all fittings securely but avoid over-tightening, which can damage components.
Regular maintenance and leak checks prevent CO2 loss and ensure consistent carbonation and dispensing performance.
Why Beer Loses Carbonation Over Time
Beer can lose carbonation due to poor seals, temperature fluctuations, or prolonged storage. Inspect the keg’s lid O-ring and poppet seals regularly—dry or cracked seals let CO2 escape. Maintain consistent refrigeration; warming causes CO2 to expand and vent through the pressure relief valve.
Keep the keg pressurized at serving pressure even when not in use to maintain equilibrium. Avoid frequent tapping and untapping, which introduces air and pressure loss. Use fresh, clean lines to prevent nucleation sites that release bubbles. If carbonation drops, reapply CO2 pressure and confirm no leaks.
Proper storage and system maintenance preserve carbonation for several months in a well-sealed keg.
Serving and Maintaining Carbonated Beer
How to Pour a Perfect Draft Beer
To pour a perfect draft beer from a keg, start with a clean, dry glass held at a 45-degree angle under the tap. Slowly open the faucet to allow beer to flow down the side of the glass, minimizing excessive foam.
As the glass fills halfway, gradually bring it upright so the stream hits the center, creating a 1–1.5 inch head of foam—this enhances aroma and flavor. Avoid over-pouring or letting the beer gush, as turbulence can release CO₂ and flatten the beer.
Use proper line length and pressure to balance flow rate; too much pressure causes foaming, too little results in flat pours. Always close the tap fully after pouring to prevent CO₂ loss. A well-poured beer maintains carbonation and delivers a premium tasting experience.
Maintaining Carbonation While Serving
To maintain consistent carbonation while serving beer from a keg, keep the keg at a stable temperature (typically 38°F or 3°C) and regulate CO₂ pressure according to the beer style. Use a properly balanced draft system with correct hose length and diameter to prevent over- or under-carbonation during dispensing.
Avoid frequent temperature fluctuations, as warming the keg releases CO₂, leading to foam issues. Check for leaks in the gas line and coupler regularly, as even small leaks can reduce pressure and affect carbonation. If using a picnic tap, serve quickly, as it doesn’t maintain pressure.
For long events, consider a secondary CO₂ tank to ensure uninterrupted pressure. Consistent pressure and temperature are critical for preserving carbonation and taste throughout service.
Cleaning and Storing Kegs After Use
After emptying a keg, disassemble and clean all components immediately to prevent bacteria and residue buildup. Use a non-abrasive cleaner like PBW or OxiClean and hot water to flush the dip tube, lid, and valve. Soak parts if needed, then rinse thoroughly with clean water.
Use a keg cleaning tool or brush to scrub the interior, ensuring no beer stone or yeast remains. Sanitize all parts before reassembly using a no-rinse sanitizer. Store the keg disassembled or with the lid off in a cool, dry place to prevent mold. Label cleaned kegs to avoid mix-ups.
Proper cleaning preserves keg integrity, prevents off-flavors in future batches, and ensures reliable performance. Never store a keg with liquid or pressure inside long-term.
Best Practices for Long-Term Beer Storage
For long-term storage of carbonated beer in a keg, maintain a consistent temperature of 38°F (3°C) and keep CO₂ pressure set to serving levels (typically 10–12 PSI for most ales) to prevent over- or under-carbonation.
Store kegs upright in a dark, vibration-free environment to minimize sediment disturbance and light exposure, which can cause skunking. Use food-grade CO₂ and ensure all seals are tight to avoid contamination and pressure loss. Avoid disconnecting the gas line during storage to maintain equilibrium.
For beers stored beyond a few months, monitor for flavor degradation, especially in hop-forward styles. Label kegs with brew date and style for rotation. Proper storage preserves carbonation, clarity, and flavor for optimal quality upon serving.
Frequently Asked Questions
What is forced carbonation in a keg?
Forced carbonation is the process of dissolving CO2 directly into beer by pressurizing a keg with carbon dioxide. It’s faster than natural carbonation and allows precise control over carbonation levels.
How do I carbonate beer in a keg using forced carbonation?
Set your CO2 regulator to 30-40 PSI and shake or rock the keg for 1-2 hours. Then, reduce the pressure to serving levels (10-14 PSI) and let the beer chill and stabilize for 24 hours.
How long does it take to carbonate beer in a keg?
With forced carbonation at 30-40 PSI and agitation, beer can carbonate in 12-24 hours. Without shaking, it may take 5-7 days at serving pressure.
What temperature should my beer be for carbonating in a keg?
Beer should be cold, ideally between 36-38°F (2-3°C), as colder beer absorbs CO2 more efficiently and holds carbonation better.
Can I naturally carbonate beer in a keg?
Yes, you can add priming sugar to the keg before transferring the beer, then seal and let it ferment at room temperature for 1-2 weeks to build carbonation naturally.
Why is my kegged beer under-carbonated?
Under-carbonation can result from low pressure, warm beer temperature, or insufficient time. Check CO2 levels, ensure the beer is cold, and allow more time for saturation.
How do I avoid over-carbonation in a keg?
Use accurate pressure settings based on beer temperature and style, and avoid excessive agitation. Refer to a carbonation chart to match PSI and temperature correctly.
Conclusion
Carbonating beer in a keg is a fast, efficient method that ensures consistent carbonation and fresh pours. By using forced carbonation with CO2, brewers save time compared to natural carbonation. Key factors like temperature, pressure, and agitation speed up the process. With proper equipment and technique, homebrewers can achieve professional-quality results. Embrace kegging to elevate your beer’s quality and enjoy the convenience it brings to your brewing journey.
