
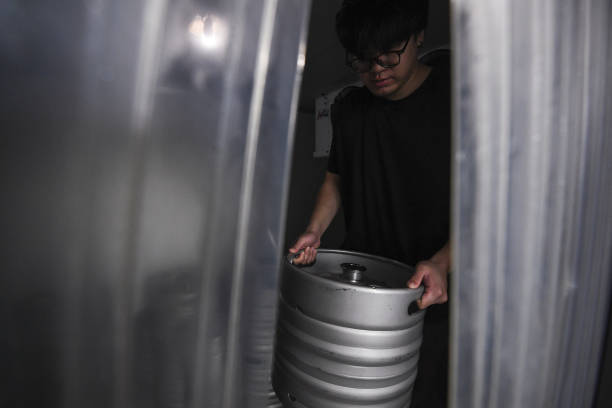
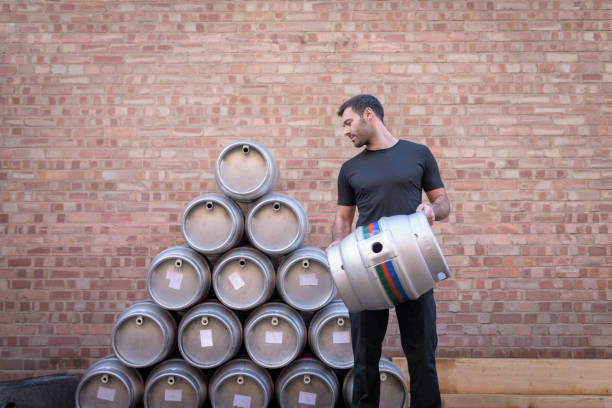
Home Brew Beer Keg
A home brew beer keg might be exactly what you need. It’s the smart, efficient way to store, carbonate, and serve your homemade beer with ease. Whether you’re new to kegging or looking to upgrade, this guide walks you through choosing the right keg, setting up your system, and keeping your brew fresh and flavorful.
How to Choose the Right Keg for Home Brew Beer
Types of Kegs: Corny vs. Pin Lock vs. Ball Lock
When choosing a keg for home brew beer, understanding the main types of corny kegs is essential. Ball lock kegs are the most common and beginner-friendly, with standardized posts that make connecting gas and liquid lines simple.
Pin lock kegs, often used by soda companies, have a different coupling system and are harder to find new. While both are types of corny kegs, adapters are available to convert between systems. Ball lock kegs are preferred by most homebrewers due to widespread availability of parts and easier maintenance.
Always verify compatibility with your CO2 system and consider purchasing all kegs of the same type to simplify your setup and reduce the need for extra fittings or tools.
Stainless Steel vs. Plastic Kegs: Pros and Cons
Choosing between stainless steel and plastic kegs depends on durability, cost, and brewing goals. Stainless steel kegs are the industry standard, offering excellent durability, temperature retention, and resistance to scratches that can harbor bacteria. They’re ideal for long-term use and frequent brewing.
On the other hand, plastic kegs (like PET) are lightweight and cheaper, making them great for beginners or temporary use. However, they scratch easily and degrade over time, increasing contamination risks. While plastic kegs are easier to inspect visually, stainless steel provides better long-term value and sanitation control.
For serious homebrewers, investing in stainless steel ensures consistent quality and easier cleaning with standard keg cleaning tools.
How Keg Size Affects Batch Planning
Keg size plays a crucial role in batch planning and storage efficiency. The most common homebrew keg size is the 5-gallon (19-liter) corny keg, which fits a standard homebrew batch. Smaller 2.5-gallon or 3-gallon kegs are useful for experimenting with different recipes or limited storage space.
Always account for headspace and serving waste—a 5-gallon keg typically holds about 4.7 gallons of beer. Consider your fermenter output, fridge capacity, and consumption rate when selecting size. Using multiple smaller kegs allows greater flexibility in serving options and reduces beer exposure to oxygen after opening.
Matching keg size to your brewing rhythm ensures fresh beer and minimal waste.
Where to Buy or Repurpose Kegs
You can source home brew beer kegs from several reliable places. New corny kegs are available from homebrew supply stores and online retailers, ensuring all parts are sanitized and functional.
For budget-conscious brewers, used kegs from Craigslist, Facebook Marketplace, or local breweries can be excellent deals—just inspect for dents, rust, or damaged O-rings. Soda distributors sometimes sell or trade repurposed pin lock kegs, but verify they’re food-grade and thoroughly cleaned. Always replace seals and posts when buying used.
Some homebrew clubs offer keg-sharing programs. Whether new or used, proper cleaning and maintenance are vital. Purchasing from reputable sources reduces long-term hassles and ensures safe, consistent beer dispensing.
Equipment Needed for Kegging Home Brew
CO2 Tank and Regulator Setup
A reliable CO2 tank and regulator setup is essential for dispensing and carbonating your home brew beer keg. The CO2 tank stores compressed gas, while the regulator controls the pressure delivered to the keg. Choose a regulator with a dual-gauge design—one shows tank pressure, the other displays output pressure.
For most ales and lagers, set the output between 10–12 PSI for serving and 30 PSI for force carbonation. Use a 5-pound CO2 tank for home use—it’s portable and lasts several batches. Ensure all connections are tight and leak-free using food-grade lubricant on O-rings.
This setup maintains consistent carbonation and ensures smooth pours every time.
Kegging Couplers: Which One You Need
Selecting the correct kegging coupler is crucial for connecting your CO2 and beer lines to the keg. Most home brewers use Sanke (Type S) couplers for Cornelius (corny) kegs, but compatibility depends on keg type. Type A (U.S. Sanke) is standard for commercial kegs, while Type D fits European models.
For DIY setups, Pin Lock and Ball Lock couplers are common—Ball Lock is more popular due to easier availability. Always match the coupler to your keg’s inlet valves to avoid leaks or damage. Invest in stainless steel couplers for durability and sanitation.
Having both gas and liquid disconnects ensures quick, clean connections and disconnections during use and cleaning.
Beer Lines, Fittings, and Hose Basics
High-quality beer lines, fittings, and hoses ensure clean, consistent beer delivery from your home brew keg. Use 5/16-inch inner diameter vinyl or PVC tubing for beer lines—long enough to reach from keg to tap, typically 4–6 feet. Pair with barb fittings and hose clamps for leak-proof connections.
Food-grade, BPA-free materials prevent off-flavors and contamination. Include a tower shank and faucet at the dispense end for a professional pour. Maintain proper line balance by matching line length and diameter to your serving pressure to prevent foaming.
Regularly clean and replace lines every few batches to avoid microbial buildup and stale flavors.
Optional Tools: Pressure Gauges and Carbonation Stones
Enhance precision and efficiency with optional tools like inline pressure gauges and carbonation stones. An inline pressure gauge installed between the regulator and keg helps monitor actual keg pressure, improving carbonation accuracy.
Carbonation stones—porous stainless steel diffusers—attach to the gas line and disperse CO2 as fine bubbles, significantly speeding up carbonation from days to hours. Use a 0.5-micron stone for optimal gas dispersion and sanitize thoroughly before use.
While not essential, these tools offer greater control, especially for fast turnaround or consistent batch results. Pair them with a carbonation lid for kegs without a gas-in port, streamlining the process for smaller setups.
Step-by-Step Guide to Kegging Your Home Brew
Sanitizing the Keg and Lines
Before kegging your home brew, thorough sanitation is critical to prevent contamination and off-flavors. Start by disassembling the keg, removing the lid, dip tube, and O-rings.
Use a no-rinse sanitizer like Star San diluted according to instructions, and fill the keg completely, shaking it to ensure all interior surfaces are coated. Soak the dip tube, lid, and pressure relief valve for at least five minutes.
Sanitize the beer and gas lines by running sanitizer through both using a transfer or inline cleaning method. Reassemble the keg while all parts are still wet with sanitizer to avoid recontamination. Store the sanitized keg closed and ready for use.
Never skip this step—even minor microbial contamination can ruin an entire batch.
Transferring Beer from Fermenter to Keg
To transfer beer safely, connect sanitized tubing from your fermenter’s spigot or racking cane to the keg’s liquid-in post using a quick disconnect. Use gravity or counter-pressure to move the beer, minimizing oxygen exposure that can cause oxidation and stale flavors.
Leave behind trub and yeast sediment by avoiding disturbing the fermenter’s bottom. For better clarity, consider using a filter during transfer. Purge the keg with CO2 before and after filling to displace oxygen. Fill slowly and steadily, monitoring for foaming.
Once full, seal the lid tightly and attach the gas line. This transfer step sets the foundation for clean, fresh-tasting beer, so maintain a sanitary, controlled environment throughout.
Setting CO2 Pressure for Carbonation
Proper carbonation begins with setting the correct CO2 pressure based on your beer style and serving temperature. Most ales carbonate well at 10–12 psi at 38°F (3°C), while lagers may require 12–14 psi for a crisper mouthfeel.
Attach the gas line to the keg’s gas-in post and adjust your regulator accordingly. For faster carbonation, shake the keg gently for 5–10 minutes with pressure applied—this is known as ‘force carbonating.’ For a slower, more natural method, leave the keg at set pressure for 5–7 days.
Always use a carbonation chart to match temperature and pressure for precise results. Avoid over-carbonating, which can lead to excessive foam and harsh mouthfeel.
Cold Conditioning and Timeframes
After carbonation, cold conditioning allows flavors to mellow and the beer to clarify. Keep the keg at a stable temperature of 36–38°F (2–3°C) for at least 1–2 weeks, depending on style. Higher-alcohol or complex beers like stouts or barleywines benefit from 3–4 weeks for optimal maturation.
Cold conditioning helps precipitate haze-forming proteins and yeast, resulting in a brighter, smoother beer. Avoid temperature fluctuations, which can cause CO2 instability and off-flavors. This phase also lets carbonation dissolve evenly, improving pour quality. Patience is key—rushing this step can compromise taste and appearance, even with perfect kegging technique.
How to Serve Draft Beer from a Home Brew Keg
Setting Up a Kegerator or DIY Cooling System
To serve draft beer from a home brew keg, maintain a consistent temperature between 38°F and 42°F using a kegerator or DIY cooling system. A kegerator offers precise temperature control and convenience, while a DIY option—like a converted refrigerator with a temperature controller—can be cost-effective.
Ensure the keg fits and has enough airflow around it for even cooling. Connect the CO2 tank to the keg’s gas in post using a regulator, and attach the beer out post to the draft line leading to the faucet. Use food-grade tubing and proper fittings to avoid contamination.
Allow 24 hours for the keg to chill fully before tapping to ensure optimal carbonation and pour quality.
Pouring the Perfect Draft
Achieve a perfect pour by rinsing the glass with cold water and holding it at a 45-degree angle under the faucet. Open the tap fully and fill the glass two-thirds, then gradually bring it upright as foam forms. A 1/2- to 1-inch foam head enhances aroma and flavor.
Use clean, straight lines free of obstructions to prevent turbulence. If beer pours too fast or foamy, check line length and pressure. For best results, keep the faucet clean and disassembled weekly to prevent yeast and bacteria buildup. Avoid over-chilling the glass, as it can increase foam.
Practice consistent technique for a smooth, enjoyable draft experience every time.
Maintaining Consistent Tap Pressure
Consistent CO2 pressure is essential for serving quality draft beer. Set the regulator between 10–12 PSI for most ales and lagers at 38–42°F, adjusting based on beer style and altitude. Use a carbonation chart to match pressure to temperature for ideal carbonation levels.
Check for leaks using soapy water on connections, and ensure the regulator gauge remains stable. Fluctuating pressure can cause over- or under-carbonation. For longer beer lines, slightly higher pressure may be needed to maintain flow, but balance is key.
Monitor pressure weekly and replace aging CO2 tanks before they run out to avoid sudden drops in performance.
Troubleshooting Flat or Foamy Beer
Flat beer often results from low CO2 pressure, warm temperatures, or leaks in the system. Verify the regulator setting and keg temperature, and inspect all connections for bubbles when sprayed with soapy water. Foamy beer is typically caused by incorrect line length, excessive pressure, or warm beer lines.
Ensure beer lines are 3–5 feet long for 10–12 PSI to provide proper resistance. Clean the draft lines every 2–4 weeks to prevent clogs and off-flavors. If foam persists, check the faucet and shank for blockages.
Purge air from the lines after connecting the keg, and allow the system to stabilize before serving for consistent results.
Cleaning and Maintaining Your Beer Keg
Post-Use Cleaning Routine
After dispensing your home brew beer keg, immediately rinse with hot water to remove residual beer and prevent dried proteins or yeast from sticking. Use a keg cleaning tool or brush to scrub the interior if needed, then flush with a mild alkaline cleaner like Five Star PBW.
Rinse thoroughly with clean water until the runoff is neutral. Never let beer sit in the keg for more than 24 hours post-use, as spoilage bacteria can form biofilms. Clean the lid, dip tube, and posts separately.
This routine ensures your keg stays sanitary and ready for the next batch, reducing the risk of off-flavors and contamination during future brews.
Deep Cleaning with PBW and Star San
For thorough sanitation between batches, soak all keg components in a PBW solution (1–2 oz per gallon of hot water) for at least 20 minutes to break down organic residues. Agitate the solution inside the keg by shaking or using a recirculation pump.
After soaking, rinse completely with clean water to remove any cleaning agent residue. Then, sanitize with Star San solution (1 oz per gallon of water), ensuring all surfaces contact the sanitizer for at least one minute. Do not rinse after Star San—let it air dry.
This two-step process with PBW for cleaning and Star San for no-rinse sanitization is essential for maintaining brewery-grade hygiene in your home brew beer keg system.
Checking and Replacing O-Rings and Seals
Regularly inspect all O-rings and seals on the lid, posts, and coupler for cracks, brittleness, or deformation—common causes of CO2 leaks and contamination. Remove each O-ring and clean it with warm, soapy water, then lubricate with food-grade silicone grease to ensure a tight seal and prevent tearing.
Replace any damaged or worn O-rings immediately, as even small gaps can compromise pressure and sanitation. Keeping spare O-rings on hand allows for quick replacements. Properly maintained seals prevent oxygen ingress and maintain carbonation, protecting the quality and shelf life of your home brew beer keg.
This simple step greatly enhances system reliability and beer consistency.
Storing Kegs Between Batches
After cleaning and sanitizing, store kegs completely dry and with lids off to prevent mold and moisture buildup. Place a sanitized plastic bag over the opening to keep dust and insects out. Store upright in a cool, dark place to protect from UV light and temperature swings.
For long-term storage, some brewers add a small amount of no-rinse sanitizer solution to inhibit microbial growth, but ensure thorough rinsing before next use. Label kegs to track cleaning dates and usage.
Proper storage preserves keg integrity and ensures your home brew beer keg remains in top condition, ready for fast turnaround between batches without compromising beer quality or safety.
Common Kegging Problems and How to Fix Them
Leaks at the Keg Post or Lid
Leaking beer or CO2 from the keg post or lid is often caused by worn or improperly seated O-rings. Begin by depressurizing the keg and disconnecting all lines. Remove the lid or post and inspect the O-rings for cracks, dryness, or deformation.
Replace any damaged O-rings and lubricate them lightly with food-grade silicone grease to ensure a tight seal. Reassemble the parts carefully, ensuring they are fully seated and tightened securely—but avoid over-tightening, which can damage threads or O-rings. For post leaks, check the hex nut and poppet alignment.
Regular preventative maintenance and O-ring replacement every 6–12 months can prevent most leaks. Keeping spare O-rings on hand ensures quick fixes and uninterrupted kegging.
Slow or No Beer Flow from Tap
If beer flows slowly or not at all, first check the CO2 pressure and gas line connections. Ensure the CO2 tank is open and the regulator is set to the correct serving pressure (typically 10–12 PSI for most ales).
Verify that the gas line is securely attached to both the tank and keg. A clogged dip tube or blocked beer line can also restrict flow—disconnect the beer line and inspect for debris or dried beer residue. Flush lines with warm water or a cleaning solution like PBW.
Kinks in the beer line or an improperly seated disconnect can also cause issues. Use the correct line length and diameter to balance resistance with dispensing pressure. Finally, ensure the keg is properly pressurized and the liquid disconnect is fully engaged.
Over-Carbonated or Under-Carbonated Beer
Improper carbonation often results from incorrect pressure settings or temperature imbalances. Beer absorbs CO2 more readily at colder temperatures, so maintain a consistent keg fridge temperature (usually 38°F). For force carbonation, use a carbonation chart to match PSI to temperature—typically 10–14 PSI over 5–7 days.
Shaking the keg speeds carbonation but risks over-carbing. For under-carbonated beer, increase pressure slightly and wait longer. For over-carbonated beer, vent excess CO2 and reduce pressure, then let the beer settle. Natural carbonation (priming with sugar) in a keg requires precise sugar calculations.
Always allow time for carbonation to stabilize—rushing leads to inconsistent results. Use a carbonation checker for accuracy.
Dealing with Contamination and Off Flavors
Contamination often stems from inadequate cleaning and sanitizing of kegs, lines, and fittings. Sour, buttery, or medicinal off-flavors may indicate bacterial growth or wild yeast. Always clean your keg system with a brewery-approved cleaner like PBW after each use, then sanitize with no-rinse sanitizer (e.g., Star San).
Pay special attention to the dip tube, lid gasket, and disconnects where residue hides. Replace old or cracked tubing, which harbors biofilm. Use dedicated cleaning tools to avoid cross-contamination. If beer tastes off, purge the keg with CO2 before filling to minimize oxygen exposure.
Store kegs sanitized and sealed when not in use. Regular system maintenance every 2–4 weeks prevents most contamination issues and ensures fresh, clean-tasting beer.
Tips for Scaling Up with Multiple Kegs
Using a Multi-Tap Draft System
A multi-tap draft system is essential for home brewers scaling up with multiple kegs, allowing you to serve different beers simultaneously. Invest in a dual, triple, or quad regulator setup to control each keg’s pressure independently, preventing flavor mixing and over-carbonation.
Use long stainless steel or plastic beer lines to ensure consistent pour quality from each tap. Install ball lock disconnects for easy keg swaps without depressurizing the entire system. Position your taps within reach of all kegs, ideally on a draft tower with proper insulation to maintain temperature.
Regularly clean lines and faucets to avoid contamination. A well-designed multi-tap system enhances serving efficiency and improves the overall tasting experience for guests while simplifying large-scale homebrew management.
Rotating Kegs for Continuous Supply
To maintain a steady supply of fresh beer, implement a first-in, first-out (FIFO) rotation system for your kegs. Label each keg with the brew date, style, and expected shelf life to track aging. As one keg finishes, replace it with the next in line to avoid gaps in availability.
Use a keg log or digital tracker to monitor usage patterns and plan brewing schedules accordingly. Avoid letting kegs sit too long, as oxidation and flavor degradation can occur after 6–8 weeks, even under CO₂. Plan brew days strategically so new batches are ready just as older ones are tapped.
This rotation ensures consistent quality and keeps your home taproom flowing without waste or downtime.
Labeling and Tracking Brews
Clear labeling and tracking are critical when managing multiple kegs of homebrew. Use waterproof labels or stainless tags to mark each keg with the beer style, brew date, carbonation level, and ABV. Consider color-coding by beer type (e.g., amber for IPAs, blue for stouts) for quick identification.
Maintain a digital or physical log that records fermentation notes, tasting feedback, and serving dates to refine future batches. This system helps avoid confusion, especially when storing similar styles. Tracking also supports quality control, allowing you to identify trends or issues across batches.
Accurate records make it easier to share your beer with confidence and improve your brewing process over time, turning hobby-scale efforts into a more professional operation.
Space and Temperature Management for Keg Storage
Proper space and temperature management are vital when storing multiple kegs. Use a dedicated kegerator, converted fridge, or temperature-controlled basement to keep all kegs at a consistent 38–45°F (3–7°C), preserving carbonation and flavor. Stack kegs vertically with keg racks or pallets to save floor space and allow airflow.
Ensure enough clearance around each keg for easy access and maintenance. Avoid direct sunlight and heat sources that can cause temperature fluctuations and spoil beer. If using multiple fridges, monitor each with a digital thermometer for accuracy. Organize by brew date or style to simplify rotation.
A well-planned storage setup maximizes space, maintains beer quality, and supports efficient, scalable homebrew operations.
Frequently Asked Questions
What is a home brew beer keg?
A home brew beer keg is a container used by homebrewers to store, carbonate, and serve their homemade beer. It allows for easier dispensing and better flavor preservation compared to bottling.
How do I carbonate beer in a keg?
You can carbonate beer in a keg by connecting it to a CO2 tank and applying pressure, typically 10–12 psi, for several days at cold temperatures. Alternatively, force carbonation using higher pressure for 24–48 hours speeds up the process.
What size kegs are best for home brewing?
The most common size for home brewing is the 5-gallon (19-liter) Cornelius or ‘corny’ keg, which holds about 53 12-ounce servings. Smaller 2.5-gallon and 3-gallon kegs are also popular for limited space or smaller batches.
Can I use a commercial keg for home brew?
Yes, you can use commercial kegs like Sankey kegs for home brewing, but they require special cleaning and equipment. Many homebrewers prefer Cornelius kegs due to their ease of use and availability.
How do I clean and sanitize a home brew keg?
Clean the keg with a brewery wash solution like PBW, then rinse thoroughly. Sanitize with a no-rinse solution like Star San before filling to prevent contamination.
What equipment do I need for kegging home brew?
You’ll need a keg, CO2 tank, regulator, air line, disconnects, and a kegerator or cooling method. A faucet or tap is also necessary for serving.
How long does home brew last in a keg?
Properly stored and pressurized, home brew can last 6–8 months in a keg without significant quality loss. Keeping it cold and away from light extends shelf life.
Conclusion
Home brewing beer and serving it from a keg offers unmatched freshness, flavor control, and cost savings over time. With the right equipment and sanitation practices, anyone can master the process. Whether you’re a beginner or experienced brewer, kegging enhances consistency and convenience. Embrace the craft, experiment with recipes, and enjoy the rewarding experience of sharing homemade beer. Start your kegging journey today and taste the difference in every pour.