Home Cider Making Kit
Want to make delicious, fresh apple cider at home without the hassle? A home cider making kit is your simple solution. Whether you’re a beginner or a seasoned DIYer, these all-in-one kits come with everything you need—presses, filters, and easy instructions—to turn apples into sweet, crisp cider in no time. Say goodbye to store-bought versions full of additives. In just a few minutes, you’ll learn how to choose the best kit, what features matter most, and how to start crafting your own flavorful cider right in your kitchen.
What is a Home Cider Making Kit?
Components of a Typical Cider Making Kit
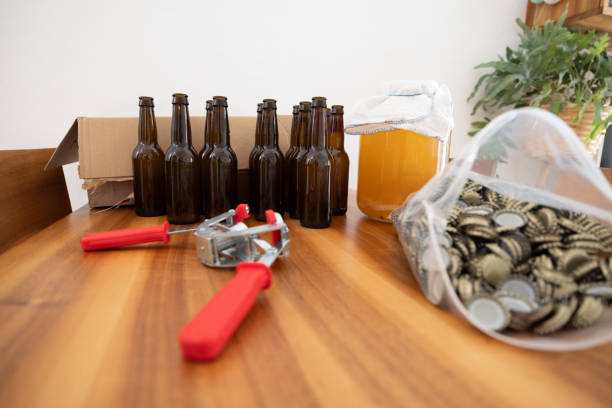
A home cider making kit typically includes essential brewing tools to guide you from raw ingredients to finished cider. Most kits come with a food-grade fermentation vessel, complete with an airlock to allow carbon dioxide to escape while preventing contaminants.
You’ll also find siphoning tubing and a bottling wand for transferring liquid safely, plus bottles and caps for storage. Many kits include yeast strains specifically selected for cider fermentation, along with cider concentrate or apple juice base for consistent flavor.
Additional items often include a hydrometer to measure sugar levels and alcohol potential, a stirring spoon, and sanitizing solution. Sanitation is critical, so having cleaning supplies included ensures a contamination-free process.
These components work together to provide a complete, beginner-friendly setup that eliminates guesswork and helps produce high-quality cider at home with minimal effort.
Types of Kits for Beginners and Experts
Home cider making kits are designed to suit all experience levels, from first-time fermenters to seasoned homebrewers. Beginner kits focus on simplicity, often including pre-measured ingredients, step-by-step instructions, and minimal equipment—ideal for learning the basics without overwhelm. These kits usually use cider concentrate, reducing prep time and ensuring consistent results.
In contrast, advanced kits offer more customization, featuring dry yeast options, bulk apple juice recommendations, and tools for precise control over fermentation temperature and timing. Some expert-level kits even include oak chips or flavor additives for complex profiles.
All-grain or fresh-press kits allow users to start from raw apples, appealing to purists and craft-focused makers. Whether you want a quick, foolproof batch or an experimental project, there’s a tailored kit to match your skill and ambition, making cider crafting accessible and enjoyable for everyone.
How Cider Kits Simplify the Process
A home cider making kit streamlines the entire brewing journey, making it approachable for anyone, regardless of experience. By providing pre-selected, compatible components, kits eliminate the confusion of sourcing individual items. The step-by-step instructions guide users through sanitation, fermentation, and bottling with clear timelines and best practices.
This structure reduces errors and increases success rates. Many kits are designed for short fermentation cycles, allowing you to enjoy fresh cider in just a few weeks. The inclusion of measuring tools like hydrometers helps monitor progress and ensures proper alcohol development. Pre-portioned ingredients maintain flavor balance and prevent waste.
Overall, cider kits reduce complexity, save time, and boost confidence, turning a potentially daunting process into a fun, rewarding hobby. With everything in one box, you can focus on the experience—not the logistics—making homemade cider accessible, consistent, and enjoyable.
How to Choose the Best Cider Making Kit

Key Features to Look For
When selecting a home cider making kit, focus on essential components that ensure a smooth fermentation process. Look for kits that include a food-grade fermenter with an airlock, as this prevents contamination while allowing carbon dioxide to escape.
A reliable siphon hose and bottling wand make transferring liquid easier and reduce oxidation. Yeast selection is also critical—some kits include cider-specific yeast strains that enhance flavor and clarity. Check if the kit provides a hydrometer to monitor sugar levels and alcohol content, which helps achieve consistent results.
Durability and ease of cleaning are equally important; glass or BPA-free plastic fermenters are ideal. Finally, consider kits with clear instructions and beginner-friendly guides to support first-time users. Including these key features ensures your cider making experience is efficient, safe, and enjoyable from the first batch to the last.
Comparing Starter Kits vs. Advanced Systems
Choosing between a starter kit and an advanced system depends on your experience level and long-term goals. Starter kits are ideal for beginners, offering all the basics—fermenter, airlock, siphon, and instructions—in one affordable package.
They’re designed for simplicity and ease of use, perfect for making small batches (1–5 gallons) at home. In contrast, advanced systems cater to enthusiasts seeking precision and scalability. These often include temperature control, secondary fermentation options, and larger capacity vessels, enabling experimentation with flavors and techniques.
Advanced kits may also support automated monitoring and oxygen-free transfers, improving consistency and quality. While starter kits provide a low-risk entry point, advanced systems offer greater control and customization for those passionate about perfecting their craft.
Assess your commitment level and desired output to determine which system aligns best with your cider making journey.
Budget-Friendly Options Under $100
You don’t need to overspend to start making great cider at home—many high-quality kits under $100 deliver excellent value. Look for kits that include a complete fermentation setup: a 1- or 5-gallon carboy or bucket, airlock, stopper, siphon, and bottling wand.
Some even bundle cider concentrate and yeast, giving you everything needed for your first batch. Brands like Northern Brewer, Midwest Supplies, and Artisan Fermenter offer reliable entry-level kits praised for durability and clarity of instructions. Check customer reviews to ensure the kit has minimal missing parts and clear guidance.
While cheaper kits may use plastic instead of glass, many are still BPA-free and fermentation-safe. Investing in a well-rounded budget kit lets you test the hobby before upgrading. With the right affordable, all-in-one solution, you can produce delicious homemade cider without exceeding your budget.
Step-by-Step Guide to Using a Cider Kit
Preparing Your Equipment
Before starting with your home cider making kit, it’s essential to thoroughly clean and sanitize all equipment to prevent contamination. Gather your fermenter, airlock, siphon, bottles, and any transfer tubing, then wash them with a non-abrasive cleaner.
Use a no-rinse sanitizer to eliminate bacteria and wild yeast that could spoil your batch. Pay special attention to hard-to-reach areas like the spigot of the fermenter or inside the airlock. Even a small oversight can lead to off-flavors or fermentation failure.
Most cider kits come with pre-measured ingredients, so verify the contents and have clean measuring tools ready. Use filtered or boiled water if your tap water has strong chlorine or mineral content, as this can affect taste. Keeping a clean workspace and organizing tools beforehand streamlines the process.
Proper preparation ensures a smooth, successful fermentation and high-quality homemade cider right from the start.
Fermentation Setup and Timing
After sanitizing, transfer the cider concentrate from your kit into the fermenter and mix with the recommended amount of water—usually 1 to 5 gallons depending on the kit. Ensure the mixture is at room temperature (65–75°F) before sprinkling in the included yeast.
Seal the fermenter with an airlock filled with sanitizer or water to allow CO2 to escape while blocking contaminants. Place the fermenter in a dark, temperature-stable area away from direct sunlight. Fermentation typically begins within 24–48 hours, indicated by bubbles in the airlock.
Primary fermentation lasts 7–10 days, but let it continue until bubbling stops completely. Avoid opening the lid frequently, as this increases contamination risk. Use a sanitized hydrometer after a week to check specific gravity; stable readings over two days mean fermentation is complete and you’re ready to bottle.
Bottling and Carbonation Tips
Once fermentation is complete, it’s time to transfer the cider to bottles for carbonation. Use a sanitized siphon and tubing to move the cider from the fermenter, avoiding the sediment at the bottom.
For carbonation, dissolve priming sugar (like dextrose) in boiled water and mix it gently into the cider before bottling—typically 3/4 cup for 5 gallons. This provides yeast with the sugar needed to produce natural CO2. Use high-quality swing-top or crown-cap bottles designed for pressure.
Fill bottles, leaving about an inch of headspace, and cap securely. Store bottles at room temperature for 1–2 weeks to allow carbonation. Chill one bottle first and test carefully before opening others to avoid gushers.
Properly carbonated cider should be crisp and effervescent, ready to enjoy or store cool for longer aging.
Top 5 Home Cider Making Kits in 2024
Best Overall Kit for Beginners
The FermZilla All-in-One Brewing Kit stands out as the best overall choice for beginners entering home cider making. This kit simplifies the process with an easy-to-use fermentation vessel that includes built-in temperature control and a transparent viewing window to monitor progress.
It comes with essential accessories like an airlock, tap, and sanitizer, ensuring you have everything needed right out of the box. The user-friendly design minimizes guesswork, making it ideal for first-time cider makers. With clear instructions and reliable performance, this kit supports consistent, high-quality results.
Beginners will appreciate the minimal setup time and straightforward cleaning process, allowing them to enjoy fresh, homemade cider in just a few weeks with confidence and ease.
Premium Kit with All-In-One Features
For enthusiasts seeking advanced functionality, the iBrew All-in-One Fermenter Kit delivers premium performance with integrated smart technology and automated controls. This all-in-one system features precise temperature management, app-based monitoring, and a built-in pump for recirculation, ensuring optimal fermentation conditions.
The large 8-gallon capacity allows for batch brewing, perfect for sharing or storing. Durable stainless steel construction guarantees longevity and easy sanitation. The kit includes a digital hydrometer and step-by-step guidance for crafting complex cider profiles.
Whether you’re experimenting with yeast strains or perfecting sweetness levels, this kit offers professional-grade precision in a home-friendly package, making it the top choice for serious cider makers who value innovation and consistency.
Compact Kit for Small Spaces
The CiderCraft Mini Fermentation Bundle is the ideal solution for urban dwellers or those with limited space. Designed for efficiency, this compact kit features a space-saving 1-gallon glass carboy that fits easily on a countertop or in a small closet.
Despite its size, it includes all essentials: an airlock, stopper, siphon tube, and organic cider base. The simple setup requires minimal equipment and storage, making it perfect for apartments or dorm rooms. Its easy-clean design ensures hassle-free maintenance between batches.
You can produce small, experimental batches without clutter, ideal for testing flavors or enjoying fresh cider in moderation. For anyone wanting to explore home cider making without a large footprint, this kit offers convenience, quality, and flexibility in a compact form.
Organic-Friendly Cider Kit Options
The PurePress Organic Cider Making Kit is crafted specifically for those committed to natural, chemical-free brewing. It includes certified organic apple juice concentrate, organic yeast, and reusable stainless steel tools, ensuring every ingredient supports a clean fermentation process. The kit avoids preservatives and artificial additives, allowing for authentic, farm-to-glass flavor.
Clear instructions guide users through each step using eco-friendly practices, from sanitizing with natural solutions to bottling without plastic waste. Its emphasis on sustainable materials and sourcing appeals to environmentally conscious makers.
Whether you’re new to fermentation or a seasoned hobbyist, this kit makes it easy to produce crisp, delicious cider that aligns with organic lifestyles—offering purity, taste, and peace of mind in every pour.
Common Mistakes to Avoid When Making Cider
Using Contaminated Equipment
One of the most critical mistakes in home cider making is using contaminated equipment, which can introduce unwanted bacteria or wild yeast and spoil your batch. Even seemingly clean tools can harbor microbes that compete with your cider yeast, leading to off-flavors or stalled fermentation.
Always sanitize thoroughly before use—this includes fermenters, airlocks, siphons, and bottles. Use a no-rinse sanitizer designed for brewing to ensure all surfaces are safe. Never assume dish soap alone is enough; it removes visible grime but not microbes.
Pay special attention to hard-to-reach areas like airlock crevices or the inside of bottle brushes. Reusing containers without proper cleaning is another common pitfall. A single lapse in sanitation can ruin weeks of effort, so make sanitizing a non-negotiable step every time you handle your cider.
Consistent hygiene is key to producing clean, flavorful cider safely and reliably with your home cider making kit.
Incorrect Fermentation Temperatures
Maintaining the ideal fermentation temperature is essential for balanced, consistent cider. Too cold, and your yeast becomes dormant, halting fermentation; too warm, and it produces excessive alcohol or off-flavors like sulfur or vinegar. Most cider yeasts perform best between 60–70°F (15–21°C), but always check your kit’s instructions.
Avoid placing your fermenter near heat sources or in direct sunlight, as temperature swings stress the yeast. Consider using a fermentation temperature control device like a brew belt or a temperature-controlled chamber for precision. Fluctuations can lead to incomplete fermentation or unpredictable taste.
Remember, patience pays—let the yeast work at its natural pace under stable conditions. Rushing by cranking up the heat only compromises quality. Monitoring and stabilizing temperature ensures your home cider making kit delivers a crisp, well-developed final product every time.
Rushing the Bottling Process
A common error among beginners is bottling too early, before fermentation has fully completed. This can lead to overcarbonation, gushing bottles, or even dangerous explosions from built-up pressure. Always confirm fermentation is finished by taking consistent hydrometer readings over several days—if the gravity remains stable, you’re ready.
Skipping this step risks trapping active yeast with added sugar, causing unpredictable carbonation. Additionally, premature bottling may leave your cider cloudy or overly sweet. Allow adequate time for clearing and conditioning in the fermenter.
When you do bottle, use the correct amount of priming sugar and mix it evenly to avoid inconsistencies. Patience during this stage ensures a safe, balanced, and effervescent cider. Letting your batch mature fully is one of the simplest ways to elevate quality when using a home cider making kit.
Customizing Your Cider Recipes
How to Flavor Your Cider Naturally
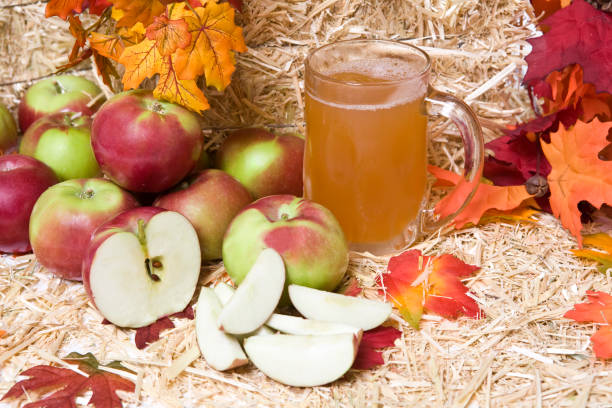
When customizing your cider with a home cider making kit, flavoring naturally is key to achieving authentic, balanced results. Start by selecting fresh, high-quality apples as your base—sweeter varieties like Fuji or Gala provide a smooth foundation, while tart apples like Granny Smith add complexity.
To enhance flavor without artificial additives, consider cold-infusing apple juice with organic ingredients before fermentation. This method preserves delicate aromas and avoids off-flavors. You can also use natural yeast strains that complement your desired profile—some highlight fruitiness, while others bring earthy or spicy notes.
Always sanitize any added components to prevent contamination. Taste your cider at each stage to monitor flavor development, adjusting only as needed.
By focusing on natural ingredients and fermentation control, you’ll craft ciders that are both delicious and true to tradition, making your home cider making kit a gateway to artisanal results.
Adding Fruit, Spices, and Sweeteners
Enhance your cider’s complexity by thoughtfully incorporating fruit, spices, and sweeteners using your home cider making kit. For fruit additions, freeze and thaw berries, peaches, or pears to break down cell walls and release more juice during fermentation. Add them during secondary fermentation to preserve vibrant flavors.
Use whole spices—like cinnamon sticks, cloves, or star anise—instead of ground versions to avoid cloudiness and overpowering taste; place them in a sanitized muslin bag for easy removal. When sweetening, opt for natural options like honey, maple syrup, or unrefined cane sugar, which add character beyond mere sweetness.
Always stabilize the cider with potassium sorbate before sweetening to prevent re-fermentation in the bottle. Small test batches help refine combinations safely. With careful experimentation, your home cider making kit becomes a creative lab for crafting rich, layered ciders tailored to your palate.
Creating Seasonal Cider Varieties
Designing seasonal cider varieties with your home cider making kit allows you to celebrate the time of year through flavor. In autumn, blend sharp apples with roasted cinnamon, nutmeg, and vanilla for a warm, spiced profile reminiscent of apple pie.
Winter calls for richer touches—try adding dried fruits like figs or raisins and a hint of orange zest for a festive, complex brew. Spring ciders shine with light, floral notes from pear juice, elderflower, or a touch of lavender.
For summer, go crisp and refreshing by infusing with citrus peels, fresh mint, or berries during secondary fermentation. Match your fermentation temperature to the season’s theme—cooler ferments preserve delicate aromas, while warmer ones extract deeper spice notes. Label and date each batch to track what works.
Using your home cider making kit this way turns cider crafting into a year-round sensory journey, connecting each sip to the season’s spirit.
Storing and Serving Your Homemade Cider
Best Practices for Long-Term Storage
To ensure your homemade cider retains its flavor and quality during long-term storage, use airtight, sanitized containers such as glass carboys or food-grade PET bottles. After fermentation is complete and the cider has cleared, transfer it carefully to minimize oxygen exposure, which can lead to spoilage or off-flavors.
Store bottles upright in a cool, dark place with stable temperatures around 50–55°F (10–13°C), like a basement or wine cellar. Avoid temperature fluctuations and direct sunlight, as both accelerate aging and can degrade taste.
If using bottles with corks, store them on their side to keep the cork moist and maintain a tight seal. Check for signs of spoilage—such as cloudiness, off-odors, or unexpected fizz in still cider—before consuming.
Properly stored, hard cider can last 6 to 12 months, with some styles improving with age. Always label your bottles with the brew date to track aging progress and ensure optimal enjoyment.
Ideal Serving Temperatures and Glassware
Serving your homemade cider at the correct temperature enhances its aroma, balance, and overall drinking experience. For most hard ciders, the ideal range is 45–55°F (7–13°C)—chilled but not ice-cold, which can mute flavors.
Dry ciders shine slightly cooler, while sweeter or spiced varieties benefit from being served a bit warmer to release their complexity. Use appropriate glassware to elevate presentation and taste: tulip glasses capture aromas, pint glasses offer casual enjoyment, and white wine glasses work well for refined, vintage-style ciders.
Pour slowly to minimize foam, especially with naturally carbonated batches. If your cider is bottle-conditioned, chill it upright for several hours to settle the yeast. Avoid over-chilling, as it dulls nuanced notes developed during fermentation.
The right temperature and glass can transform your homebrewed cider into a restaurant-quality beverage, impressing guests and satisfying your palate with every sip.
How to Share and Gift Your Cider
Sharing your homemade cider is a rewarding way to showcase your craftsmanship. Begin by selecting clean, attractive bottles with secure caps or corks, and consider using swing-top bottles for a rustic, professional look.
Label each bottle with the cider name, brew date, alcohol content, and any flavor notes—this adds a personal touch and informs the recipient. For gifting, pair bottles with a handwritten note explaining the brewing process or pairing suggestions.
Present them in a gift box or basket with complementary items like cheese, charcuterie, or cider-friendly snacks. When sharing at gatherings, offer tasting samples in proper glassware and invite feedback to refine future batches.
Always remind recipients that homemade cider may contain live yeast or sediment—advise them to chill upright and pour carefully. Sharing your cider builds community, sparks conversation, and celebrates the joy of craft fermentation.
Frequently Asked Questions
What is a home cider making kit?
A home cider making kit is a packaged set of tools and ingredients designed to help beginners ferment apple cider at home. It typically includes a fermenting vessel, airlock, siphon, sanitizer, and sometimes yeast and instructions.
What do I need to start making cider at home?
You’ll need a cider making kit, fresh apple juice (preferably unpasteurized and without preservatives), yeast, and basic sanitation supplies. Some kits include everything except the juice.
How long does it take to make cider with a home kit?
Fermentation usually takes 1 to 2 weeks, followed by optional bottling and carbonation for another 1 to 2 weeks. Total time is typically 3 to 4 weeks for drinkable cider.
Can I use any apple juice in a home cider kit?
It’s best to use unpasteurized, preservative-free apple juice, as pasteurization and additives like sulfites can inhibit fermentation. Check labels carefully or use fresh-pressed juice.
Is making cider at home safe?
Yes, when following proper sanitation and fermentation practices, home cider making is safe. Using a quality kit and clean equipment minimizes risks of contamination.
Do home cider kits include instructions?
Most reputable kits include step-by-step instructions for fermentation, bottling, and safety tips, making them ideal for first-time cider makers.
Can I carbonate my homemade cider?
Yes, many kits support carbonation by adding a small amount of sugar before bottling, which creates natural carbonation during a secondary fermentation in the bottle.
Conclusion
Home cider making kits offer a simple, rewarding way to craft delicious, personalized cider from the comfort of your kitchen. With minimal equipment and easy-to-follow instructions, beginners can achieve great results in just a few weeks. Making cider at home saves money, reduces waste, and allows full control over flavor and sweetness. Whether you’re a novice or seasoned enthusiast, a cider kit is a fun, satisfying hobby worth trying—start your fermentation journey today and enjoy the fruits of your labor.