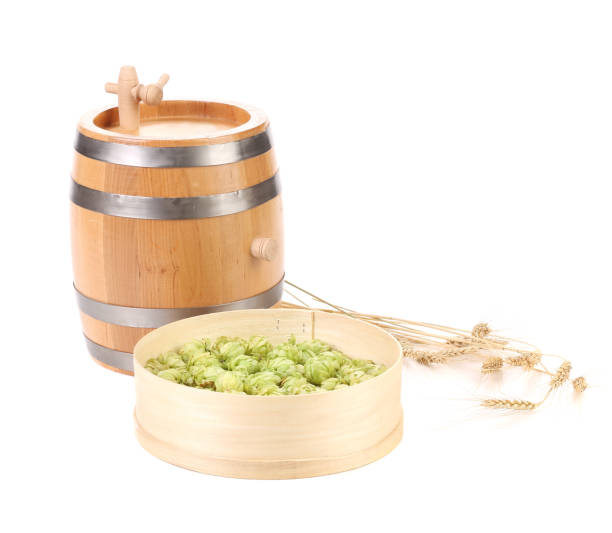
Ginger Beer Brewing Kit
Looking to brew your own spicy, refreshing ginger beer at home? A ginger beer brewing kit is the easiest way to get started—no experience needed. Whether you want a fizzy non-alcoholic drink or a fermented brew with a kick, the right kit makes it simple and fun. In this guide, we’ll break down the best options, what to look for, and how to choose the perfect kit for your taste and skill level.
What is a Ginger Beer Brewing Kit?
Components of a Typical Kit
A ginger beer brewing kit typically includes all essential ingredients and equipment needed to produce homemade ginger beer with minimal effort.
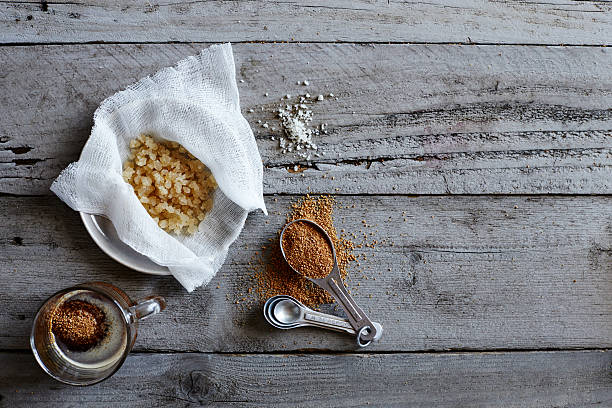
Most kits contain a concentrated ginger base or dried ginger root, sugar for fermentation, yeast specifically selected for carbonation and flavor balance, and sometimes flavor enhancers like citrus or spices.
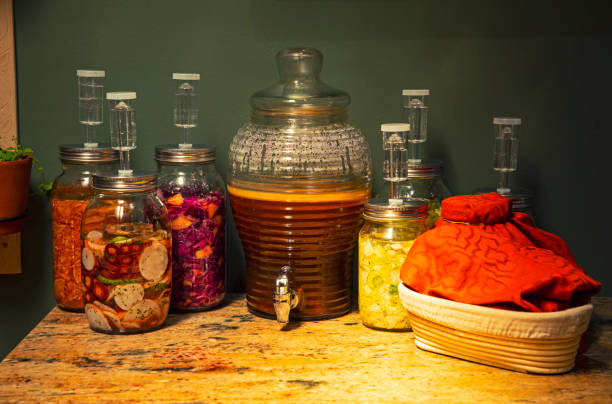
Equipment often includes a food-grade fermentation bottle or jug with an airlock, a funnel, a sanitizing tablet or solution, and detailed instructions. Pre-measured components eliminate guesswork, ensuring consistent results even for beginners. The inclusion of airtight bottles helps build natural carbonation safely.
These kits are designed for ease of use and food safety, reducing contamination risks. By providing everything in one package, they streamline the brewing process, making it accessible to novices while still satisfying experienced home fermenters looking for convenience without sacrificing quality or flavor.
Types of Ginger Beer Brewing Kits
Ginger beer brewing kits come in several varieties tailored to different skill levels and preferences. Beginner kits are all-inclusive, featuring pre-portioned ingredients and simple step-by-step guides, ideal for first-time fermenters. Organic or natural kits use non-GMO ingredients and avoid artificial additives, appealing to health-conscious users.
Some kits are flavor-specific, offering variations like lemon-ginger, spicy chili-ginger, or herbal blends with mint or turmeric. Concentrate-based kits require only water and sugar addition, speeding up preparation, while raw ingredient kits provide whole ginger, yeast, and sugar for a more hands-on experience.
Advanced kits may include secondary fermentation tools or swing-top bottles for enhanced carbonation control. Additionally, craft or gourmet kits cater to home brewers seeking restaurant-quality results, often with premium yeast strains and detailed aging instructions. Choosing the right type depends on your desired flavor, time commitment, and brewing expertise.
How These Kits Differ from Homemade Methods
Ginger beer brewing kits offer a structured, simplified alternative to traditional homemade methods, which often require sourcing ingredients separately and relying on variable recipes. Kits provide consistent, tested formulations, reducing the risk of failed batches due to incorrect ratios or incompatible yeast strains.
Unlike from-scratch brewing, which can involve grating fresh ginger, boiling syrups, and sterilizing equipment independently, kits streamline the process with pre-measured components and clear instructions. Sanitation is easier with included cleaning agents, minimizing contamination risks common in DIY setups.
Additionally, kits often use specialized yeast for reliable carbonation, whereas homemade versions may use wild fermentation or baking yeast, leading to unpredictable results. The time investment is typically lower, with some kits producing drinkable ginger beer in under a week.
Ultimately, brewing kits balance authenticity with convenience, making fermentation safe and accessible without sacrificing the satisfaction of crafting your own beverage.
How to Choose the Best Ginger Beer Brewing Kit
Key Features to Look For
When selecting a ginger beer brewing kit, focus on ingredient quality, ease of use, and fermentation control. Look for kits that include organic ginger, real sugar, and natural flavorings to ensure a rich, authentic taste.
Clear, step-by-step instructions are essential, especially for beginners, so choose kits with comprehensive guides or digital support. Fermentation vessels with airlocks help manage carbonation safely and prevent contamination. Consider whether the kit includes bottles and caps—reusable glass bottles are ideal for sustainability and pressure retention.
Some kits also offer flavor add-ins like citrus or spices, allowing for creative customization. Check the batch size to match your consumption needs; 1–2 liters are great for sampling, while 3+ liters suit regular drinkers. Lastly, verify if the kit supports both alcoholic and non-alcoholic versions, giving you flexibility.
Prioritizing these core features ensures a satisfying, successful brewing experience every time.
Comparing Starter Kits vs. Advanced Kits
Choosing between a starter and advanced ginger beer brewing kit depends on your experience level and goals. Starter kits are designed for beginners, featuring pre-measured ingredients, simple tools, and straightforward instructions—perfect for first-time fermenters.
They typically yield small batches and focus on safety and ease, often using plastic fermenters with built-in airlocks. In contrast, advanced kits offer greater control with glass carboys, hydrometers, and reusable yeast strains, appealing to hobbyists seeking precision.
These kits allow experimentation with fermentation times, alcohol levels, and complex flavor profiles. Advanced options may require additional equipment, like sanitizers or bottling wands, so assess what’s included. While starter kits lower the entry barrier, advanced kits provide long-term value and creative freedom.
Consider your commitment: if you’re testing the waters, begin with a starter kit; if you’re passionate about craft brewing, invest in advanced tools for superior results and customization.
Top Brands and What Sets Them Apart
Several standout brands dominate the ginger beer brewing kit market, each offering unique advantages. FermZilla is renowned for innovation, combining sleek fermentation vessels with precise temperature control, ideal for consistent, high-quality batches. BrewDemon emphasizes user-friendly design, providing all-in-one kits with clear tutorials—perfect for beginners seeking reliable results.
Crosby & Baker distinguishes itself with organic, ethically sourced ingredients and eco-conscious packaging, appealing to environmentally aware brewers. Mr. Beer, while broader in scope, offers affordable ginger beer add-ons compatible with their popular systems, making it a budget-friendly entry point.
GingerBrew Co. specializes exclusively in ginger fermentation, delivering bold flavors and advanced customization options like spice infusions and alcohol-boost packs. When evaluating brands, consider customer support, recipe variety, and community engagement—some offer online forums or brewing challenges.
Choosing a reputable brand ensures quality ingredients, reliable equipment, and ongoing support, elevating your homemade ginger beer from simple soda to a craft beverage
Step-by-Step Guide to Using a Ginger Beer Brewing Kit
Preparing Your Equipment
Before starting with your ginger beer brewing kit, it’s essential to thoroughly clean and sanitize all equipment to prevent contamination. Gather your fermentation vessel, airlock, siphon tube, bottles, caps, and any included utensils.
Wash each item with warm, soapy water, then sanitize using a no-rinse sanitizer to eliminate bacteria and wild yeast. Pay close attention to hard-to-reach areas like bottle necks and airlock crevices. Ensure all tools are completely dry before use.
Sterilization is critical—even a small amount of residue can spoil your batch. Most kits include a detailed checklist; follow it precisely. Keep your workspace clean and organized, and wash your hands thoroughly before handling any components.
By taking these preventative steps, you create an optimal environment for healthy fermentation, setting the foundation for a flavorful, safe ginger beer. Proper preparation reduces the risk of off-flavors and ensures consistent results.
Mixing Ingredients and Starting Fermentation
Begin by combining the provided ingredients according to your kit’s instructions—typically including fresh ginger, sugar, water, yeast, and flavorings. Heat water to the recommended temperature (usually around 90–100°F) to dissolve sugar and extract ginger flavor, then cool to room temperature before adding yeast to avoid killing the cultures.
Transfer the mixture to the sanitized fermentation vessel, seal it with an airlock filled with water, and place it in a dark, temperature-stable area (68–75°F is ideal). Fermentation typically begins within 24–48 hours, indicated by bubbles in the airlock.
Allow the brew to ferment for 5–7 days, avoiding disturbance to let yeast fully convert sugars. During this phase, monitor activity closely and keep the airlock topped with water. This step is crucial for developing flavor and natural carbonation, so patience ensures a balanced, effervescent ginger beer.
Bottling and Carbonation Process
After primary fermentation, it’s time to transfer the ginger beer to bottles for secondary carbonation. Use a sanitized siphon and tubing to carefully move the liquid, leaving sediment behind. Add a small amount of priming sugar (often included) to each bottle to fuel carbonation—typically one teaspoon per liter.
Fill bottles, leaving an inch of headspace, then cap tightly with sanitized caps. Store bottles at room temperature for 3–5 days to allow CO₂ buildup. Check carbonation daily by opening a test bottle; once desired fizz is reached, refrigerate to halt fermentation.
Always handle bottles gently to avoid gushers or explosions. This secondary phase enhances mouthfeel and sparkle, delivering a crisp, refreshing beverage. Once chilled, your homemade ginger beer is ready to enjoy—serve cold over ice for best results.
Common Problems and How to Fix Them
Dealing with Low Carbonation
Low carbonation in homemade ginger beer often stems from inadequate sugar for fermentation or using old or inactive yeast. To fix this, ensure you’re adding the recommended amount of sugar during bottling—typically 1–2 teaspoons per bottle—to provide enough food for the yeast to produce carbon dioxide.
Use fresh, high-quality brewing yeast instead of relying solely on wild fermentation, especially for consistent results. Store bottles at room temperature (68–75°F) for 3–5 days to allow proper carbonation. Avoid refrigerating too early, as cold halts fermentation.
If after a week bottles remain flat, you can ‘re-prime’ by gently opening each, adding a small amount of sugar or honey, then resealing and waiting another few days. Always inspect bottles for cracks or leaks, as escaping gas prevents pressure buildup.
Patience and precise measurements are key to achieving the ideal fizz without compromising safety.
Avoiding Overly Spicy or Bland Flavor
Balancing flavor in ginger beer is crucial—too much ginger creates harsh heat, while too little leads to a bland drink. Start by following your kit’s ginger quantity, then adjust in future batches. Use fresh, high-quality ginger root, peeled and finely grated or juiced, for the most vibrant flavor.
Simmering ginger in water before fermenting extracts flavor without excessive pungency. If your brew turns out too spicy, dilute with extra water or sweetener before bottling to mellow the taste. For a more rounded profile, add citrus zest or a pinch of cinnamon during the boil.
Conversely, if the flavor is weak, increase ginger slightly next time or extend the initial steeping time. Taste the base mixture before adding yeast to adjust flavor proactively. Remember, fermentation can mellow sharpness, so aim for a slightly stronger flavor pre-ferment. Consistent notes help perfect your recipe over time.
Preventing Bottle Explosions and Contamination
Bottle explosions are typically caused by excessive pressure from over-fermentation or using unsuitable containers. Always use strong, pressure-rated glass bottles (like swing-top ‘Grolsch’ style) or plastic PET bottles designed for brewing. Avoid thin glass or reused commercial soda bottles, which can shatter.
To limit fermentation, refrigerate ginger beer promptly once carbonated—usually after 3–5 days at room temperature. Use sanitized equipment throughout the process to prevent bacterial or mold contamination, which can produce off-flavors or dangerous gases. Sterilize bottles, funnels, and utensils with a no-rinse sanitizer before use.
Never cap bottles tightly if still actively fermenting, and ‘burp’ bottles daily if unsure. Store bottles in a cool, dark place away from direct sunlight and vibrations. Checking one bottle first before opening others can prevent widespread mess. Safety first ensures a fun, fizzy result.
Tips for Customizing Your Ginger Beer
Adding Fruits and Spices
Enhance the flavor of your ginger beer by experimenting with fresh fruits and aromatic spices during the secondary fermentation stage. After brewing with your ginger beer kit, add pureed mango, pineapple, or citrus zest to introduce bright, tangy notes that complement the ginger’s zing.
Spices like cinnamon, cloves, or star anise can add warmth and complexity—use them sparingly to avoid overpowering the drink. Always sanitize added ingredients to prevent contamination. For best results, strain the mixture before bottling to achieve a smooth texture.
You can also create layered flavor profiles by adding fruits at different stages: early for deeper infusion, or just before bottling for a fresher taste. Small test batches are ideal for refining combinations. Label your experiments to track successful blends.
This customization not only personalizes your brew but also allows you to cater to different palates, making your homemade ginger beer a standout refreshment.
Adjusting Sugar and Heat Levels
Tailor your ginger beer’s taste by controlling sugar content and ginger intensity to suit your preference. Most ginger beer brewing kits come with a recommended sugar amount, but you can reduce it for a drier, less sweet beverage or increase it slightly for extra fizz and body during carbonation.
Use natural sweeteners like honey or maple syrup for nuanced flavor variations. To adjust heat, vary the amount and form of ginger—freshly grated ginger delivers a sharper kick, while dried or boiled ginger offers a mellower warmth.
Simmering ginger longer extracts more spiciness, while shorter cooking times preserve its bright, zesty character. Taste your base syrup before fermenting to gauge heat and sweetness balance. Remember that some sugar will be consumed during fermentation, so initial sweetness should be slightly higher than your target.
Fine-tuning these elements gives you full control over your brew’s final profile.
Creating Alcohol-Free Versions
To make a truly non-alcoholic ginger beer using your brewing kit, limit fermentation time and use precise temperature control. Traditional fermentation produces trace alcohol, but you can minimize this by fermenting for only 12–24 hours at room temperature and then refrigerating immediately to halt yeast activity.
Alternatively, use a non-fermenting sweetener like stevia or erythritol in place of sugar to prevent alcohol formation entirely. Another method is to pasteurize the finished brew by heating it to 160°F (71°C) for 10 minutes after carbonation, which kills active yeast without drastically altering flavor.
Be sure to cool it quickly and store in sealed bottles. Using a brewing kit designed for soda fermentation often includes low-alcohol or alcohol-free instructions—follow these closely.
These techniques allow you to enjoy a safe, bubbly, and flavorful ginger beer suitable for all ages while still benefiting from the kit’s convenience and consistency.
Storing and Serving Your Homemade Ginger Beer
Best Practices for Refrigeration
Once your ginger beer has completed its fermentation, immediately refrigerate it to slow down yeast activity and preserve flavor. Use airtight bottles designed for carbonated drinks, such as swing-top glass bottles, to prevent leaks and maintain fizz.
Before refrigerating, burp the bottles daily for the first few days to release excess pressure and avoid explosions. Fill bottles, leaving at least 1–2 inches of headspace to accommodate expansion. Store bottles upright in the back of the fridge, where temperatures are most consistent.
Avoid frequent temperature fluctuations by minimizing how often you open the fridge. Label each bottle with the brew date so you can track freshness. If using plastic bottles, squeeze them occasionally—when they resist squeezing, fermentation is complete and it’s time to refrigerate.
Proper refrigeration ensures safety, carbonation, and peak taste when serving.
How Long It Stays Fresh
Homemade ginger beer typically stays fresh for 3 to 4 weeks when properly refrigerated. During this time, it retains its bright ginger flavor, natural carbonation, and probiotic benefits. After the fourth week, carbonation may weaken, and the taste can turn overly sour or vinegary due to continued fermentation.
To maximize shelf life, always store in cold, dark conditions and minimize exposure to air. If you notice mold, an off smell, or excessive pressure buildup, discard the batch immediately. For longer preservation, consider freezing small portions in ice cube trays for use in cocktails or smoothies—though this halts carbonation.
Unlike commercial versions with preservatives, homemade ginger beer is best enjoyed within the first month for optimal taste and fizz. Regular tasting after refrigeration helps you enjoy it at its peak.
Creative Ways to Serve and Use in Cocktails
Elevate your homemade ginger beer by using it as a versatile mixer in cocktails and mocktails. Serve it chilled over ice with a squeeze of lime for a refreshing non-alcoholic spritzer.
For a classic Moscow Mule, combine 1.5 oz vodka, fresh lime juice, and top with ginger beer in a copper mug. Try a Dark and Stormy by mixing with dark rum and a lime wedge.
Enhance flavor by adding muddled mint, cucumber slices, or fresh berries to your glass before pouring. Use it as a base for ginger beer sangria with chopped fruit and white wine. It also pairs well with bourbon for a spicy twist on a highball.
For non-alcoholic options, blend with apple juice or tea for a flavorful punch. The natural spice and effervescence make it ideal for both sipping and cooking—try using it in marinades or glazes for a zesty kick.
Cost and Time Comparison: Kit vs. DIY Brewing
Breakdown of Kit Expenses
A ginger beer brewing kit typically includes essential equipment and pre-measured ingredients, simplifying the initial setup. Most kits range from $30 to $60, covering items like bottles, caps, a fermentation vessel, airlock, siphon, and spice blends.
This upfront cost offers immediate convenience and reduces guesswork, especially for beginners unfamiliar with ingredient ratios or sanitation protocols. While individual components may seem inexpensive when purchased separately, sourcing them independently often results in higher cumulative costs due to minimum order quantities or shipping fees.
Additionally, kits usually contain high-quality, food-safe materials designed for safe carbonation and consistent fermentation. By bundling everything in one package, kits eliminate the need for trial and error, saving both time and money in the short term.
However, always check what’s included—some kits exclude bottles or caps, which can add unexpected expenses.
Time Investment for Each Batch
Using a ginger beer brewing kit significantly reduces preparation and troubleshooting time compared to a full DIY approach. With pre-measured spices and clear instructions, kits streamline the brewing process, allowing most batches to be ready in under 30 minutes of active work.
Fermentation time remains similar—typically 3 to 7 days—but the structured guidance minimizes errors that could delay results. In contrast, DIY brewing requires sourcing recipes, measuring ingredients precisely, and ensuring equipment compatibility, which can extend setup time to over an hour.
Beginners may also face longer learning curves, increasing the risk of contamination or failed batches. Kits often include time-saving tools like built-in airlocks or no-rinse sanitizers, further accelerating the process.
For those with limited time or brewing experience, kits offer a reliable, efficient path to consistent ginger beer without extensive research or experimentation.
Long-Term Savings with Reusable Supplies
While the initial cost of a ginger beer brewing kit may seem high, it offers substantial long-term savings through reusable components. Fermenters, bottles, airlocks, and siphons can be used for dozens of batches, reducing the need for repeated purchases.
Once the kit is acquired, ongoing costs drop significantly—future batches require only fresh ginger, sugar, and yeast, typically costing under $5 per batch. In contrast, DIY brewers who start with disposable or low-quality tools may need to replace equipment frequently, increasing long-term expenses.
Additionally, kits often use durable, food-grade materials designed for repeated use, enhancing safety and performance over time. As skills grow, brewers can expand their setup with minimal investment, using the same base equipment.
Over a year, frequent brewers can save $100 or more compared to buying commercial ginger beer—making the kit a cost-effective, sustainable choice for dedicated home fermenters.
Frequently Asked Questions
What is a ginger beer brewing kit?
A ginger beer brewing kit is a packaged set of ingredients and instructions designed to help you make homemade ginger beer. It typically includes dried ginger, sugar, yeast, and sometimes flavorings or bottles for carbonation.
What do I need besides the kit to brew ginger beer?
You’ll typically need clean water, a large pot for boiling, a fermentation vessel with an airlock, and bottles for bottling the finished product. Sanitizing supplies are also essential to prevent contamination.
How long does it take to brew ginger beer with a kit?
The brewing process usually takes 7 to 14 days, including 3–5 days of primary fermentation and an additional week for carbonation in bottles. Warmer temperatures can speed up fermentation.
Is homemade ginger beer alcoholic?
Yes, because fermentation uses yeast to convert sugar into alcohol and CO2, homemade ginger beer typically contains 0.5% to 2% alcohol by volume unless specially controlled.
Can I make non-alcoholic ginger beer with a brewing kit?
Most kits are designed for fermentation, but you can minimize alcohol by limiting fermentation time or using non-fermenting sweeteners. For truly non-alcoholic versions, look for kits labeled as such or use a soda-making method instead.
How do I prevent over-carbonation or bottle explosions?
Ensure accurate sugar measurement during bottling and store bottles in a cool, dark place. Always refrigerate the ginger beer before opening to slow yeast activity and reduce pressure.
Are ginger beer brewing kits suitable for beginners?
Yes, most kits are beginner-friendly and come with step-by-step instructions. Basic attention to sanitation and temperature control will lead to successful results.
Conclusion
Brewing your own ginger beer with a ginger beer brewing kit is a fun, rewarding experience that allows you to enjoy a natural, fizzy drink tailored to your taste. These kits simplify the process, making fermentation accessible even for beginners. With minimal effort and time, you can create refreshing, probiotic-rich beverages at home. Start your brewing adventure today!