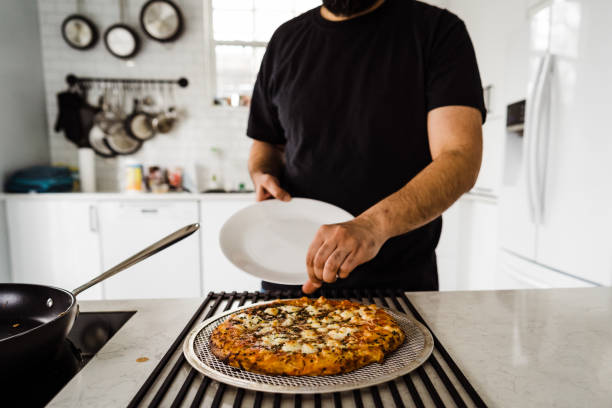
How To Clean Pizza Stone Burnt
Burnt spots on your pizza stone can be frustrating, but don’t worry—you don’t need harsh chemicals or scrubbing. The good news is cleaning a burnt pizza stone is simple and gentle, preserving its integrity while restoring its performance. Keep reading for a quick, effective method that gets your pizza stone looking and working like new—so your next homemade pie bakes to perfection.
Understanding Pizza Stone Burnt Residue
What Causes Burnt Buildup on Pizza Stones?
Burnt residue on pizza stones typically forms due to high-heat cooking and the carbonization of food particles, especially oils, cheese, and dough that stick to the stone’s porous surface. Unlike metal cookware, pizza stones are made from natural materials like ceramic or cordierite, which absorb moisture and oils during baking.
When these substances are repeatedly exposed to intense heat, they break down and burn, creating stubborn black spots or a charred film. Using oily toppings or pre-oiling the stone can accelerate buildup. Additionally, frequent use without proper maintenance allows residue to accumulate over time.
While minor discoloration is normal and can contribute to seasoning, excessive burnt residue may affect flavor and performance. Understanding these causes helps in adopting preventative cleaning habits, such as scraping off debris while the stone is cool and avoiding oil-based preparation methods.
Why You Shouldn’t Use Soap on Pizza Stones
Using soap on a pizza stone is strongly discouraged because the porous material absorbs soap residues, which can later leach into food and create unpleasant flavors or odors. These microscopic pores trap moisture and particles during cooking, and introducing soap can lead to long-term contamination of your meals.
Additionally, many soaps contain chemicals that, when heated during future baking sessions, may emit harmful fumes or degrade the stone’s structure. Instead, the best cleaning approach involves cooling the stone completely and gently brushing off debris with a stiff brush or scraper.
For stuck-on bits, a damp cloth or minimal water can be used, but never soak the stone. Allowing it to dry thoroughly for 24 hours prevents cracking. Avoiding soap preserves the stone’s integrity and ensures safer, better-tasting results over time.
The Risks of Improper Cleaning Methods
Improper cleaning methods—such as soaking, using abrasive scrubbers, or applying harsh chemicals—can permanently damage your pizza stone. Soaking causes water absorption, leading to cracking when heated due to steam expansion. Steel wool or wire brushes can scratch and weaken the surface, reducing its effectiveness and lifespan.
Dishwashers expose stones to extreme temperature shifts and detergents, increasing the risk of breakage and contamination. Even excessive scraping can create grooves where residue builds up faster. These practices compromise both food safety and cooking performance.
Instead, use a ceramic scraper or nylon brush on cooled stones, and rely on dry methods whenever possible. Allowing natural seasoning to develop over time enhances non-stick properties. Proper care ensures your pizza stone remains a durable, reliable tool for achieving perfectly crisp crusts without health or structural risks.
Immediate Steps After a Burnt Pizza Incident
Let the Stone Cool Completely
After a pizza stone has been exposed to high heat and a burnt incident occurs, the first and most critical step is to let the stone cool down completely before attempting any cleaning.
Sudden temperature changes can cause thermal shock, leading to cracking or warping of the stone, especially if it’s made of ceramic or cordierite.
Remove the stone from the oven carefully using heat-resistant gloves and place it on a heat-safe surface, such as a trivet or cooling rack, allowing it to return to room temperature naturally—this may take 1 to 2 hours.
Never immerse a hot stone in water or expose it to cold surfaces, as this dramatically increases the risk of damage. Patience at this stage preserves the integrity of the stone and ensures safer handling during cleaning.
Once cooled, you can proceed to evaluate and clean the surface without risking injury or further damage.
Remove Loose Debris Safely
Once the pizza stone has fully cooled, gently remove any loose charred bits or food particles using a soft brush, plastic scraper, or dry cloth. Avoid using metal utensils or abrasive pads, as these can scratch or gouge the porous surface, compromising the stone’s performance over time.
Hold the stone at a slight angle over a trash can or sink to allow debris to fall away easily. For stubborn residue, lightly scrape in one direction to prevent digging too deep into the stone’s surface.
If needed, use a nylon brush with stiff bristles to dislodge stuck-on bits without causing damage. Do not wash with soap or submerge in water at this stage, as the stone absorbs liquids and can retain odors or weaken structurally.
The goal is to clear surface debris while preserving the stone’s natural seasoning and integrity before assessing deeper cleaning needs.
Assess the Severity of the Burn
After removing loose debris, closely examine the stone to determine the extent of the burn—this guides your next cleaning steps. Light surface charring can often be managed with brushing and minimal intervention, while deep, carbonized stains may require more thorough treatment.
Look for areas where food has carbonized into black, crusty patches; these are typically the result of oil or sauce dripping during baking. Avoid aggressive cleaning methods for minor burns, as excessive scrubbing can damage the stone.
If the burn is superficial, regular use and seasoning may gradually improve its appearance. For severe burns, consider spot-cleaning with a paste of baking soda and water, applied gently with a non-abrasive sponge.
Always air-dry the stone completely before storing or reusing to prevent moisture retention, which can lead to cracking during future heating.
Safe and Natural Cleaning Methods
Using a Dough Scraper or Stone Brush
To safely remove burnt residue from your pizza stone, start with a dry, stiff-bristled brush or a dough scraper. Never use soap or submerge the stone in water, as it can absorb liquids and crack when heated later.
Once the stone has completely cooled, gently scrape off charred bits with firm, even strokes. A dedicated stone brush with natural bristles works best to avoid scratching the porous surface.
For stubborn spots, lightly dampen a corner of the brush with clean water, then scrub carefully—immediately dry the area with a towel. Allow the stone to air-dry fully for at least 24 hours before reuse. This method preserves the stone’s integrity and seasoning while effectively removing debris.
Regular maintenance after each use prevents buildup and extends the life of your stone.
Baking Soda and Water Paste Technique
For moderate burnt-on stains, create a natural cleaning paste using baking soda and a small amount of water. Mix two tablespoons of baking soda with just enough water to form a thick, spreadable paste.
Apply the paste directly to the stained areas using a soft cloth or sponge, focusing only on the affected zones to minimize moisture exposure. Let the paste sit for 10–15 minutes to lift grime, then gently scrub with a non-metal brush or pad.
Baking soda acts as a gentle abrasive without damaging the stone’s surface. Wipe off the residue with a damp cloth, then pat dry thoroughly. Allow the stone to air-dry completely—preferably overnight—before baking again.
This method safely breaks down carbonized food particles while maintaining the stone’s porous structure, making it ideal for routine deep cleaning without harsh chemicals.
The Vinegar and Baking Soda Deep Clean
For severely burnt or stained pizza stones, a vinegar and baking soda treatment can provide a powerful, natural deep clean. First, sprinkle baking soda liberally over the stained areas. Then, lightly spray or dab white vinegar onto the surface to trigger a fizzing reaction that helps lift stubborn grime.
Let the foam work for 5–10 minutes, then gently scrub with a stone-safe brush. Avoid soaking the stone—only use minimal liquid. After scrubbing, wipe with a barely damp cloth and remove all residue.
The acidic nature of vinegar helps dissolve mineral deposits and burnt oils, while baking soda provides mild abrasion. Rinse-free and chemical-free, this method is safe for porous stones when used sparingly. Always dry the stone completely for 24–48 hours before reuse to prevent steam damage during heating.
Preventing Future Burnt Residue
Proper Preheating Techniques
To prevent burnt residue on your pizza stone, always preheat the stone gradually before placing any food on it. Start by positioning the stone in a cold oven, then set the temperature to around 475°F (245°C) and allow it to heat for at least 30–45 minutes.
This slow, even heating helps the stone reach a stable temperature, reducing the risk of thermal shock and uneven cooking that can lead to charring. Never place a cold stone into a hot oven, as this can cause cracking and hot spots that burn food.
Preheating ensures the surface is uniformly hot, allowing the crust to begin cooking immediately and reducing the chance of sticking or scorching. For best results, use an oven thermometer to verify temperature accuracy, since built-in thermostats can be unreliable.
This foundational step not only enhances pizza quality but also protects the stone from damage and residue buildup over time.
Using Parchment Paper or Flour
One of the most effective ways to prevent burnt residue is to create a protective barrier between your pizza dough and the stone using parchment paper or a light dusting of flour or cornmeal.
Parchment paper is especially helpful for sticky or wet doughs, as it allows easy transfer and prevents direct contact that can lead to charring.
If you prefer a crispier crust, sprinkle cornmeal or flour generously on the pizza peel before sliding the pizza onto the stone—this acts as tiny ball bearings and reduces sticking. Avoid using oil on the stone or parchment, as it can carbonize and create stubborn burnt spots.
Parchment paper also simplifies cleanup, since any minor spills or cheese drips won’t bake directly onto the stone. By consistently using these simple barriers, you maintain the stone’s integrity and dramatically reduce long-term residue accumulation.
Avoiding Oily or Saucy Toppings Directly on Stone
To keep your pizza stone free from burnt residue, prevent excessive oil and sauce from dripping directly onto the surface. Oily toppings like extra olive oil, greasy meats, or wet sauces can seep through the crust during baking and burn onto the porous stone, creating stubborn, carbonized stains.
Instead, apply sauce conservatively and avoid spreading it too close to the edge of the dough. Use leaner toppings and blot high-moisture ingredients like fresh mozzarella or vegetables with a paper towel before adding them.
If you’re making a sauce-heavy dish like a casserole or tart, consider using a baking sheet instead of the stone. For pizza, ensure the dough is thick enough around the edges to contain toppings.
These precautions not only improve flavor and texture but also protect the stone from absorbing fats and liquids that degrade its performance and lead to difficult cleaning tasks later.
Deep Cleaning a Heavily Burnt Pizza Stone
The Self-Cleaning Oven Method
The self-cleaning oven cycle is one of the most effective ways to deep clean a heavily burnt pizza stone without damaging it. First, remove all loose debris from the stone’s surface using a dry brush or scraper.
Then, place the stone on the middle rack of your oven and run the self-cleaning cycle, which reaches extremely high temperatures that incinerate carbonized food residues. Never use soap or water during this process, as the intense heat can cause moisture to crack the stone.
Once the cycle finishes and the oven has cooled completely, carefully remove the stone. You may notice ash residue, which can be gently brushed off with a dry nylon brush. While this method is powerful, use it sparingly, as repeated exposure to extreme heat can weaken the stone over time.
Always allow the stone to cool gradually to prevent thermal shock.
Overnight Baking to Burn Off Residue
For a gentler alternative to the self-cleaning cycle, overnight baking can gradually burn off stubborn burnt residues from your pizza stone. Start by preheating your oven to 500°F (260°C) and placing the stone inside.
Let it bake for 8 to 12 hours, ideally overnight, allowing the high heat to carbonize and loosen burnt-on food particles. This slow process minimizes thermal stress compared to rapid temperature changes. After baking, turn off the oven and let the stone cool completely inside to prevent cracking.
Once cool, use a dry nylon brush or scraper to remove the loosened ash and debris. Avoid using water or cleaning agents, as moisture absorption can damage the stone. This method is ideal for routine deep cleaning and helps restore the stone’s surface without aggressive scrubbing.
Repeat if necessary for heavily soiled stones.
Scrubbing with a Nylon Brush After Heating
After using heat-based cleaning methods, scrubbing with a nylon brush helps remove residual ash and charred bits without scratching the stone’s surface. Once the stone has cooled completely from baking or a self-cleaning cycle, use a stiff nylon brush or stone scraper to gently scrub the top and edges.
Focus on areas with visible buildup, using circular motions for better results. Never use metal brushes or abrasive pads, as they can damage the porous surface and affect future baking performance. If needed, lightly dampen the brush—but never soak the stone—then scrub and immediately dry with a towel.
This step ensures the stone remains free of debris that could transfer to future pizzas. After cleaning, bake the stone empty for 30 minutes to eliminate any moisture. Regular maintenance with this method keeps your pizza stone in optimal condition for even heat distribution and crisp crusts.
Drying and Re-Seasoning Your Pizza Stone
Air-Drying to Prevent Cracking
After addressing burnt residue on your pizza stone, allow it to air-dry completely at room temperature before any further steps. Never use a towel or apply heat to speed up drying, as rapid moisture loss can cause thermal shock and lead to cracks.
Place the stone on a dry rack or countertop in a well-ventilated area, ensuring air circulates evenly on all sides. If you’ve used a damp cloth to wipe away debris, make sure no moisture remains in the pores of the stone.
Drying can take several hours, so patience is essential—rushing this process risks damaging the stone. Avoid placing a damp stone back into a hot oven, as trapped water turns to steam and creates internal pressure. Letting the stone dry naturally preserves its structural integrity and extends its lifespan.
This gentle method ensures your stone remains a reliable tool for achieving crispy, evenly baked pizzas over time.
Baking to Remove Moisture
Once your pizza stone has air-dried thoroughly, bake it empty in the oven to eliminate any residual moisture deep within its pores. Place the stone on the middle rack and heat the oven to 400°F (200°C) for at least one hour.
This slow, dry heat safely drives out hidden moisture without risking cracks. Never place a cold stone into a preheated oven, as the sudden temperature change can cause breakage—instead, start with a cold oven and heat both together.
After the cycle, turn off the oven and let the stone cool completely inside to avoid thermal stress. This baking step not only dries the stone but also helps burn off lingering odors or residues from previous use.
It’s a crucial step after cleaning, especially if water contacted the surface, ensuring your stone performs optimally and remains free from damage over time.
Lightly Oiling to Re-Season (Optional)
While most manufacturers advise against oiling pizza stones, some porous stones benefit from occasional, light re-seasoning after deep cleaning or prolonged use. If you choose to re-season, use a high-smoke-point oil like grapeseed or sunflower, applying just a thin layer with a paper towel—never pour oil directly.
Focus on the top and edges, avoiding excess, as too much oil can turn rancid or cause smoking during baking. Then, bake the stone upside down at 400°F (200°C) for one hour to polymerize the oil into a protective layer. Let it cool in the oven afterward.
This process can enhance non-stick properties and protect against moisture absorption, but it’s optional and not recommended for all stone types. Always check your manufacturer’s guidelines—many modern stones are designed to develop seasoning naturally through regular use without added oil.
Maintaining Long-Term Pizza Stone Performance
Regular Maintenance Cleaning Routine
To maintain long-term pizza stone performance, clean after every use once the stone has completely cooled. Never use soap or submerge the stone in water, as porous ceramic absorbs liquids and can crack or retain odors. Instead, use a stiff brush or plastic scraper to remove stuck-on debris.
For burnt-on residue, make a paste of baking soda and water, gently scrub the area, then wipe with a damp cloth. Allow the stone to air dry for at least 24 hours before reuse. Avoid high heat cleaning methods like oven self-cleaning cycles, which can cause thermal shock.
Over time, seasoning builds up naturally, enhancing non-stick properties—this is beneficial. Regular, gentle cleaning preserves integrity and prevents deep stains or odors. Consistent care extends lifespan and ensures even heat distribution, critical for perfect crusts. With proper routine, your stone will perform optimally for years.
Storing Your Stone Properly
Proper storage is essential for preserving your pizza stone’s structural integrity and preventing contamination. Always store the stone in a dry, cool place, ideally in a kitchen cabinet or on a shelf where it won’t be exposed to moisture.
If possible, keep it in its original box or wrap it in a clean, dry towel to protect against dust and accidental chipping. Avoid stacking heavy items on top, as stones are brittle and can crack under pressure.
Ensure the stone is completely dry before storing to prevent mold or mildew growth, especially in humid environments. If you use the stone frequently, consider leaving it on an oven rack when cool to minimize handling. However, if removing, place it on a flat, stable surface.
Proper storage prevents thermal stress and physical damage, ensuring the stone remains ready for consistent baking performance whenever needed.
When to Replace a Damaged Pizza Stone
Even with excellent care, pizza stones have a lifespan and should be replaced if cracked, deeply stained, or emitting odors despite cleaning. Cracks are a serious concern because they compromise structural integrity—using a cracked stone risks shattering during heating due to thermal expansion.
Deep, persistent stains or absorbed grease may indicate porous saturation, which affects performance and food safety. If the stone develops a strong, rancid smell when heated, it’s likely harboring bacteria or oil breakdown and should be discarded. Minor discoloration or surface wear is normal and not a replacement trigger.
However, significant flaking, warping, or pitting suggests material degradation. Replacing a damaged stone ensures consistent baking results and avoids potential hazards. Always monitor your stone’s condition after prolonged use, and err on the side of safety—a new stone is a small investment for reliable, high-quality pizza baking.
Frequently Asked Questions
Can I use soap to clean a burnt pizza stone?
No, you should not use soap on a pizza stone because it can absorb the soap and affect the flavor of future pizzas. The porous surface of the stone retains liquids and chemicals, making soap a poor choice for cleaning.
How do I remove burnt food from a pizza stone?
Let the stone cool completely, then gently scrape off burnt residue with a plastic or wooden scraper. Avoid metal tools that can damage the surface.
Can I soak my pizza stone in water to clean it?
No, never soak a pizza stone in water as it can cause cracking or crumbling due to moisture absorption. Use only minimal water when necessary and never submerge it.
What is the best way to clean a heavily burnt pizza stone?
After scraping off loose debris, make a paste of baking soda and a small amount of water, apply it to stains, let it sit for 10–15 minutes, then wipe with a damp cloth. Rinse with minimal water and let dry completely.
Can I put my pizza stone in the dishwasher?
No, putting a pizza stone in the dishwasher can damage it due to high heat and water exposure. Always clean it by hand using gentle methods.
How can I prevent my pizza stone from burning in the future?
Avoid cooking oily or sugary foods directly on the stone, and always preheat it gradually. Using parchment paper or a light dusting of cornmeal can also help prevent sticking and burning.
Conclusion
Cleaning a burnt pizza stone requires patience and the right techniques. Avoid harsh chemicals and instead use gentle scraping, baking soda paste, and minimal water to preserve the stone’s integrity. Regular maintenance prevents buildup and extends its lifespan. With consistent care, your pizza stone can continue delivering perfectly crispy crusts for years. Don’t be discouraged by stains—seasoning is natural. Keep using and cleaning it properly, and enjoy delicious homemade pizza with confidence.